How to Wash a Wrapped Car Without Damaging the Wrap
Washing a wrapped car requires a gentle touch and the right techniques to keep the vinyl looking fresh and protected. You will learn the safest hand-washing methods, the products to use, and the mistakes that can ruin your wrap. This guide covers everything from daily care to deep cleaning, so your wrapped vehicle stays glossy and damage-free for years.
Your wrapped car looks incredible. The color is bold, the finish is sleek, and heads turn every time you park. But here is the thing most wrap owners learn the hard way. Washing a vinyl wrap is not the same as washing regular paint. One wrong move and you can ruin weeks or even months of investment. That is why this guide exists.
In this article, we walk you through exactly how to wash a wrapped car without damaging the vinyl. We cover the right products, the wrong techniques, and everything in between. Whether you have a matte black wrap, a glossy finish, or a custom color shift, these tips will help you keep your wrapped vehicle looking flawless. Let us get into it.
Key Takeaways
- Always hand wash your wrapped car: Avoid automatic car washes and high-pressure washers that can lift edges and damage the vinyl.
- Use pH-neutral car wash soap: Harsh chemicals strip the wrap’s protective layer and cause fading or peeling.
- Dry with a soft microfiber cloth: Never air-dry or use abrasive towels that can scratch the surface.
- Avoid direct sunlight when washing: Hot surfaces cause soap to dry too fast and leave residue that dulls the wrap.
- Apply wrap sealant every few months: This adds UV protection and keeps the finish looking brand new.
- Steer clear of wax and polish: Traditional car wax can bond to vinyl and create a messy, difficult-to-remove layer.
- Clean wrapped vehicles regularly: Routine washing prevents buildup that degrades the wrap over time.
📑 Table of Contents
- Why Proper Car Wrap Cleaning Matters
- What You Need to Wash a Wrapped Car
- Step-by-Step Guide to Washing a Wrapped Car
- Common Mistakes That Damage Car Wraps
- How Often Should You Wash a Wrapped Car?
- Best Products for Washing a Wrapped Car
- Dealing with Stubborn Stains and Contaminants
- Maintaining Your Wrap Between Washes
- Can You Pressure Wash a Wrapped Car?
- Winter Care for Wrapped Cars
- When to Seek Professional Help
- Final Thoughts on Washing a Wrapped Car
Why Proper Car Wrap Cleaning Matters
A car wrap is a large sheet of vinyl that adheres directly to your vehicle’s surface. Unlike paint, it does not have a clear coat protecting it. The vinyl itself is the outermost layer. This means it is more vulnerable to scratches, chemical damage, and UV fading. When you wash your car correctly, you protect both the appearance and the wrap durability.
Regular car wrap care also extends the life of the vinyl. A well-maintained wrap can last five to seven years. A neglected wrap might start peeling or fading within two. The difference comes down to how you clean it. Dirt, bird droppings, tree sap, and road grime all attack the vinyl over time. Removing them gently and regularly keeps the wrap in top shape.
The Science Behind Vinyl Wraps
Vinyl used for car wrapping is a polyurethane-based material. It is flexible, which allows it to contour around curves and edges. The surface has a special adhesive layer and a clear protective coating. This coating reflects UV rays and repels water to a degree. But it is not invincible. High heat, harsh chemicals, and physical abrasion all break down this protective layer over time. Understanding this helps you understand why gentle wrapped vehicle maintenance is so important.
What You Need to Wash a Wrapped Car
Before you start, gather everything you need. Having the right tools makes the job faster and safer. Here is your checklist.
- pH-neutral car wash soap – Look for products specifically designed for vinyl wrap or paint protection film. These are gentle and free of harsh detergents.
- Two buckets – One for soapy water and one for rinsing your mitt. This prevents dragging dirt across the wrap.
- Microfiber wash mitt – Soft and non-abrasive. Avoid sponges with rough textures.
- Soft microfiber drying towels – At least two. These absorb water without scratching the surface.
- Gentle hose or pressure washer on low setting – Never use a high-pressure nozzle close to the wrap.
- Wrap-safe sealant or coating – Optional but recommended for added protection.
- Detailing spray – Great for quick touch-ups between full washes.
Avoid using household cleaners, dish soap, or all-purpose spray. These products strip the vinyl’s protective layer. They also leave behind residues that make the wrap look dull. Stick to products made for car detailing on wrapped surfaces.
Step-by-Step Guide to Washing a Wrapped Car
Now that you have your supplies, let us walk through the process. Follow these steps every time you wash your vinyl wrap.
Step One: Choose the Right Location and Time
Find a shaded area to wash your car. Direct sunlight heats up the vinyl quickly. When the surface is hot, soap dries too fast and leaves stubborn residue. This residue can be hard to remove and may dull the finish. A cool, shaded spot gives you time to rinse and dry properly.
Also, make sure the car is cool to the touch. If you have been driving, wait at least 20 to 30 minutes before you start. Washing a hot vehicle is one of the most common mistakes wrap owners make.
Step Two: Rinse the Car Thoroughly
Use a gentle stream of water to rinse the entire vehicle. Start from the top and work your way down. This removes loose dirt, dust, and debris before you begin scrubbing. Use a low-pressure setting if you are using a pressure washer. Keep the nozzle at least 12 inches away from the surface. High pressure can push water under the edges of the wrap and cause lifting.
Pay extra attention to the wheel wells and lower panels. These areas collect the most road grime. A gentle cleaning rinse here prevents scratches when you start soaping up the car.
Step Three: Wash Using the Two-Bucket Method
Fill one bucket with cool water and add your pH-neutral car wash soap. Fill the second bucket with clean water for rinsing your mitt. Dip the microfiber mitt into the soapy water and wash one section at a time. Start at the roof and work downward. Use straight-line motions rather than circular ones. Circular motions can create swirl marks on the vinyl surface.
After washing each section, rinse the mitt in the clean water bucket before dipping it back into the soap. This keeps abrasive particles from scratching the wrap. Work quickly and do not let soap sit on the surface for too long.
Step Four: Rinse Off All Soap
Rinse the entire car again, making sure no soap residue remains. Soap left on the vinyl can attract dirt and create a hazy film. Use long, sweeping motions with the water stream. Check areas like the mirrors, door jambs, and trim where soap tends to hide.
Step Five: Dry the Car Properly
Use a clean, soft microfiber drying towel to pat the car dry. Do not rub or drag the towel across the surface. Patting absorbs water without creating friction. Work in sections and flip the towel frequently to a dry side.
Never let a wrapped car air-dry. Water spots form quickly on vinyl and can be difficult to remove. They also leave mineral deposits that dull the finish over time. If you notice water spots forming, wipe them off immediately with a damp microfiber cloth.
Step Six: Apply a Wrap Sealant (Optional)
Once the car is completely dry, you can apply a wrap sealant or coating designed for vinyl. This adds a layer of protection against UV rays, water, and minor scratches. Spray the sealant onto a microfiber cloth and wipe it onto the surface in thin, even layers. Let it cure according to the product instructions. A good sealant can last three to six months and makes future washes easier.
Common Mistakes That Damage Car Wraps
Even with the best intentions, many wrap owners make mistakes that shorten the life of their vinyl. Here are the most common ones to avoid.
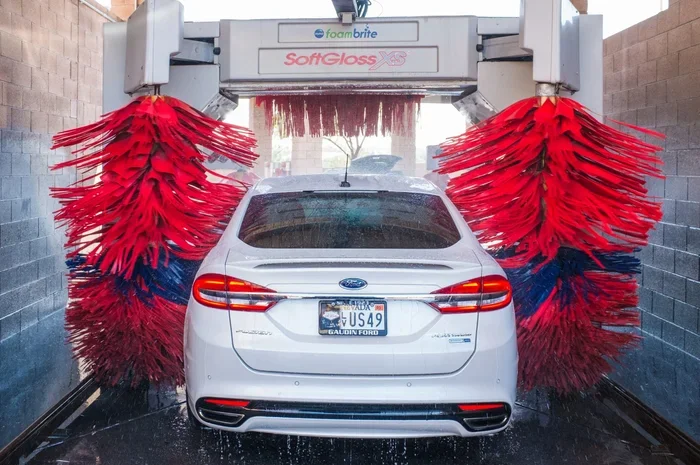
- Using an automatic car wash: The rotating brushes in tunnel washes are too harsh for vinyl. They scratch the surface and can peel the edges of the wrap. Always hand wash.
- Applying regular car wax: Wax contains oils and abrasives that bond to vinyl. Removing wax from a wrap is difficult and often damages the finish. Use vinyl-safe products only.
- Washing in direct sunlight: The heat causes soap and water to evaporate too quickly. This leaves streaks, residue, and water spots that are hard to clean.
- Using high-pressure washers too close: A powerful jet of water can slide under the wrap edges and loosen the adhesive. Keep the pressure low and the distance far.
- Ignoring bird droppings and tree sap: These substances are highly acidic. They eat into the vinyl protective layer if left for more than a few hours. Clean them as soon as possible with a damp cloth and mild soap.
- Using abrasive towels or brushes: Anything rough can scratch the vinyl surface. Stick to microfiber cloths and soft wash mitts.
Quick Tips to Avoid Wrap Damage
- Always test new products on a small, hidden area first.
- Wash your wrapped car at least once every two weeks.
- Keep a detailing spray in your trunk for quick spot cleans.
- Never use a squeegee directly on the wrap unless it has a soft rubber edge.
- If you are unsure about a product, check with your wrap installer first.
How Often Should You Wash a Wrapped Car?
The frequency depends on your driving conditions and environment. If you drive daily in city traffic, wash your car every one to two weeks. Road salt, pollution, and exhaust fumes all build up on the vinyl and cause damage over time. If your car sits in a garage most of the time, a monthly wash is usually sufficient.
After events like road trips, beach days, or off-road adventures, wash the car as soon as possible. Salt, sand, and mud are particularly harmful to vinyl wrap surfaces. The longer they sit, the harder they are to remove and the more damage they cause.
Here is a simple schedule you can follow.
- Every 1 to 2 weeks: Full hand wash with pH-neutral soap.
- Every 3 months: Apply a new layer of wrap sealant.
- As needed: Spot clean bird droppings, sap, or bug splatter immediately.
- Every 6 months: Inspect the wrap for any lifting edges or wear and tear.
Best Products for Washing a Wrapped Car
Not all car wash products are created equal. Some are specifically formulated for vinyl wrap and paint protection film. Here are a few product types to look for.
| Product Type | Why It Works | What to Avoid |
|---|---|---|
| pH-neutral car wash soap | Gentle on vinyl, does not strip the protective layer | Harsh detergents and degreasers |
| Microfiber wash mitt | Soft texture prevents scratches | Sponges, brushes, and abrasive pads |
| Vinyl-safe sealant | Adds UV and water protection | Traditional carnauba wax |
| Detailing spray | Quick refreshes between washes | Silicone-heavy spray dressings |
| Dedicated wrap cleaner | Formulated specifically for vinyl surfaces | All-purpose household cleaners |
Some top-rated brands in the car detailing world include products from Chemical Guys, Meguiar, and Gyeon. Look for product lines that specifically mention compatibility with vinyl wraps and PPF (paint protection film). These products are designed to be safe on delicate synthetic surfaces.
Dealing with Stubborn Stains and Contaminants
Even with regular washing, your wrapped car will encounter tough stains. Here is how to handle the most common ones without damaging the vinyl.
Bird Droppings
Bird droppings are acidic and can eat into the vinyl if left too long. If you spot one, clean it immediately. Spray the area with a mixture of cool water and a few drops of pH-neutral soap. Let it sit for 30 seconds to soften the droppings. Then gently wipe with a damp microfiber cloth. Do not scrub. If the stain persists, use a dedicated vinyl-safe stain remover.
Tree Sap
Tree sap is one of the trickiest contaminants for vinyl wrap. It bonds strongly to the surface and can leave a sticky residue. Start by applying a small amount of rubbing alcohol to a microfiber cloth. Gently dab the sap until it softens. Then wipe it away with a clean, damp cloth. Never pick or scrape at sap with your fingernails or a sharp object.
Bug Splatter
Bug remains contain enzymes that break down the vinyl protective layer. Remove them as soon as possible. A pre-soak with soapy water helps loosen the residue. For stubborn spots, use a bug and tar remover that is safe for vinyl. Apply it with a soft cloth and wipe gently. Rinse thoroughly afterward.
Water Spots and Hard Water Stains
If you live in an area with hard water, you may notice white spots on your wrap. These are mineral deposits left behind when water evaporates. To remove them, mix a solution of equal parts water and white vinegar. Apply it to the spots with a microfiber cloth and wipe gently. Rinse and dry thoroughly after treatment.
Maintaining Your Wrap Between Washes
Washing is only part of wrap maintenance. Between washes, there are simple habits you can adopt to keep your vinyl wrap in great condition.
- Park in shaded areas whenever possible: This reduces UV exposure and keeps the vinyl from fading or becoming brittle.
- Use a car cover: If your car sits outside, a breathable car cover protects the wrap from rain, dust, and bird droppings.
- Avoid parking under trees: Sap, bird droppings, and falling leaves are all easier to avoid than to clean.
- Wipe down the car after rain: Acid rain can etch into the vinyl over time. A quick wipe with a dry microfiber cloth helps prevent damage.
- Touch up small scratches immediately: Small scratches can grow if left untreated. Use a vinyl repair kit for minor issues.
These habits take minimal effort but make a huge difference in how long your wrap lasts and how good it looks. Think of them as part of your regular car wrap care routine.
Can You Pressure Wash a Wrapped Car?
The short answer is yes, but with caution. A pressure washer can be useful for rinsing off heavy dirt and grime. However, you must use the lowest pressure setting available. A setting of 1200 PSI or less is generally safe for vinyl wraps. Keep the nozzle at least 12 inches from the surface and never aim directly at the edges, seams, or corners of the wrap.
Avoid using a pressure washer on a hot day or on a hot vehicle. The heat combined with pressure can cause the vinyl to expand and the edges to lift. If you are unsure, stick to hand washing. It is slower but much safer for your wrapped vehicle.
Winter Care for Wrapped Cars
Winter presents unique challenges for wrap maintenance. Road salt, ice, and freezing temperatures all take a toll on vinyl. Here is how to protect your wrap during the colder months.
- Wash your car more frequently in winter: Road salt is corrosive and can eat through the wrap’s protective layer if left too long. A weekly wash is ideal.
- Avoid hot water when de-icing: Pouring hot water on a frozen wrap can cause the vinyl to contract and crack. Use a plastic ice scraper instead.
- Apply an extra layer of sealant before winter: This adds a barrier against salt and moisture.
- Remove snow gently: Use a soft-bristle snow brush rather than a metal shovel or hard broom.
Taking these extra steps in winter pays off when spring arrives and your wrap still looks as good as the day it was installed.
When to Seek Professional Help
There are times when DIY cleaning is not enough. If your wrap has significant lifting, bubbling, or peeling, it is time to consult a professional. A certified car wrap installer can assess the damage and recommend repairs or a full rewrap. Attempting to fix major issues on your own can make things worse and cost you more money in the long run.
Professional detailers who specialize in vinyl wrap care can also perform deep cleaning and restoration services. They have access to industrial-grade products and tools that are safe for your wrap. If you are unsure about a particular stain or cleaning method, it is always better to ask an expert than to risk damaging your investment.
Final Thoughts on Washing a Wrapped Car
Washing a wrapped car does not have to be complicated. With the right products, the right technique, and a little regular care, you can keep your vinyl wrap looking stunning for years. The key is to be gentle, stay consistent, and avoid shortcuts that seem easier but cause long-term damage.
Remember to always use pH-neutral soap, hand wash in the shade, dry with microfiber towels, and apply sealant regularly. Avoid automatic car washes, harsh chemicals, wax, and high-pressure washers. These simple rules protect your investment and keep your wrapped vehicle turning heads wherever you go.
Your car wrap is a significant investment. Treat it well, and it will reward you with a flawless finish that lasts. Start following these steps today, and your car wrap will thank you tomorrow.
Frequently Asked Questions
Can I use a regular automatic car wash on a wrapped car?
No. Automatic car washes use harsh brushes and strong chemicals that can scratch, peel, or lift the edges of your vinyl wrap. Always hand wash your wrapped car with gentle products and a soft microfiber mitt to avoid damage.
How often should I apply sealant to my wrapped car?
It is recommended to apply a wrap-safe sealant every three to six months. This adds a protective layer against UV rays, water, and minor scratches. Regular sealant application keeps your car wrap looking fresh and extends its lifespan significantly.
Is it safe to use a pressure washer on a wrapped car?
Yes, but only on the lowest pressure setting and from at least 12 inches away. Never aim the jet directly at the edges, seams, or corners of the wrap. High pressure can push water under the vinyl and cause the adhesive to loosen or the edges to lift.
Can I wax a car with a vinyl wrap?
No. Traditional car wax contains oils and abrasive compounds that bond to vinyl and are very difficult to remove. Waxing a wrapped vehicle can create a messy, uneven finish and may permanently damage the wrap. Always use products specifically designed for vinyl wrap surfaces instead.
How do I remove bird droppings from my wrapped car safely?
Clean bird droppings immediately to prevent acid damage. Spray the area with cool water and a few drops of pH-neutral car wash soap. Let it sit for 30 seconds, then gently wipe with a damp microfiber cloth. Never scrub or pick at the droppings, as this can scratch the vinyl surface.
What is the best way to dry a wrapped car after washing?
Use a clean, soft microfiber drying towel and pat the surface dry. Do not rub or drag the towel, as this can create micro-scratches on the vinyl. Work in sections and flip the towel frequently to a dry side. Never let a wrapped car air-dry, as this leads to water spots and mineral deposits that dull the finish over time.
=== CONCLUSION ===
How to wash a wrapped car properly is one of the most important skills every wrap owner should master. The process is simple: use gentle products, wash by hand in the shade, dry with microfiber, and apply sealant regularly. Avoid the common pitfalls like automatic car washes, harsh chemicals, and high-pressure washers. With consistent car wrap care, your vinyl wrap will stay vibrant, protected, and damage-free for many years to come. Start today, and your wrapped vehicle will look better with every wash.