How to Vinyl Wrap a Car and Upgrade Its Look Instantly
Vinyl wrapping your car is one of the best ways to transform its look without permanent changes. This guide walks you through every step of how to vinyl wrap a car, from choosing the right material to applying it like a pro. You will learn about the essential tools, surface prep techniques, and common mistakes that can ruin your project. Whether you want a matte finish, a bold color change, or simple paint protection, this tutorial has you covered.
Your car deserves a fresh new look, but a full paint job costs thousands of dollars. That is where vinyl wrapping comes in. How to vinyl wrap a car is a skill that saves you money and gives you total creative freedom. You can change the color, add patterns, or protect your original paint — all without visiting a body shop.
More drivers are discovering the power of a car wrap vinyl every single day. It is not just for show cars or luxury vehicles anymore. Everyday drivers use automotive wrap films to upgrade their rides, protect factory paint from scratches, and even boost resale value. The best part? You do not need professional experience to get great results.
This guide covers everything you need to know about wrapping a car yourself. From picking the right vinyl wrap material to applying it smoothly on curves and edges, we have got your back. By the end, you will feel confident enough to start your own project. Let us dive in.
Key Takeaways
- Vinyl wrapping is affordable: It costs a fraction of a full paint job and can be removed anytime.
- You need the right tools: A heat gun, squeegee, cutting knife, and microfiber cloths are essential for a clean finish.
- Surface prep is critical: Washing, drying, and decontaminating the car ensures the vinyl adheres properly and lasts longer.
- Patience wins the race: Rushing the application leads to bubbles, wrinkles, and premature peeling.
- Maintenance keeps it looking new: Regular washing and proper storage extend the life of your car wrap vinyl significantly.
- DIY is doable: With the right guidance and enough time, most car owners can wrap their vehicles at home successfully.
📑 Table of Contents
Understanding Vinyl Wrapping Basics
Before you grab a roll of vinyl wrap film, it helps to understand what you are working with. A car wrap is a large vinyl decal that sticks directly to your vehicle’s exterior. It changes the appearance or protects the original paint underneath. The vinyl wrap adhesive is specially designed to grip smooth surfaces without damaging the factory finish.
There are several types of vinyl wrap materials available on the market today. Each one serves a different purpose and offers a unique look. Here is a quick breakdown of the most popular options:
- Gloss vinyl wrap: Gives your car a shiny, mirror-like finish that looks sleek and polished.
- Matte wrap car finish: Creates a flat, non-reflective look that is trendy and modern.
- Satin wrap: Sits between matte and gloss with a subtle soft sheen that works on any style.
- Carbon fiber wrap: Adds a textured, sporty appearance without the weight of real carbon fiber.
- Chrome wrap: Provides a mirror-metal finish that turns heads everywhere you go.
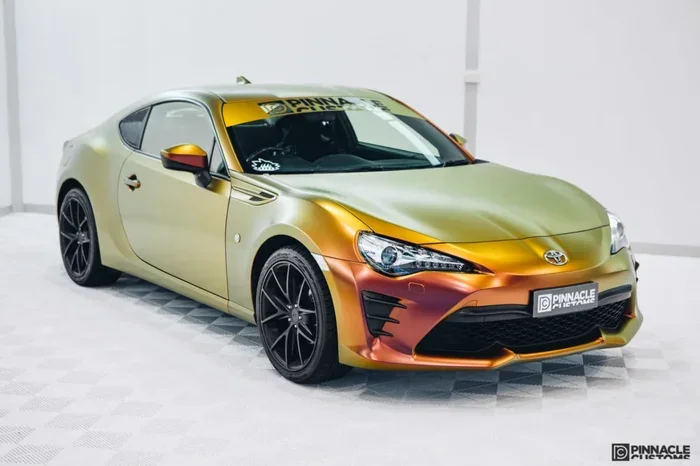
- Color-shift wrap: Changes color depending on the angle of light for a dramatic effect.
The car wrap longevity depends heavily on the quality of the film and how well you maintain it. Premium automotive wrap films can last five to seven years with proper care. Budget wraps may last two to three years before showing signs of wear. Investing in a higher-quality vinyl car wrap kit pays off in durability and visual appeal.
What Makes Vinyl Wrap Different from Paint?
Paint is permanent. Once it is on your car, it stays there unless you pay for a costly removal process. Vinyl wrap paint protection works differently. The film sits on top of your original paint like a second skin. You can remove it whenever you want, revealing the untouched factory finish underneath. This makes wrapping an ideal choice for leased vehicles or anyone who likes to switch up their style frequently.
Another major advantage is cost. The average car wrapping cost for a professional job ranges from $2,000 to $5,000 depending on the vehicle size and material quality. A DIY vinyl wrap car project can cost as little as $500 to $1,500 for materials. That is a massive savings, especially when you factor in the satisfaction of doing it yourself.
Tools and Materials You Will Need
Gathering the right car wrapping tools before you start is one of the most important steps. Having everything ready prevents frustrating pauses mid-application and keeps your workflow smooth. Here is a complete list of what you need:
Essential Tools
- Heat gun: This tool softens the vinyl so it conforms to curves, edges, and body contours. A quality heat gun is non-negotiable for a professional-looking finish.
- Squeegee: A soft-edge squeegee pushes out air bubbles and water from under the film. It is your best friend during application.
- Sharp cutting knife: You need a razor-sharp blade to trim excess vinyl cleanly around edges, mirrors, and trim pieces.
- Microfiber cloths: Multiple clean microfiber cloths are essential for drying and buffing surfaces before and during the wrap.
- Isopropyl alcohol (IPA): A high-concentration IPA solution removes oils and residue from the car surface for better adhesion.
- Application fluid: This soapy solution lets you slide the vinyl into position before it permanently sticks.
- Measuring tape: Accurate measurements prevent wasted material and ensure full coverage.
- Plastic trim tools: These help you gently push vinyl around small details without scratching the surface.
Choosing the Right Vinyl Wrap Kit
Not all vinyl wrap kits are created equal. When shopping for car wrap vinyl, look for films from reputable brands that offer a warranty. The thickness of the film matters too — most quality wraps are 3 to 4.5 mils thick. Thicker films are more forgiving during installation and resist shrinking over time.
Consider the custom car wrap design you want before purchasing material. If you are going for a full color change, buy enough vinyl to cover the entire vehicle with some extra for mistakes. A standard sedan needs roughly 50 to 75 square feet of material. SUVs and trucks require significantly more. Always add 10 to 15 percent extra to your total to be safe.
Preparing Your Car for Wrapping
Surface preparation is the step most people skip, and it is also the step that causes the most problems. How to vinyl wrap a car correctly starts long before you peel the backing off the film. If your surface is not perfectly clean and smooth, the wrap will peel, bubble, and look terrible within weeks.
Step 1: Deep Clean the Vehicle
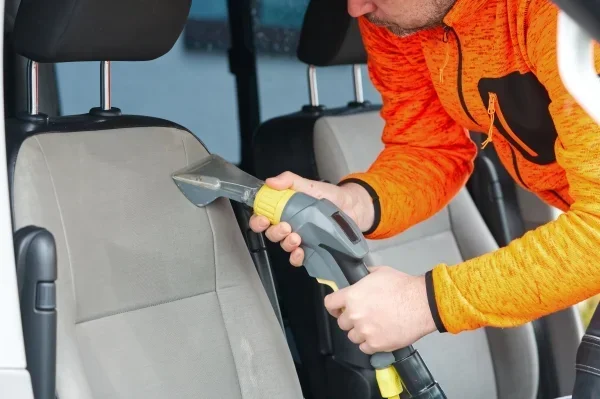
Start by washing the entire car with a quality automotive soap. Use a two-bucket method — one bucket with soapy water and one with clean rinse water. This prevents swirl marks and scratches. Pay extra attention to areas that collect grime, like wheel wells, door jambs, and the lower panels.
After washing, dry the car completely with clean microfiber towels. Any remaining moisture will interfere with the vinyl adhesion. Work in a shaded area or indoors to prevent the soap from drying on the surface before you rinse it off.
Step 2: Decontaminate the Surface
Even after a good wash, invisible oils, tar spots, and industrial fallout can remain on the paint. Spray a cloth with isopropyl alcohol and wipe down every panel. This removes the last traces of contamination and gives the vinyl wrap adhesive a clean surface to bond with.
For vehicles with existing wax or sealant, you will need to strip it off. Wax creates a barrier that prevents the vinyl from gripping properly. Use a clay bar or a dedicated wax remover to bring the paint back to a bare, clean state. This step alone dramatically improves wrap durability.
Step 3: Repair Any Imperfections
Take a close look at your car’s paint job. Small scratches, chips, or dents will show through the vinyl wrap. Fill any shallow scratches with a touch-up pen and sand down rough spots. The goal is a surface as smooth as possible so the vinyl lays flat without revealing every tiny imperfection underneath.
Step 4: Mask Off Areas You Do Not Want to Wrap
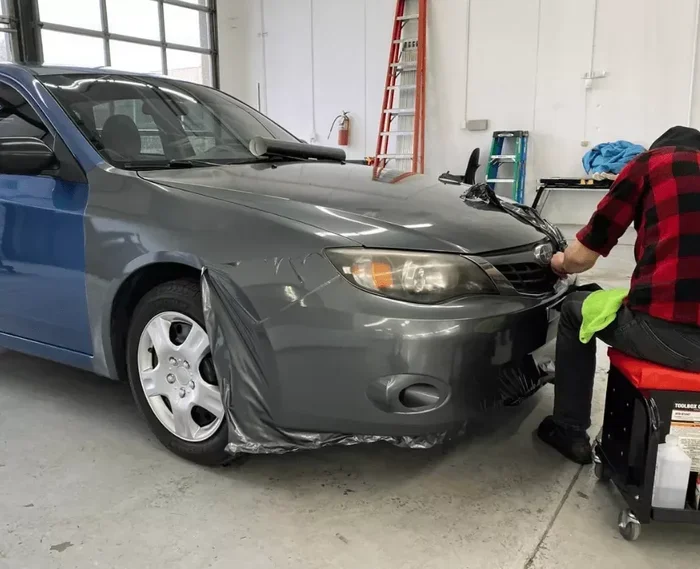
If you are doing a partial wrap, use painter’s tape and plastic sheeting to protect areas like windows, door handles, and trim pieces. Even for full wraps, masking off sensitive areas like headlights and taillights prevents accidental damage during the application process.
Step-by-Step Vinyl Wrapping Process
Now comes the fun part — actually applying the car wrap. This process requires patience and attention to detail, but it is entirely manageable for a motivated beginner. Set aside a full weekend for a first-time project, and make sure you work in a clean, temperature-controlled space.
Step 1: Measure and Cut the Vinyl
Measure each panel of your vehicle carefully. Add extra material around the edges — you can always trim excess, but you cannot add more if you cut too short. Lay the vinyl flat on a clean surface and use your cutting knife to trim pieces to size. Label each piece so you know which panel it belongs to.
Step 2: Apply Application Fluid
Mix a solution of water and a few drops of dish soap in a spray bottle. This application fluid creates a slippery layer that lets you position the vinyl perfectly before it sticks. Spray the solution generously onto both the car surface and the back of the vinyl film.
Step 3: Lay the Vinyl onto the Panel
Start from one edge and slowly lay the vinyl onto the panel, squeegeeing out the soapy water as you go. Work from the center outward to push air toward the edges. Use gentle, even pressure with the squeegee to avoid creating new bubbles.
Step 4: Use Heat to Conform to Curves
This is where the heat gun vinyl wrap technique becomes essential. Hold the heat gun about six inches from the surface and move it constantly. The warmth makes the vinyl soft and pliable, allowing it to stretch around curves, follow body lines, and hug tight contours. Be careful not to overheat — too much heat can warp or discolor the film.
Step 5: Squeegee Out Air Bubbles
Once the vinyl is in position, go over the entire panel again with the squeegee. Work out any trapped air bubbles by pushing them toward the nearest edge. Small bubbles often disappear on their own as the vinyl fully adheres, but larger bubbles need to be addressed immediately.
Step 6: Trim and Edge Seal
Use your sharp cutting knife to trim the excess vinyl along edges and around trim pieces. Make clean, precise cuts at a 45-degree angle for the neatest finish. For areas that experience frequent rubbing or exposure, apply a thin line of edge sealant to prevent peeling.
Step 7: Repeat for Every Panel
Follow the same process for each remaining panel — doors, hood, trunk, roof, and fenders. Work systematically from top to bottom so that gravity does not pull the vinyl into unwanted positions while you are still adjusting it.
Quick Tips for a Flawless Application
- Work in a dust-free environment to prevent particles from getting trapped under the film.
- Keep the room temperature between 60 and 80 degrees Fahrenheit for optimal vinyl flexibility.
- Do not stretch the vinyl too aggressively — it can thin out and become translucent.
- Take breaks when you feel frustrated. Fatigue leads to sloppy cuts and misaligned edges.
- Watch online tutorials for specific tricky areas like mirror caps, door handles, and window surrounds.
Common Mistakes to Avoid
Even experienced DIY wrappers make mistakes sometimes. Knowing what to avoid saves you time, money, and frustration. Here are the most common errors people make when they wrap a car at home:
- Skipping surface preparation: Dirty or waxy surfaces cause the vinyl to peel prematurely. Always clean and decontaminate thoroughly.
- Using too much heat: Overheating the vinyl can cause it to shrink, bubble, or warp. Keep the heat gun moving at all times.
- Stretching the film too thin: Aggressive stretching makes the vinyl see-through, especially on dark-colored wraps. Apply gentle, even pressure instead.
- Cutting too early: Wait until the vinyl is fully positioned before trimming. Cutting too soon leaves gaps and misaligned edges.
- Ignoring temperature guidelines: Applying vinyl in extreme cold or heat affects adhesion and conformability. Always work in moderate conditions.
- Rushing the process: A full car wrap takes 8 to 15 hours for most DIYers. Trying to finish in one rushed session almost guarantees visible mistakes.
Expert installers often say that surface preparation accounts for 80 percent of a successful wrap. If you get that step right, the application itself becomes much easier and more forgiving.
Maintaining Your Vinyl Wrap for Long-Lasting Beauty
Once your vinyl wrap car project is complete, proper maintenance keeps it looking fresh for years. The good news is that caring for a wrapped vehicle is surprisingly simple. You do not need special products or expensive detailing routines — just a little regular attention.
Washing Your Wrapped Car
Hand wash your wrapped car every two weeks using a gentle automotive soap and a soft microfiber mitt. Avoid high-pressure washers directed at the edges, as the force can lift the vinyl at the seams. Stay away from automatic car washes with spinning brushes — they can scratch and peel the wrap material.
Dry the car with a clean, soft towel after each wash. Avoid letting the wrap air dry in direct sunlight, as water spots can settle into the film surface over time.
Protecting the Wrap from Damage
While quality vinyl wrap durability is impressive, certain threats can shorten its lifespan. Bird droppings, tree sap, and road salt are the biggest enemies of car wrap material. Remove these contaminants as soon as possible using a gentle cleaner and a soft cloth.
Avoid parking under trees whenever you can. Sap is particularly tricky because it bonds strongly to vinyl and can cause discoloration if left too long. If you notice any damage to the wrap, address it quickly to prevent it from spreading to surrounding areas.
When to Consider a Wrap Replacement
Even the best automotive wrap will eventually need replacement. Signs that it is time include peeling edges, fading color, persistent bubbles, and visible cracks in the film. Most wraps last between three and seven years depending on the material quality, sun exposure, and maintenance habits.
When the time comes, removing a vinyl wrap removal is usually straightforward. Heat the edges with a heat gun and peel slowly. Any remaining adhesive residue can be cleaned with a specialized adhesive remover that is safe for automotive paint.
Benefits of Vinyl Wrapping Your Car
Still on the fence about whether a custom car wrap is worth your time? Here are some compelling reasons to take the leap:
- Cost-effective transformation: A full wrap a car project costs a fraction of a professional paint job.
- Paint protection: The vinyl shields your factory paint from UV rays, minor scratches, and environmental damage.
- Reversible: Unlike paint, a wrap can be removed without altering your vehicle’s original finish.
- Endless customization: From matte black to vibrant racing stripes, the design possibilities are virtually limitless.
- Quick turnaround: A professional paint job takes weeks. A DIY wrap can be completed in a single weekend.
- Resale value boost: A well-maintained wrap keeps the car looking great and protects the paint underneath, which helps preserve resale value.
Is Vinyl Wrapping Worth It?
For most car owners, the answer is a resounding yes. Whether you want a bold new color, a subtle protective layer, or a temporary design change for a special event, how to vinyl wrap a car gives you all the flexibility you need. The combination of affordability, reversibility, and visual impact makes it one of the best upgrades you can do for your vehicle.
Conclusion
How to vinyl wrap a car is a rewarding project that transforms your vehicle’s appearance without the high cost or permanence of a paint job. From choosing the right vinyl wrap material to preparing the surface and applying the film carefully, every step matters. The key to a flawless finish lies in patience, preparation, and practice.
Start with a small section if you are nervous about tackling a full vehicle. Once you see how satisfying the results look, you will be motivated to wrap the entire car. Remember that even professional installers took years to perfect their technique — your first attempt will not be perfect, and that is completely okay.
Invest in quality car wrap vinyl, follow the steps outlined in this guide, and take your time. Your car will look incredible, and you will have the satisfaction of knowing you did it yourself. Grab your car wrapping tools, pick a design you love, and start your vinyl wrap project today.
Frequently Asked Questions
Can I vinyl wrap a car myself without any experience?
Yes, many car owners successfully wrap their vehicles at home with no prior experience. Start with a small panel to practice your technique before tackling the entire car. Watch detailed tutorials, take your time, and remember that patience is the most important skill in vinyl wrapping.
How long does a vinyl wrap last on a car?
A quality car wrap vinyl typically lasts between three and seven years depending on the material, climate, and maintenance. Premium wraps with proper care can reach the seven-year mark, while budget wraps may need replacement after two to three years.
Does vinyl wrapping damage the original car paint?
No, vinyl wrapping does not damage factory paint when applied and removed correctly. The vinyl wrap adhesive is designed to hold securely without pulling or scarring the paint underneath. Always remove the wrap gently using heat and peel slowly to preserve the original finish.
How much does it cost to vinyl wrap a car?
The car wrapping cost varies widely based on vehicle size, material quality, and whether you hire a professional or do it yourself. A DIY vinyl wrap car project typically costs $500 to $1,500 for materials, while professional installation ranges from $2,000 to $5,000 or more.
Can I wash my car after vinyl wrapping it?
Yes, you should wash your wrapped car regularly to keep it looking its best. Hand wash using a gentle soap and soft microfiber mitt. Avoid high-pressure washers on edges and never use automatic car washes with spinning brushes, as they can damage the wrap edges.
What is the best vinyl wrap color for a first-time project?
Matte black is the most popular choice for beginners because it hides small imperfections well and looks dramatic. Satin finishes are also forgiving and easy to work with. Choose a color you love and that complements your vehicle’s shape and style for the best results.