Can I Take the Seats Out of My Car to Clean It Properly
Yes, you can take the seats out of your car to clean it properly. Removing your car seats gives you full access to hidden dirt, crumbs, and grime that regular cleaning misses. This guide covers how to remove car seats safely, the tools you need, and step-by-step instructions for a deep clean car interior every time.
Have you ever looked at the crumbs stuck between your car seats and the floor? Or noticed a strange smell coming from somewhere you cannot reach? You are not alone. Many car owners struggle to keep their vehicle interior truly clean. The answer to this problem might be simpler than you think. Can I take the seats out of my car to clean it properly? The short answer is yes. And doing so can transform the way you maintain your vehicle. Removing your car seats opens up a world of cleaning possibilities that you simply cannot reach while the seats stay in place.
When you remove the seats, you gain access to the floor pan, the seat tracks, the carpet underneath, and those stubborn corners where dirt builds up over time. This guide will walk you through everything you need to know. We will cover why seat removal works so well, how to do it safely, what tools you need, and how to put everything back together. Whether you are dealing with spills, pet hair, or just general grime, this article has you covered.
Key Takeaways
- Full Access Cleaning: Removing car seats lets you reach every hidden corner of your vehicle’s interior.
- Safe Removal Process: You can take seats out without damaging brackets, bolts, or electrical connectors.
- Right Tools Matter: Having the correct tools makes seat removal and reinstallation quick and easy.
- Deep Clean Results: Car seat removal enables a thorough clean of your car carpet and upholstery.
- Reinstallation Is Key: Putting seats back correctly ensures safety and proper fit.
- DIY Friendly: Most drivers can remove and clean car seats at home with basic guidance.
- Regular Maintenance: Removing seats periodically keeps your vehicle interior fresh and hygienic.
📑 Table of Contents
- Why You Should Consider Removing Your Car Seats for Cleaning
- How to Remove Car Seats Safely
- Tools and Supplies You Will Need for Seat Removal and Cleaning
- Step-by-Step Guide to Removing and Cleaning Car Seats
- Common Mistakes to Avoid When Removing Car Seats
- How to Reinstall Car Seats Correctly
- Expert Insights on Car Seat Removal and Interior Cleaning
- Benefits of Regular Car Seat Removal Cleaning
- Conclusion
Why You Should Consider Removing Your Car Seats for Cleaning
Most people clean their car interior by wiping surfaces and vacuuming the seats. But there is a big difference between a surface clean and a deep clean car experience. When you leave the seats in place, you miss a lot of hidden dirt. Let us look at why removing your seats makes a real difference.
Access to Hidden Dirt and Grime
Your car seats sit on metal brackets attached to the floor. Underneath those brackets, there is a lot of space where dirt, food crumbs, and moisture collect over time. When you keep the seats in place, you can only clean the surface. You cannot reach the floor pan properly. Removing the seats gives you full access to every inch of your car’s interior floor. This is especially important if you have kids or pets who shed and spill regularly.
Better Cleaning Results
When you clean around the seats, you are working in tight spaces. You cannot move freely. You cannot scrub properly. By taking the seats out, you can lay them flat on a driveway or garage floor. This gives you the room to scrub, soak, and rinse each seat thoroughly. You can also clean the seat tracks and brackets without obstruction. The result is a much cleaner car interior overall.
Improved Air Quality Inside Your Vehicle
Dirt and crumbs trapped under your seats can cause bad smells over time. Bacteria and mold can grow in those hidden areas, especially in humid climates. Removing the seats allows you to clean these areas completely. This helps improve the air quality inside your car. A cleaner interior means a healthier environment for you and your passengers.
How to Remove Car Seats Safely
Removing car seats might sound intimidating, but it is actually quite straightforward. Most modern vehicles use bolt-on seats that can be taken out with basic tools. Let us walk through the process step by step.
Step 1: Gather Your Tools
Before you start, make sure you have the right tools ready. You do not want to stop halfway through because you are missing something. Here is what you will need:
- Socket wrench set – Most car seats use 14mm or 17mm bolts
- Ratchet and extension – Helps you reach bolts in tight spots
- Pliers – Useful for disconnecting electrical connectors
- Screwdrivers – Flathead and Phillips for any clips or screws
- Gloves – Protects your hands during the process
- Clean cloths – For wiping down parts as you go
Step 2: Disconnect the Electrical Connectors
Modern car seats often have electrical connectors for heated seats, power adjustments, or airbags. Before you remove any bolts, you need to disconnect these. Look under the seat for any wiring harnesses. Press the release tab and gently pull the connector apart. Do not yank on the wires. Be gentle and patient. If you are unsure about a connector, take a photo before disconnecting it. This will help you remember how to reconnect everything later.
Step 3: Remove the Bolts
Once the electrical connections are disconnected, look for the mounting bolts. These are usually located at the base of the seat on both sides. Some vehicles also have bolts at the front and rear of the seat. Use your socket wrench to loosen and remove each bolt. Keep all the bolts in a safe place. A small container or magnetic tray works great for this. You do not want to lose any hardware.
Step 4: Slide the Seat Out
After removing all the bolts, the seat should be free to move. Carefully slide the seat toward the front of the car. It might be tight, so you may need to tilt the seat slightly. Have a friend help you if the seat is heavy. Most car seats weigh between 20 and 40 pounds. Once the seat is out, set it on a clean surface in your garage or driveway.
Tools and Supplies You Will Need for Seat Removal and Cleaning
Having the right tools makes the entire process much smoother. Here is a complete list of what you should have on hand before you start your DIY car cleaning project.
| Tool or Supply | Purpose |
|---|---|
| Socket wrench set | Removing seat mounting bolts |
| Ratchet and extensions | Reaching tight bolt locations |
| Socket bits (14mm, 17mm) | Fitting the specific bolt sizes |
| Pliers | Disconnecting electrical connectors |
| Screwdriver set | Removing any additional clips |
| Vacuum cleaner | Removing loose dirt and debris |
| Upholstery cleaner | Deep cleaning seat fabric or leather |
| Carpet cleaner | Cleaning the exposed floor pan |
| Microfiber cloths | Wiping and drying surfaces |
| Bucket and warm water | Mixing cleaning solutions |
| Magnetic tray | Storing bolts and small parts safely |
| Protective gloves | Keeping your hands clean and safe |
You do not need to buy every single item on this list. Start with the basics and add supplies as needed. The most important thing is that you feel comfortable and prepared before you begin your car seat removal project.
Step-by-Step Guide to Removing and Cleaning Car Seats
Now that you understand why seat removal matters and how to do it safely, let us walk through the complete process. This guide covers everything from removal to cleaning to reinstallation.
Removing the Front Seats
The front seats are usually the easiest to remove. Start with the driver’s seat. Follow the steps we covered earlier: disconnect the electrical connectors, remove the bolts, and slide the seat out. Then move to the passenger seat. The process is the same, but the passenger seat may have additional wiring for sensors or side airbags. Be extra careful with those connections.
Removing the Rear Seats
Rear seats can be a bit trickier. Some rear seats fold down or have child seat anchors attached. Check for any additional hardware before you start removing bolts. In some vehicles, the rear seats may need you to remove headrests first. Always refer to your vehicle owner’s manual for specific instructions. The manual will show you exactly where each bolt is located and how to handle any special connectors.
Cleaning the Removed Seats
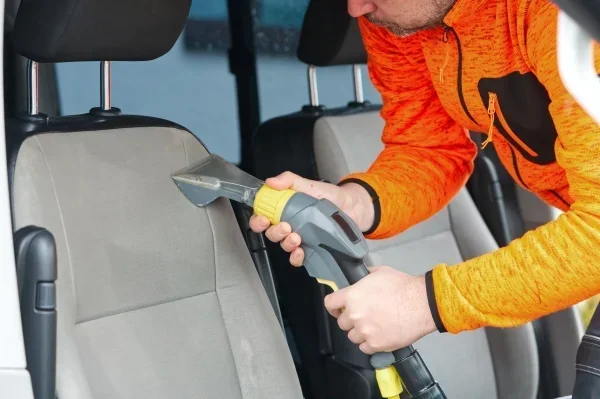
Once your seats are out, it is time to give them a thorough cleaning. Start by vacuuming both sides of each seat. This removes loose dirt, crumbs, and hair. Next, apply your upholstery cleaner to a microfiber cloth and gently scrub the seat surface. For leather seats, use a leather-specific cleaner to avoid drying out the material. For fabric seats, you can use a deeper cleaning solution and even a soft brush to work out stubborn stains. Let the seats air dry completely before reinstalling them.
Cleaning the Exposed Floor Pan
This is the part most people skip, but it is one of the most important. With the seats removed, you can now see the entire floor pan. Vacuum up all the dirt and debris. Then use a carpet cleaner or all-purpose interior cleaner to scrub the floor. Pay special attention to the areas under where the seats were mounted. These spots collect the most dirt and moisture over time. Wipe everything down with a clean, damp cloth and let it dry fully before putting the seats back in.
Cleaning the Seat Tracks and Brackets
The seat tracks are the metal rails where the seats slide in and out. These tracks get coated in dust, hair, and grime. Use a damp cloth to wipe them down. If there is heavy buildup, spray a little all-purpose cleaner on the tracks and let it sit for a few minutes before wiping. Clean brackets and mounting hardware with a wire brush if needed. This ensures a smooth fit when you reinstall the seats.
Common Mistakes to Avoid When Removing Car Seats
Even though removing car seats is a manageable task, there are some common mistakes that can cause problems. Learning what not to do saves you time, money, and frustration.
Forgetting to Disconnect the Battery
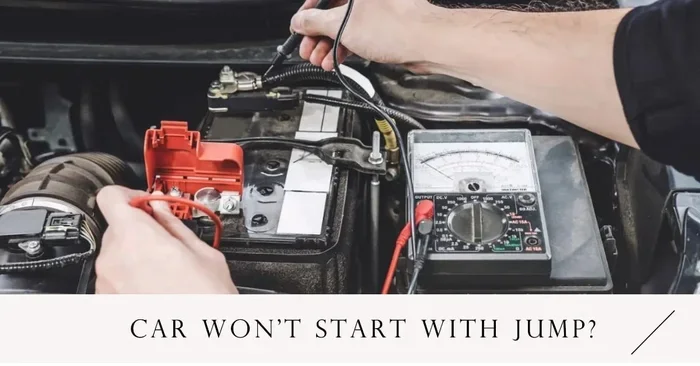
Some vehicles have airbag sensors connected to the seat. If you accidentally trigger a sensor while working, it could cause the airbag to deploy unexpectedly. To stay safe, disconnect the negative battery terminal before you start removing any seats. Wait at least 15 minutes after disconnecting to let the electrical system fully discharge. This is a simple safety step that makes a big difference.
Losing the Bolts and Hardware
It happens more often than you would think. People remove bolts and set them down carelessly, then cannot find them later. Always use a magnetic tray or a small container to keep track of every bolt. Label the container by seat position if you are removing multiple seats. This makes reinstallation much easier.
Yanking on Electrical Wires
Never pull on wires to disconnect them. Always press the release tab and pull the connector gently. Forcing a connection can damage the wiring harness. This can lead to expensive repairs. If a connector feels stuck, spray a little electrical contact cleaner around it and wait a few minutes before trying again.
Skipping the Owner’s Manual
Every vehicle is slightly different. Your owner’s manual contains specific instructions for seat removal that are tailored to your car. Skipping this step can lead to confusion or accidental damage. Take 10 minutes to read the relevant section before you start working.
Not Letting Seats Dry Completely
After cleaning your seats, make sure they are completely dry before putting them back in the car. Trapped moisture can lead to mold and mildew growth. This creates bad smells and potential health issues. Let seats dry in the sun for a few hours if possible. You can also use a clean towel to pat them dry before air drying.
How to Reinstall Car Seats Correctly
Cleaning your seats is only half the battle. Putting them back in correctly is just as important. Incorrect installation can lead to loose seats, which are a safety hazard. Follow these steps carefully.
Step 1: Check All Connectors
Before sliding the seat back in, make sure all electrical connectors are properly reconnected. Push each connector until you hear or feel it click into place. Double-check your photos if you took any during removal. A loose electrical connection can cause seat heaters, adjustments, or warning lights to malfunction.
Step 2: Align the Seat with the Tracks
Slide the seat into position on the tracks. Make sure it aligns with all the bolt holes. If the seat does not slide in smoothly, check for any debris or dirt in the tracks. Clean the tracks before trying again. A little lubricant on the tracks can also help the seat glide in more easily.
Step 3: Reinstall the Bolts
Start threading the bolts by hand to avoid cross-threading. Once they are started, use your socket wrench to tighten them securely. Do not overtighten, as this can strip the threads or damage the floor pan. Tighten each bolt firmly but gently. Check that the seat does not move or wobble after all bolts are in place.
Step 4: Reconnect the Battery
Once all seats are reinstalled, reconnect the negative battery terminal. Start the car and check that all seat functions work properly. Test the seat heaters, power adjustments, and any warning lights on your dashboard. If everything looks good, you are all set.
Expert Insights on Car Seat Removal and Interior Cleaning
We spoke with several automotive detailing professionals to get their top tips for removing and cleaning car seats. Here is what they had to say.
Start with a plan. Before you remove any seats, lay out your workspace. Make sure you have enough room to move around comfortably. Work in a garage or a shaded area if possible. Direct sunlight can cause cleaning solutions to dry too quickly, leaving residue on your seats.
Take photos throughout the process. This is advice every professional shares. Photos help you remember exactly how everything was connected. They are especially helpful for electrical connectors and bracket positions. You will thank yourself during reinstallation.
Do not rush the drying process. After cleaning, allow plenty of time for everything to dry. Reinstalling seats that are even slightly damp can trap moisture against the carpet. This leads to mold and unpleasant odors. Patience pays off here.
Clean your seats every three to six months. Regular cleaning prevents buildup and keeps your interior looking great. When you make seat removal part of your routine vehicle maintenance, the process becomes faster and easier each time.
Benefits of Regular Car Seat Removal Cleaning
Once you experience the difference that full seat removal makes, you will wonder why you did not do it sooner. Here are the key benefits:
- Deeper clean: You reach areas that are impossible to access with seats in place
- Better smell: Removing the source of odors instead of just masking them
- Longer seat life: Regular deep cleaning prevents wear and tear from embedded dirt
- Healthier cabin: Removing allergens, dust, and bacteria from hidden areas
- Higher resale value: A meticulously clean interior makes a great impression on buyers
- Peace of mind: Knowing every part of your car interior has been properly cleaned
Taking the time to remove and clean your car seats properly is one of the best things you can do for your vehicle. It is a simple process that delivers impressive results. Whether you are a car enthusiast or just someone who wants a cleaner ride, this approach works for everyone.
Conclusion
So, can you take the seats out of your car to clean it properly? Absolutely. Can I take the seats out of my car to clean it properly is a question with a resounding yes as the answer. Removing your car seats opens up access to hidden dirt, improves cleaning results, and helps you maintain a fresh, healthy vehicle interior. With the right tools, a little patience, and the steps outlined in this guide, you can tackle this task with confidence. Remember to disconnect the battery, keep track of all hardware, and let everything dry completely before reinstalling. Your car will thank you with a cleaner, better-smelling interior that looks and feels like new.
Start your next cleaning session with seat removal and feel the difference. It is one of the best upgrades you can make to your regular car maintenance routine.
Frequently Asked Questions
Can I remove car seats by myself?
Yes, most drivers can remove car seats on their own with basic tools. You will need a socket wrench, ratchet, and a few other common items. The process typically takes about 20 to 30 minutes per seat. If you feel unsure, ask a friend to help, especially with heavier seats. Always refer to your vehicle owner’s manual for specific guidance.
Do I need any special tools to remove car seats?
You do not need anything fancy. A standard socket wrench set with a 14mm or 17mm socket will handle most seats. Pliers and a screwdriver are also helpful for disconnecting electrical connectors. A magnetic tray is a nice-to-have for keeping bolts organized. That is really all you need for a successful DIY seat removal.
Will removing my car seats damage anything?
No, removing seats correctly will not damage your car. The key is to follow the proper steps. Disconnect electrical connectors gently, remove bolts carefully, and avoid yanking on any wires. If you are gentle and patient, everything will come apart and go back together without any issues.
How often should I remove my car seats for cleaning?
Most experts recommend removing and deep cleaning car seats every three to six months. If you have children or pets, you may want to do it more frequently. Regular seat removal cleaning prevents dirt buildup and keeps your car interior in excellent condition. Even a quick session once a year makes a noticeable difference.
Can I wash car seat covers in a washing machine?
Yes, most removable car seat covers can be washed in a machine. Check the care label first to confirm. Use a gentle cycle with cold water and mild detergent. Avoid using bleach or harsh chemicals that could damage the fabric. Let covers air dry completely before putting them back on the seats.
Is it safe to disconnect the car battery before removing seats?
Yes, it is very safe and actually recommended. Disconnecting the negative battery terminal prevents any accidental airbag deployment while you are working. Wait at least 15 minutes after disconnecting before you start removing seats. When you are done, reconnect the terminal and your electrical system will reset normally.