How Do I Know If My Brake Fluid Needs Changing Today
Brake fluid is the lifeblood of your car’s braking system, and knowing when to change it can save your life. You can check your brake fluid color, level, and feel to spot warning signs early. Most experts recommend a brake fluid flush every two years or 30,000 miles. Ignoring dirty or contaminated fluid leads to poor braking, spongy pedals, and expensive repairs. This guide walks you through every step to know exactly when your brake fluid needs changing.
Your car stops because of a complex system that relies on hydraulic pressure. Brake fluid is the invisible hero that makes it all work. But here is the thing most drivers forget — brake fluid degrades over time. It absorbs moisture, loses its boiling point, and becomes less effective. So how do you know when it is time to change it? This guide will show you every sign, test, and tip you need to keep your brakes working perfectly.
Whether you are a DIY car owner or someone who just wants to understand their vehicle better, this article has you covered. We will walk through the visual checks, the physical signs, and the tools you can use to test your fluid. By the end, you will know exactly what to look for and when to act. Let us get into it.
Key Takeaways
- Check the color: Fresh brake fluid is clear or light yellow. Dark brown or black fluid means it is time for a change.
- Feel the pedal: A spongy or soft brake pedal often signals moisture contamination in your brake fluid.
- Use a brake fluid tester: These cheap tools measure moisture content and tell you if your fluid is still good.
- Follow the schedule: Most manufacturers recommend replacing brake fluid every 2 years, regardless of how it looks.
- Never mix fluid types: DOT 3, DOT 4, and DOT 5 fluids are not interchangeable and mixing them can damage your system.
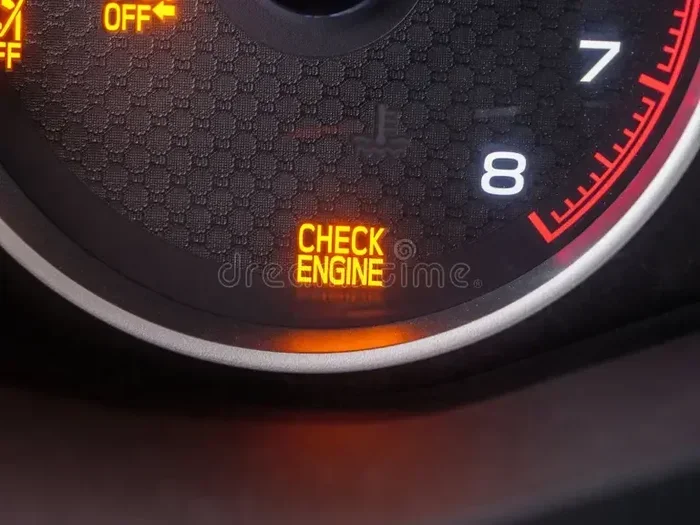
- Watch for warning lights: A brake warning light on your dashboard can indicate low fluid or contaminated fluid.
- DIY or professional: You can do a brake fluid flush at home with basic tools, or visit a mechanic for a professional job.
📑 Table of Contents
- What Does Brake Fluid Do and Why Does It Matter?
- Visual Signs Your Brake Fluid Needs Changing
- Physical Signs That Your Brake Fluid Is Degraded
- How to Test Brake Fluid Moisture Content
- Brake Fluid Change Intervals and Schedules
- Common Brake Fluid Mistakes to Avoid
- How to Perform a Brake Fluid Flush at Home
- When to See a Professional Mechanic
- Final Thoughts on Brake Fluid Maintenance
What Does Brake Fluid Do and Why Does It Matter?
Brake fluid is a special hydraulic fluid that transfers force from your brake pedal to the brake calipers. When you press the pedal, the fluid pushes the calipers tight against the rotors. This creates the friction that slows your car down. Without clean brake fluid, this entire process breaks down.
Here is why it matters so much. Brake fluid works under extreme heat and pressure. Every time you brake, the fluid absorbs tiny amounts of moisture from the air. Over months and years, this moisture builds up. It lowers the boiling point of the fluid. When the fluid boils under heavy braking, it creates air bubbles. Air in the brake lines means a spongy pedal or, worse, total brake failure.
Your braking system is one of the most safety-critical parts of your vehicle. Keeping the brake fluid fresh is not optional. It is essential.
The Role of Brake Fluid in the Hydraulic System
The braking system works because brake fluid is incompressible. Unlike air, it transfers force instantly and evenly. This is what gives you that firm, responsive feel when you press the pedal. But moisture contamination changes everything. Even a small amount of water in the fluid can cause dangerous brake fade during hard stops.
Most cars use DOT 3 or DOT 4 brake fluid. These are glycol-based fluids that naturally attract water. Some high-end vehicles use DOT 5, which is silicone-based and does not absorb moisture. But regardless of the type, all brake fluid has a service life. It does not last forever.
Visual Signs Your Brake Fluid Needs Changing
One of the easiest ways to check your brake fluid is by looking at it. You do not need any special tools for this. Just pop the hood and locate the brake fluid reservoir. It is usually near the back of the engine bay, on the driver’s side. The reservoir cap will often have a brake symbol on it.
Open the cap and look at the fluid inside. Fresh brake fluid should be clear or a light amber color. If the fluid looks dark brown or black, it has absorbed too much moisture and debris. This is a clear sign that a brake fluid flush is needed.
Checking Brake Fluid Color
Color is one of the most reliable visual indicators. Here is a simple guide:
- Clear to light yellow: Your fluid is fresh and in good condition.
- Medium amber: The fluid is aging but may still be okay. Monitor it closely.
- Dark brown or black: The fluid is contaminated and needs to be replaced immediately.
Do not rely solely on color, though. Fluid can look dark even if it has not absorbed much moisture. Use the other tests in this article to get a complete picture.
Checking Brake Fluid Level
The reservoir has minimum and maximum markings on the side. If the fluid level is consistently low, it could mean a leak in the braking system. Low fluid level is not always a sign that the fluid needs changing, but it is always a sign that something needs attention. Top off the fluid and have the system inspected.
A quick drop in fluid level after a brake pad replacement is normal. New brake pads are thicker, so the calipers need more fluid to seat them. But if the level drops again, get it checked right away.
Physical Signs That Your Brake Fluid Is Degraded
Your body can tell you a lot about your brake fluid if you know what to feel for. The brake pedal is your best diagnostic tool. Pay close attention to how it feels every time you drive.
Spongy or Soft Brake Pedal
A spongy brake pedal is one of the most common signs of contaminated brake fluid. When moisture gets into the fluid, it creates air pockets in the hydraulic lines. Air compresses, unlike brake fluid, so you lose hydraulic pressure. The result is a pedal that feels mushy, soft, or sinks to the floor.
If you notice this feeling, do not ignore it. A spongy pedal means your brakes are not working at full efficiency. Get the fluid tested or replaced as soon as possible.
Hard or Unresponsive Brake Pedal
On the other side of the spectrum, a hard pedal that does not respond well can also indicate brake fluid problems. If the fluid has degraded to the point of boiling during normal driving, it can cause vapor lock. This makes the pedal feel hard and the brakes almost non-responsive.
This is especially dangerous during long downhill drives or emergency stops. If your brakes feel weird in any way, get them checked immediately.
Unusual Brake Noises
Grinding, squealing, or squeaking noises when you brake can sometimes be linked to brake fluid issues. Contaminated fluid can cause uneven pressure in the calipers. This leads to uneven pad wear and metal-on-metal contact. While noises are more often a sign of worn brake pads, they can also point to fluid problems.
How to Test Brake Fluid Moisture Content
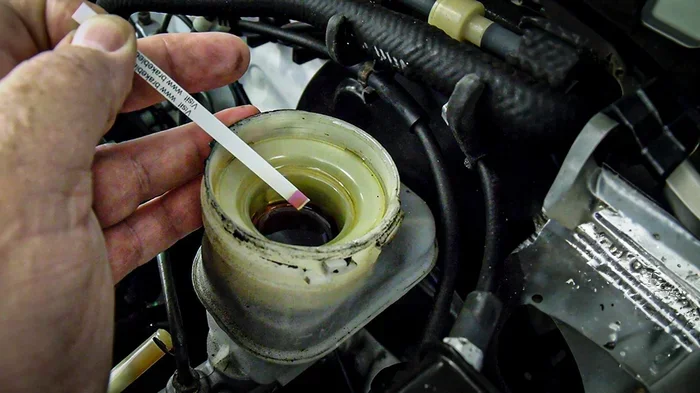
Visual checks and pedal feel are helpful, but they are not always precise. The most accurate way to know if your brake fluid needs changing is to test its moisture content. You can buy a brake fluid tester for under $20 at any auto parts store.
These testers measure the water content in the fluid as a percentage. Most mechanics agree that brake fluid with more than 3% moisture content should be replaced. At this level, the boiling point drops significantly and your braking performance suffers.
Using a Brake Fluid Tester
Testing is simple. Here is how to do it:
- Locate the brake fluid reservoir and clean the area around it.
- Open the reservoir cap.
- Dip the tester probe into the fluid.
- Read the moisture percentage on the display.
- Compare the reading to the recommended threshold.
If the reading is above 3%, schedule a brake fluid flush. If it is below 2%, your fluid is still in good shape. Retest every few months to stay on top of it.
Understanding Brake Fluid Boiling Point
Every brake fluid has a dry boiling point and a wet boiling point. The dry boiling point is the temperature at which fresh fluid boils. The wet boiling point is the temperature at which fluid with 3.7% moisture boils. As fluid absorbs moisture over time, its wet boiling point drops dramatically.
For example, DOT 4 brake fluid has a dry boiling point of around 446°F (230°C). But after absorbing moisture, the wet boiling point can drop to around 311°F (155°C). That is a huge difference. During heavy braking, your brake components can reach temperatures above 300°F. Old, wet fluid can boil right in the lines and cause brake failure.
Brake Fluid Change Intervals and Schedules
So how often should you actually change your brake fluid? The answer depends on your vehicle, your driving habits, and the type of fluid you use. But there are some general guidelines that apply to almost everyone.
Manufacturer Recommendations
Most car manufacturers recommend a brake fluid flush every 2 years or 30,000 miles, whichever comes first. Check your owner’s manual for the exact schedule. Some brands, like BMW and Mercedes, are very specific about their brake fluid maintenance intervals. Following these guidelines keeps your warranty intact and your brakes in top shape.
Do not assume your fluid is fine just because you have not hit the mileage mark. Time matters too. Brake fluid absorbs moisture even if you do not drive the car much. A car that sits in a garage for two years still needs a fluid change.
Driving Conditions That Require More Frequent Changes
Certain driving conditions accelerate brake fluid degradation. If any of these apply to you, consider changing your fluid more often:
- Driving in hot, humid climates
- Towing heavy trailers or loads
- Frequent stop-and-go city driving
- Racing or track driving
- Driving on steep, winding roads
- Short-trip driving where brakes do not fully cool down
In these conditions, moisture enters the fluid faster and the fluid degrades more quickly. A brake fluid flush every 12 months might be a smart move.
Brake Fluid Replacement Cost
The cost of a brake fluid change is very reasonable. A DIY brake fluid flush costs around $20 to $50 for fluid alone. If you go to a mechanic, expect to pay between $70 and $150 for the service. This is a small price to pay for the safety and reliability of your braking system.
Compare that to the cost of replacing damaged brake components caused by contaminated fluid. A ruined ABS module or warped brake rotor can cost hundreds or even thousands of dollars. Regular fluid changes save you money in the long run.
Common Brake Fluid Mistakes to Avoid
Even well-meaning car owners make mistakes when it comes to brake fluid. Here are the most common ones and how to avoid them.
Mixing Different Brake Fluid Types
Never mix DOT 3, DOT 4, and DOT 5 fluids unless your vehicle manual specifically allows it. DOT 3 and DOT 4 are both glycol-based and can be mixed in a pinch, but they have different boiling points. DOT 5 is silicone-based and should never be mixed with glycol-based fluids. Mixing the wrong types can cause seal damage and brake failure.
Overlooking the Brake Fluid Reservoir Cap
The reservoir cap seals the system and prevents moisture from entering. If the cap is loose, cracked, or missing, moisture gets in fast. Always make sure the cap is tight and in good condition after checking your fluid.
Ignoring the Brake Warning Light
A brake warning light on your dashboard is not something to brush off. It can indicate low fluid, a leak, or a problem with the ABS system. Check your fluid level first. If it is low, top it off and have the system inspected for leaks.
Using the Wrong Fluid for the Job
Always use the brake fluid type recommended by your vehicle manufacturer. Using the wrong DOT rating can affect brake performance and potentially damage expensive components like the ABS modulator.
How to Perform a Brake Fluid Flush at Home
If you are a hands-on car owner, you can change your brake fluid yourself. It is not as hard as it sounds, and it saves you money. Here is a simple step-by-step guide.
What You Will Need
- The correct type of brake fluid for your vehicle
- A clear hose or brake bleeder kit
- A wrench set
- A catch container
- A helper or a brake bleeder tool
- Clean rags
Step-by-Step Brake Fluid Flush
- Start with the wheel farthest from the master cylinder, usually the right rear.
- Have your helper press the brake pedal slowly and hold it.
- Open the bleeder valve on the caliper and let old fluid flow out through the hose.
- Close the valve before your helper releases the pedal.
- Repeat until the fluid coming out is clear and free of bubbles.
- Move to the left rear, then right front, then left front.
- Top off the reservoir with fresh fluid throughout the process.
- Check the pedal feel. It should be firm and responsive.
Always dispose of old brake fluid properly. It is hazardous waste and should not go down the drain. Take it to a local recycling center or auto parts store that accepts it.
When to See a Professional Mechanic
Not everyone is comfortable doing a brake fluid flush themselves. That is perfectly fine. A professional mechanic has the right tools, including vacuum bleeders and pressure bleeder machines, that make the job faster and cleaner.
You should see a mechanic if you notice any of the following:
- The brake pedal goes to the floor even after bleeding
- You see fluid leaks under your car
- Your ABS light stays on after a fluid change
- The brake fluid smells burnt or looks extremely dark
- You hear grinding or clicking noises when braking
A professional brake fluid change typically takes about 30 to 60 minutes. Many shops will also inspect your entire braking system for free as part of the service.
Final Thoughts on Brake Fluid Maintenance
Your brake fluid is one of the most overlooked yet critical parts of your vehicle. It does not get the attention it deserves until something goes wrong. But as you now know, checking and changing your brake fluid regularly is simple, inexpensive, and potentially life-saving.
Use the visual checks, the pedal tests, and the moisture tester to stay on top of your fluid condition. Follow your manufacturer’s recommended schedule and adjust for your driving conditions. Do not mix fluid types, and never ignore warning signs like a spongy pedal or dark fluid.
Your brakes are the most important safety feature in your car. Taking care of the brake fluid is one of the easiest ways to make sure they work when you need them most. Make it a habit to check your fluid at every oil change. It takes two minutes and gives you peace of mind.
Stay proactive about your brake fluid health. Your future self and everyone on the road with you will thank you.
Frequently Asked Questions
How often should I change my brake fluid?
Most manufacturers recommend changing brake fluid every 2 years or 30,000 miles, whichever comes first. However, if you drive in harsh conditions like hot climates or do a lot of towing, consider changing it every 12 months for safety.
Can I check my brake fluid myself?
Yes, checking brake fluid is one of the easiest DIY maintenance tasks. Just locate the reservoir under the hood, check the color and level, and use a brake fluid tester to measure moisture content. It takes less than five minutes.
What happens if I don’t change my brake fluid?
Over time, brake fluid absorbs moisture which lowers its boiling point. This can cause brake fade, a spongy pedal, or even complete brake failure during hard stops. Contaminated fluid also corrodes internal brake components, leading to expensive repairs.
Is it safe to drive with old brake fluid?
Driving with old brake fluid is risky. The reduced boiling point and moisture content can seriously compromise your braking performance, especially during emergency stops or heavy braking. It is not worth the safety risk.
What is the difference between DOT 3, DOT 4, and DOT 5 brake fluid?
DOT 3 and DOT 4 are glycol-based fluids with different boiling points. DOT 4 has a higher boiling point and is more common in modern vehicles. DOT 5 is silicone-based and does not absorb moisture. Never mix these types unless your vehicle manual specifically allows it.
How much does a brake fluid change cost?
A DIY brake fluid change costs around $20 to $50 for fluid. If you go to a mechanic, expect to pay between $70 and $150. This is a small cost compared to the potential damage caused by neglecting brake fluid maintenance.
=== CONCLUSION ===
Knowing how to tell if your brake fluid needs changing is a simple skill that every driver should have. Check the color, feel the pedal, and use a moisture tester to stay ahead of degradation. Follow the recommended service intervals and adjust for your driving conditions. Your braking system works hard for you every day — give it the care it deserves with fresh, clean brake fluid. Stay safe out there.