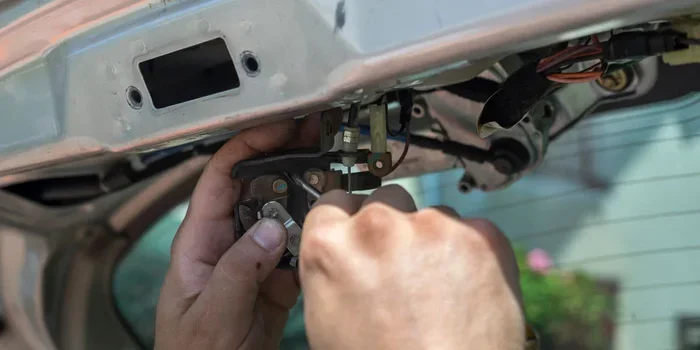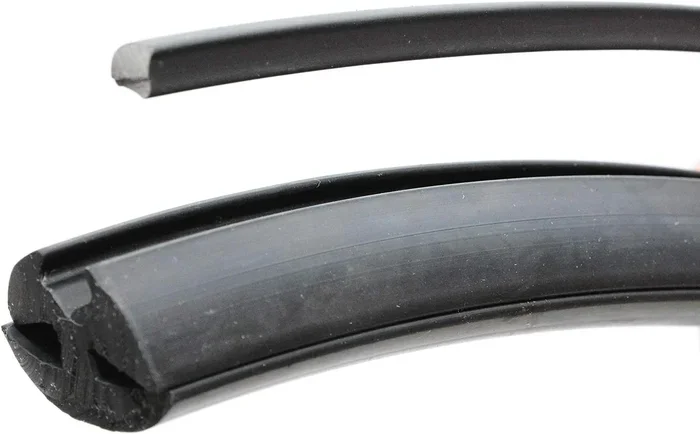
Car Window Rubber Beading Everything You Need to Know
Car window rubber beading is the rubber trim that seals your car windows against water, wind, and debris. When this rubber beading wears out, it can cause leaks, wind noise, and damage to your car window seal. This complete guide covers everything from identifying problems to replacing and maintaining your window seal like a pro.
Key Takeaways
- Car window rubber beading is essential for sealing your windows against water, wind, and debris
- Rubber deterioration from UV exposure and age is the most common cause of seal failure
- Early signs include water leaks, increased wind noise, and visible cracks in the rubber trim
- DIY window seal replacement is possible with basic tools and about 1-3 hours of time
- Regular maintenance with rubber conditioner can extend the life of your car window seal by years
- Call a professional for complex window systems or if you are unsure about the repair
📑 Table of Contents
What Is Car Window Rubber Beading?
Every car has a car window rubber beading system that you probably never think about until something goes wrong. This rubber trim runs along the edges of your windows, creating a tight seal between the glass and the window frame. It keeps rain, wind, dust, and noise outside where they belong.
The rubber beading is also known as window molding or rubber trim. It comes in different shapes and sizes depending on your vehicle model. Some cars have a single strip, while others use multiple pieces around the window perimeter. Either way, the job is the same: create a secure, weatherproof barrier.
Understanding the Basics of Car Window Rubber Beading
The rubber beading strip attaches to the window channel inside the door or body of the car. It presses against the glass when you roll it up or down. This constant contact means the rubber takes a lot of wear and tear over time. Most window rubber beading is made from synthetic rubber or PVC materials designed to withstand UV rays and temperature changes.
Inside the window channel, you will also find the window regulator, which is the mechanism that moves your window up and down. The beading sits alongside these components, keeping everything sealed and protected. When the beading fails, it can affect how smoothly your window operates.
How Car Window Rubber Beading Works on Your Vehicle
When you roll up your window, the glass presses against the rubber bead lining the channel. This creates a compression seal. The car window seal prevents water from entering the cabin and blocks cold air from coming inside during winter. It also reduces wind noise at highway speeds.
The beading works together with the weather stripping on your doors and the door seal around the entire vehicle. Think of it as part of a larger system that keeps your car interior dry and comfortable. If one part of this system fails, it can cause problems in other areas too.
Quick Tip: Run your finger along the rubber beading during your next car wash. If you feel cracks, tears, or gaps, it is time to take action before the problem gets worse.
Why Car Window Rubber Beading Matters
You might wonder why a small rubber strip deserves so much attention. The truth is, car window rubber beading plays a bigger role than most people realize. It protects your entire interior and affects how comfortable your daily drive feels.
Protection That Car Window Rubber Beading Provides
The primary job of rubber molding around your windows is to block water. When it works properly, rain and snow cannot enter your car. But when the rubber deterioration sets in, water can seep through gaps and cause serious damage.
Water leaks can ruin your carpet, damage electrical components, and even cause mold growth inside your car. These problems are expensive to fix and can affect your health. A simple window seal replacement can prevent all of this.
UV rays also cause significant damage to exposed rubber. Over months and years, sunlight breaks down the rubber fibers, making them brittle and less flexible. This is why window seal replacement becomes necessary eventually for every vehicle owner.
Reducing Wind Noise with Proper Car Window Rubber Beading
Have you ever noticed a whistling sound inside your car at highway speeds? This is often caused by a failing car window seal. When the rubber beading no longer fits snugly against the glass, air passes through the gaps and creates annoying wind noise.
Beyond the noise, drafts can make your car uncomfortable in every season. In winter, cold air enters through gaps in the window rubber. In summer, hot air leaks in and makes your AC work harder. This increases fuel consumption and reduces comfort.
Common Mistake: Many drivers ignore small rattles or occasional drafts. They assume it is normal. In reality, these are early warning signs of rubber deterioration that will only get worse over time.
Common Signs Your Window Rubber Beading Is Worn Out
Spotting early warning signs of rubber deterioration can save you from expensive car window repair bills later. Here are the most common indicators that your car window rubber beading needs attention.
Visual Clues: Checking Your Car Window Rubber Beading
The easiest way to check your window seal is to look at it closely. Run your eyes along the entire length of the rubber beading. Watch for these visual signs:
- Cracks or splits in the rubber surface
- Softening or mushy texture in parts of the beading
- Discoloration or fading from sun exposure
- Gaps between the rubber and the glass or frame
- Rubber pulling away from the window channel
- Visible tears or missing pieces of the rubber beading strip
If you notice any of these signs, your window gasket is losing its effectiveness. Even small cracks can let water enter your car during heavy rain.
Performance Issues Caused by Worn Car Window Rubber Beading
Sometimes the damage is not visible right away, but you can feel it. Pay attention to these performance issues:
- Water dripping inside your car after it rains
- Increased wind noise at highway speeds
- Cold air or hot drafts entering through the windows
- Window rattling or vibrating while driving
- Difficulty rolling the window up or down smoothly
- Condensation forming between the glass and the door panel
These symptoms point to a failing car window seal. The rubber trim is no longer creating the tight seal your windows need. Addressing the problem early can prevent water damage and further rubber deterioration.
Expert Insight: Many experienced mechanics recommend checking your window seal condition during every oil change. A quick visual inspection takes less than two minutes but can catch problems early. This simple habit can extend the life of your window rubber significantly.
How to Replace Car Window Rubber Beading
Replacing car window rubber beading is one of the most manageable car window repair tasks you can do yourself. With the right tools and a little patience, you can complete the job in under two hours.
Tools and Materials for Car Window Rubber Beading Replacement
Before you start, gather everything you need. Having all your materials ready will make the process smooth and efficient.
- New rubber beading (measure your window dimensions first)
- Adhesive sealant rated for rubber and glass contact
- Rubbing alcohol or window cleaner
- A plastic trim removal tool
- Flathead screwdriver (for gentle prying)
- Clean cloths or paper towels
- Masking tape
Make sure you purchase the correct window seal kit for your specific vehicle model. Auto parts stores carry universal kits, but a custom-fit beading will look better and seal more effectively.
Step-by-Step Replacement Guide
Follow these steps carefully for a clean window seal replacement:
- Clean the window channel thoroughly with rubbing alcohol. Remove all old adhesive and debris.
- Gently pry out the old rubber beading using the plastic trim tool. Work slowly to avoid cracking the glass.
- Inspect the window channel for any damage or debris. Clean it again if needed.
- Dry the channel completely with a clean cloth.
- Apply a thin, even line of adhesive sealant along the channel where the new beading will sit.
- Press the new rubber beading strip into the channel starting from one corner.
- Work your way around the window, pressing the beading firmly into place.
- Use masking tape to hold the beading in position while the adhesive cures.
- Wait at least 24 hours before rolling the window up or down.
This process works for most window rubber beading types. If your vehicle has a complex window system or power windows, take extra care around the regulator mechanism.
| Aspect | DIY Replacement | Professional Service |
|---|---|---|
| Cost | $20-$50 for parts | $100-$300 including labor |
| Time Required | 1-3 hours | 30 minutes to 1 hour |
| Skill Level Needed | Moderate DIY skills | None required |
| Risk of Mistakes | Higher if inexperienced | Minimal |
| Custom Fit | Depends on kit quality | Usually exact fit |
Quick Tip: Apply a thin layer of silicone-based lubricant to the new rubber beading before installation. This helps it slide into the window channel more easily and prevents pinching when you roll the window.
Common Mistake: Using too much adhesive sealant is a frequent error. Excess adhesive can squeeze out and interfere with the window movement. Apply just enough to create a bond without overflow.
Tips for Maintaining Your Window Rubber Beading
Prevention is always better than replacement. With a few simple habits, you can extend the life of your car window rubber beading and avoid premature rubber deterioration.
Daily Habits to Protect Your Car Window Rubber Beading
Small actions throughout your driving routine make a big difference over time:
- Clean your window rubber regularly with a mild soap solution
- Avoid rolling your window down completely in freezing temperatures
- Wipe away bird droppings and tree sap immediately
- Use a sunshade when parking in direct sunlight for extended periods
- Check your rubber trim condition monthly during car washes
- Lubricate the window channel with silicone spray every few months
These habits protect the rubber from UV damage, chemical exposure, and physical stress. They are simple but surprisingly effective at preventing rubber deterioration.
Products That Keep Your Car Window Rubber Beading Healthy
Several products can help maintain your car window seal and keep the rubber supple:
- Rubber conditioner – restores flexibility and protects against UV damage
- Silicone-based lubricant – reduces friction in the window channel
- UV protectant spray – shields rubber from sun degradation
- Glycerin-based seal conditioner – prevents cracking and drying
Apply rubber conditioner every two to three months. This simple step keeps the rubber molding soft and pliable, significantly extending its lifespan. Avoid petroleum-based products, as they can actually break down rubber over time.
Expert Insight: Many professional detailers recommend applying a thin coat of adhesive sealant conditioner to the rubber bead every six months. This creates an invisible protective layer that shields the rubber from environmental damage while keeping it flexible.
When to Call a Professional Instead of DIY
While replacing car window rubber beading is a great DIY project, some situations call for professional help. Knowing when to seek expert assistance saves time, money, and frustration.
Complex Repairs and Safety Concerns
Some vehicles have complex window systems that are difficult to work on without specialized knowledge. If your car has power windows with electronic regulators, the window regulator and window gasket work together in tight spaces. Mistakes during DIY work can damage electrical components or the window mechanism itself.
Also, if you notice water leaking inside your car after a window seal replacement, the problem may be deeper than just the beading. Water intrusion can damage the door seal, the weather stripping, or even the vehicle body structure. A professional can diagnose the full extent of the problem.
Cost Considerations
The cost of professional window seal replacement varies depending on your vehicle and location. On average, you can expect to pay between $100 and $300 per window for professional service. This includes both parts and labor.
For comparison, DIY window seal kit costs typically range from $20 to $50 per window. However, if you make a mistake and need to redo the work, the savings disappear quickly. Consider your skill level, available time, and the complexity of your vehicle before deciding.
Quick Tip: Get a quote from a local mechanic before attempting DIY replacement. Knowing the professional cost helps you decide if the savings from a DIY approach justify the effort and risk.
Conclusion
Car window rubber beading is a small but essential component of your vehicle. It protects your interior from water damage, reduces wind noise, and keeps your cabin comfortable in every season. Taking care of your window seal through regular maintenance and timely window seal replacement saves you money and prevents costly car window repair bills down the road.
Whether you choose to tackle the replacement yourself or hire a professional, the key is to act quickly when you notice signs of rubber deterioration. Ignoring a failing car window rubber beading system leads to water leaks, wind noise, and interior damage that only gets worse with time.
Now that you understand everything about car window rubber beading, you are equipped to keep your vehicle sealed and protected. Check your window rubber regularly, maintain it properly, and do not hesitate to replace it when the time comes. Your car and your comfort will thank you for it.
Frequently Asked Questions
How Long Does Car Window Rubber Beading Last?
Most car window rubber beading lasts between five and ten years, depending on climate and exposure. Vehicles parked in sunny or coastal areas may experience faster rubber deterioration. Regular maintenance can extend this lifespan significantly.
Can I Drive with a Broken Window Seal?
You can drive short distances with a damaged car window seal, but it is not recommended. Water can enter your car during rain, and wind noise increases at highway speeds. Prolonged driving with a broken seal can lead to interior water damage and mold growth.
What Causes Rubber Beading to Deteriorate?
The main causes are UV exposure from sunlight, extreme temperature changes, and natural aging. Chemicals from car wash products and road salts also accelerate rubber deterioration. Regular cleaning and conditioning help slow this process.
How Much Does It Cost to Replace Window Rubber Beading?
DIY window seal replacement costs between $20 and $50 for parts. Professional service ranges from $100 to $300 per window, including labor. The exact cost depends on your vehicle model and the complexity of the window regulator system.
Can I Use Any Adhesive for Window Seal Replacement?
No, you should use an adhesive sealant specifically designed for rubber and glass contact. Generic adhesives may not create a proper seal or could damage the rubber bead. Look for products rated for automotive window seal applications at auto parts stores.
Is It Better to Replace Rubber Beading or the Entire Window Regulator?
In most cases, replacing just the car window rubber beading is sufficient. The window regulator only needs replacement if it is mechanically failing. A professional inspection can determine whether your window gasket and regulator both need attention or if the beading alone is the problem.