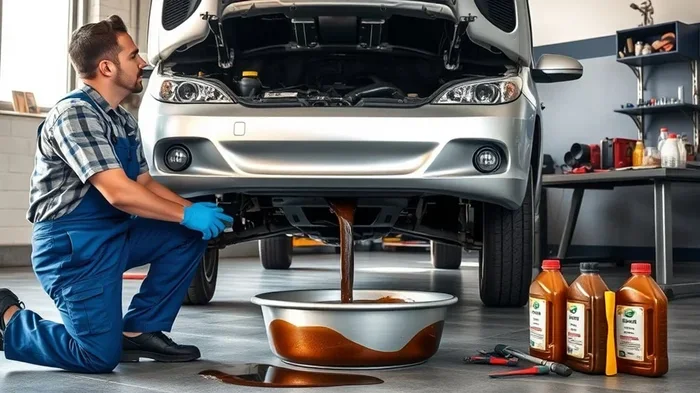
Can I Change My Oil Myself Yes Here Is How You Do It
Yes, you can absolutely change your oil yourself. It is one of the easiest and most rewarding DIY car maintenance tasks you can do. With basic tools and a little guidance, you will save money and learn valuable vehicle maintenance skills. This guide walks you through every step of the process.
There is something deeply satisfying about doing your own car maintenance. Few tasks feel as rewarding as changing your own oil for the first time. You save real money, learn how your vehicle works, and gain confidence as a car owner.
Many people think this job is too hard or too messy. But the truth is, it is simpler than you might expect. With the right tools and a clear guide, most people finish in under an hour. Whether you drive a sedan, truck, or SUV, the process is very similar across vehicles.
In this article, we will walk you through everything you need to know. From gathering supplies to disposing of old oil the right way, we have you covered. You will also learn common mistakes to avoid and tips that make the job easier. By the end, you will feel ready to roll up your sleeves and get it done.
Can I change my oil myself? The short answer is a confident yes. Let us show you exactly how.
Key Takeaways
- You can save money: A DIY oil change costs less than half of what a shop charges.
- Basic tools are all you need: A wrench, drain pan, and jack stands are the essentials.
- Safety comes first: Always use jack stands and work on a flat surface.
- Proper disposal matters: Never dump used oil. Take it to a recycling center.
- Check your owner’s manual: It tells you the right oil type and filter for your vehicle.
- Timing is key: Change your oil every 5,000 to 7,500 miles for best results.
- It builds confidence: Once you do it, you will feel more comfortable with your car.
📑 Table of Contents
- Why You Should Consider Changing Your Oil Yourself
- What You Need to Get Started
- Step-by-Step Guide to Changing Your Oil
- Common Mistakes to Avoid
- How to Dispose of Used Oil Properly
- When It Is Better to Leave It to a Professional
- Benefits of Regular Oil Changes
- Quick Tips for a Smooth Oil Change Experience
- Conclusion
Why You Should Consider Changing Your Oil Yourself
Changing your own oil is one of the best entry points into DIY car care. It is simple, affordable, and gives you direct control over the quality of work. Here are some strong reasons to give it a try.
Save Money on Every Oil Change
A professional oil change at a shop typically costs between $50 and $100. When you do it yourself, the supplies usually cost $20 to $40. That means you can save $30 to $60 every single time. Over a year of regular oil changes, those savings add up fast.
You also avoid upsells. Shops sometimes recommend extra services you do not need. When you do it yourself, you only pay for what matters. Your DIY oil change stays focused and affordable.
Learn How Your Vehicle Works
Understanding your car builds confidence. When you know where the drain plug is and how the oil filter works, you become a more informed driver. You can spot potential problems early. This knowledge helps you communicate better with mechanics when you do need professional help.
Control Over Oil Quality and Type
When you change your own oil, you choose exactly what goes into your engine. You can pick the right motor oil grade, whether conventional, synthetic blend, or full synthetic. You also know the filter is fresh and high quality. No guessing, no surprises.
What You Need to Get Started
Before you start, gather everything you need. Having all your supplies ready makes the process smooth and fast. You do not want to stop halfway through because you are missing something.
Essential Tools and Supplies
Here is a checklist of what you will need for your oil change:
- New engine oil: Check your owner’s manual for the correct amount and oil viscosity grade.
- New oil filter: Make sure it matches your vehicle model and engine type.
- Oil drain pan: This catches the old oil as it drains out.
- Socket wrench and socket: The right size for your drain plug.
- Oil filter wrench: Helps remove the old filter without stripping it.
- Jack and jack stands: Never rely on a jack alone. Jack stands keep you safe.
- Disposable gloves: Keeps your hands clean and protects your skin from old oil.
- Rags or paper towels: For wiping spills and cleaning the drain plug area.
- Funnel: Makes pouring new oil clean and mess-free.
- Torque wrench: Ensures the drain plug is tightened to the correct specification.
Choosing the Right Oil
Not all engine oil is the same. Your vehicle needs a specific oil type based on its engine design and climate. The oil viscosity rating (like 5W-30 or 10W-40) tells you how the oil flows at different temperatures. Always follow what the manufacturer recommends in your service manual.
Synthetic oils offer better protection and last longer than conventional oils. They cost more upfront but can extend your oil change interval. Conventional oil is more affordable and works well for many older vehicles. Pick what fits your budget and driving habits.
Step-by-Step Guide to Changing Your Oil
Now for the part you have been waiting for. Here is the full walkthrough for your DIY oil change. Follow these steps carefully and you will have clean, fresh oil in your engine in no time.
Step 1: Prepare Your Vehicle
Start by parking on a flat, level surface. Turn off the engine and let it cool for about 10 to 15 minutes. Warm oil drains better than cold oil, so do not let it cool completely. Just enough to avoid burns.
Engage the parking brake. This keeps the vehicle from rolling while you work underneath it. Place wheel chocks behind the rear tires for extra safety.
Step 2: Lift the Vehicle Safely
Use a hydraulic jack to lift the front of the vehicle. Position the jack under the designated lift point on the frame or subframe. Once the vehicle is up, place jack stands under sturdy support points.
Never work under a car supported only by a jack. Jacks can slip or fail. Jack stands provide the stability you need to work safely beneath the undercarriage.
Step 3: Locate the Drain Plug and Oil Filter
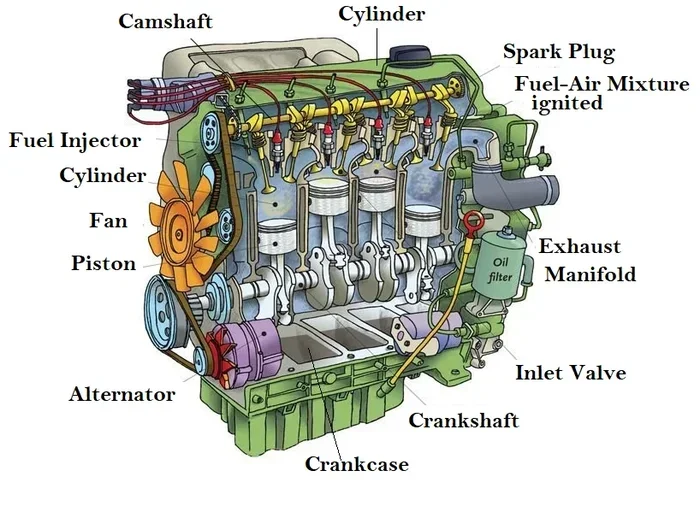
Crawl under the vehicle and find the oil drain plug. It is usually at the bottom of the oil pan. The oil filter is typically nearby, mounted on the engine block.
Place your drain pan directly under the drain plug. Make sure it is large enough to hold all the old oil. A typical passenger vehicle holds between four and six quarts.
Step 4: Drain the Old Oil
Using your socket wrench, slowly loosen the drain plug. Turn it counterclockwise. Once it is loose, finish removing it by hand. Let the old oil flow freely into the drain pan.
Wait about 10 to 15 minutes for the oil to fully drain. This ensures you remove as much contaminated oil as possible. Check the drain plug and surrounding area for any leaks or debris.
Step 5: Remove the Old Oil Filter
Position your drain pan under the oil filter. Use an oil filter wrench to loosen the old filter. Turn it counterclockwise. It may be tight, so use steady pressure.
Be careful when removing the filter. It will still contain oil. Lower it into the drain pan slowly. Use a rag to clean any remaining oil from the filter mounting surface on the engine.
Step 6: Prepare the New Oil Filter
Before installing the new filter, lightly coat the rubber gasket with a little fresh oil. This creates a better seal and makes future removal easier. Screw the new filter onto the engine by hand.
Tighten it snugly but do not overtighten. Most filters need about three-quarters of a turn after the gasket contacts the surface. Over-tightening can damage the threads or make removal difficult later.
Step 7: Replace the Drain Plug
Once the oil has finished draining, reinstall the drain plug. Thread it in by hand first to avoid cross-threading. Then use your torque wrench to tighten it to the manufacturer’s specification.
Do not guess the torque value. Check your service manual or look it up online. An improperly tightened plug can cause leaks or, worse, engine damage.
Step 8: Add New Oil
Remove the oil fill cap on top of the engine. Place a funnel in the opening. Pour in the new oil slowly, adding about three-quarters of the recommended amount first.
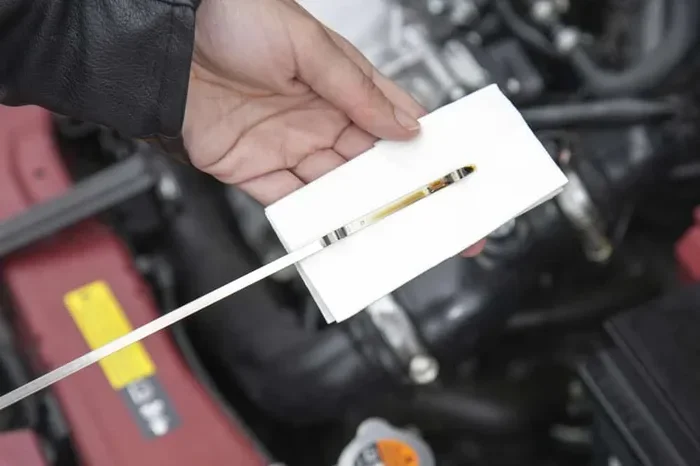
Wait a minute for the oil to settle. Then check the level with the dipstick. Add more oil gradually until the level reaches the full mark on the dipstick. Do not overfill. Too much oil can cause pressure problems in the engine.
Step 9: Clean Up and Check for Leaks
Wipe any spilled oil with rags. Remove the drain pan from under the vehicle. Lower the car off the jack stands carefully. Start the engine and let it run for about 30 seconds.
Check underneath the vehicle for any leaks around the drain plug and oil filter. Turn off the engine and wait a few minutes. Then recheck the oil level on the dipstick. Top off if needed.
Step 10: Record the Oil Change
Write down the date and mileage of your oil change. This helps you track your oil change interval and stay on schedule. Some people stick a receipt on the inside of their glove box for easy reference.
Common Mistakes to Avoid
Even simple tasks can go wrong if you are not careful. Here are the most common mistakes people make during a DIY oil change, and how to avoid them.
Skipping Jack Stands
This is the number one safety mistake. A jack alone is not stable enough for working underneath a vehicle. Always use jack stands. Your life is worth more than the cost of a set of stands.
Using the Wrong Oil or Filter
Not all oils and filters fit every vehicle. Using the wrong oil viscosity can reduce engine protection. An incorrect filter may not seal properly. Always double-check compatibility before purchasing supplies.
Overtightening the Drain Plug
Too much force can strip the threads on the oil pan. This leads to expensive repairs. Use a torque wrench and follow the recommended specification. Gentle and firm is the right approach.
Forgetting to Check the Oil Level
After adding new oil, always verify the level on the dipstick. Running the engine with too little oil can cause serious damage. Too much oil is also problematic. Find that sweet spot.
Ignoring the Old Oil Filter
Reusing an old filter or installing a new one without pre-filling it can reduce oil flow to the engine. Always install a fresh filter and lightly coat the gasket with new oil before mounting.
How to Dispose of Used Oil Properly
Proper disposal of used motor oil is not optional. It is an environmental responsibility. One gallon of used oil can contaminate up to one million gallons of fresh water. Here is how to handle it correctly.
Store Used Oil Safely
Pour the drained oil into a clean, sealed container. A used oil jug or a sturdy plastic container works well. Label it clearly as used motor oil. Keep the container in a cool, secure place away from children and pets.
Find a Recycling Center
Most auto parts stores accept used oil for free recycling. Service stations and municipal waste centers also take it. Call ahead to confirm their drop-off policies. Never pour used oil down a drain, into a storm sewer, or onto the ground.
Recycle the Old Filter Too
The old oil filter still contains residual oil. Many recycling centers accept used filters as well. Some auto parts stores will take them as part of their recycling program. Do not throw them in the regular trash.
When It Is Better to Leave It to a Professional
DIY oil changes are great, but they are not for everyone. There are situations where taking your car to a professional makes more sense. Knowing when to call in the experts is part of smart vehicle ownership.
If your vehicle requires special equipment to access the drain plug or filter, a shop may be the better choice. Some modern cars have engine designs that make DIY access very difficult. If you feel uncomfortable working underneath your vehicle, there is no shame in letting a trained technician handle it.
Also consider your time and tools. If you do not have a garage, proper jack stands, or the right wrenches, a professional service ensures the job is done safely and correctly. Many quick-lube shops offer oil change services for a reasonable price and can complete the job in 15 to 20 minutes.
Finally, if you are dealing with a leak or unusual engine noise alongside an oil change, let a professional diagnose the issue. A vehicle maintenance professional can spot problems you might miss. There is no rule that says you must do everything yourself.
Benefits of Regular Oil Changes
Whether you do it yourself or visit a shop, staying on top of your oil changes is critical. Fresh oil keeps your engine running smoothly and extends the life of your vehicle. Here is what regular oil changes do for you.
- Lubricates engine parts: Reduces friction and wear on internal components.
- Removes contaminants: Fresh oil carries away dirt, metal particles, and combustion residues.
- Improves fuel efficiency: Clean oil reduces engine drag, helping you get better gas mileage.
- Prevents overheating: Oil absorbs heat and helps regulate engine temperature.
- Extends engine life: Consistent maintenance can add years to your vehicle’s lifespan.
Skipping oil changes is one of the fastest ways to shorten your engine’s life. Old oil breaks down and loses its lubricating properties. Sludge builds up and restricts oil flow. This leads to increased wear, higher repair costs, and potential engine failure.
Check your service manual for the recommended oil change interval for your specific vehicle. Many modern cars can go 7,500 to 10,000 miles between changes when using full synthetic oil. Older vehicles or those used in severe conditions may need changes every 3,000 to 5,000 miles.
Quick Tips for a Smooth Oil Change Experience
Here are some extra tips that make the process easier and more enjoyable:
- Warm up the engine slightly before draining. This helps the oil flow faster and more completely.
- Take photos before you start. This gives you a reference if you forget where a part goes.
- Keep a phone nearby for looking up torque specs or watching tutorial videos.
- Wear old clothes. Even careful mechanics get oil on themselves sometimes.
- Work with a friend. Having someone spot you or hand you tools makes the job faster and safer.
- Keep a maintenance log. Tracking your oil changes helps you stay organized and monitor your vehicle’s health over time.
These small habits make a big difference. They turn a simple task into a smooth, stress-free experience. Before long, you will look forward to your oil change as part of your regular vehicle maintenance routine.
Conclusion
Can I change my oil myself? Absolutely yes. It is one of the most accessible and rewarding DIY projects for any car owner. With basic tools, the right supplies, and a little patience, you can keep your engine running strong and save real money in the process.
Remember to follow every step carefully. Use the correct oil and filter for your vehicle. Work safely with jack stands on a flat surface. Dispose of your used oil responsibly. And most importantly, enjoy the sense of accomplishment that comes with taking care of your own vehicle.
Every oil change you do yourself builds your skills and confidence. You become more self-reliant and more connected to the machine you rely on every day. So grab your wrench, gather your supplies, and give it a try. Your car and your wallet will thank you.
Frequently Asked Questions
How long does it take to change your own oil?
Most people complete a DIY oil change in 30 to 60 minutes. If you are doing it for the first time, give yourself extra time. Once you have done it a few times, you will get faster and more efficient.
What tools do I need for a DIY oil change?
You need a socket wrench, an oil filter wrench, a drain pan, jack stands, a torque wrench, and a funnel. You will also need fresh motor oil and a new oil filter that matches your vehicle’s specifications.
How often should I change my oil?
Check your owner’s manual for the recommended oil change interval. Most vehicles need an oil change every 5,000 to 7,500 miles. Vehicles using full synthetic oil may go longer between changes.
Can I reuse the old oil filter?
No. Always install a new oil filter with every oil change. A used filter contains contaminants and old oil that can reduce the effectiveness of your fresh motor oil.
Is it safe to change oil at home?
Yes, as long as you follow safety precautions. Always use jack stands on a flat surface. Wear gloves and eye protection. Work in a well-ventilated area. If you are unsure about any step, consult a professional.
Where can I dispose of used motor oil?
Most auto parts stores, service stations, and municipal waste centers accept used oil for recycling. Never pour it down a drain or onto the ground. Store it in a sealed container and transport it to a recycling location.