Can I Replace a Headlight by Myself A Complete Guide
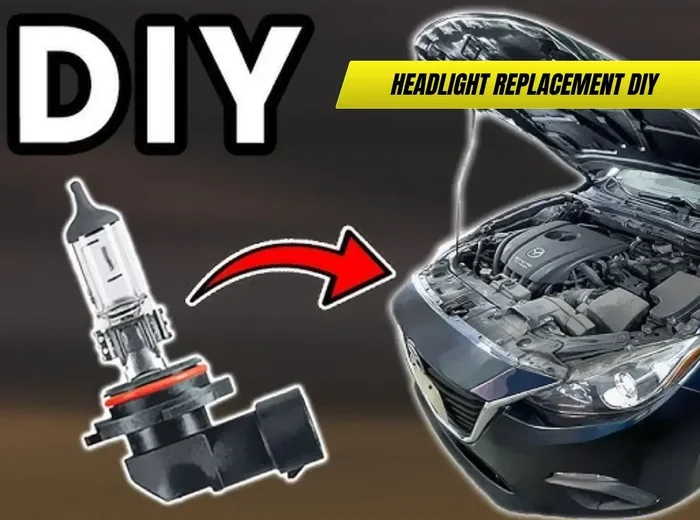
Can I Replace a Headlight by Myself? Yes, you absolutely can! This guide gives you everything you need to swap a dead headlight bulb in minutes. You’ll save money, learn your car better, and avoid the shop queue with our simple, step-by-step instructions.
Have you ever driven home and noticed one of your headlights is dim or dead? It’s a scary moment. You might wonder if you need to rush to the shop or if you can handle it yourself. The good news is that Can I Replace a Headlight by Myself is a question with a confident yes answer. Most modern vehicles make headlight replacement a simple bolt-and-swap job. You don’t need a mechanic’s certificate or a garage full of tools. Just a few basic items and a little patience.
Most drivers face this situation at least once. A burned-out headlight is not just an annoyance; it’s a safety hazard. Driving with one weak beam can get you a ticket or cause an accident. So, what’s the fastest fix? Often, it’s a DIY project you can finish while drinking a cup of coffee. In this guide, I’ll walk you through everything you need to know. You’ll learn which bulb to buy, the tools to grab, and the exact steps to follow. By the end, you’ll feel confident enough to do it yourself.
Replacing a headlight bulb is one of the easiest car maintenance tasks. It’s a great way to learn more about your vehicle. You’ll understand the wiring, the housing, and how the light works. Plus, you’ll save a trip to the repair shop. Let’s get started with the basics.
Key Takeaways
- You can do it yourself: Replacing a headlight is a straightforward task that most car owners can handle in under 30 minutes.
- Save money: DIY replacement avoids labor costs, and the bulb itself is often the only expense.
- Right bulb matters: Match the bulb type (halogen, LED, or HID) to your vehicle’s specifications.
- Safety first: Always disconnect the battery and let the bulb cool before touching it.
- Avoid touching the glass: Oils from your skin can shorten the bulb’s lifespan.
- Check alignment after installation: A misaligned headlight can blind other drivers and fail inspection.
📑 Table of Contents
Why Replacing a Headlight Yourself Makes Sense
Many people assume headlight replacement requires a professional. That’s not true for most cars today. The process is designed to be user-friendly. Manufacturers know drivers want to save money. So they put the bulb behind an easy-access panel. You often don’t even need to open the hood.
The Cost Savings Are Real
A shop might charge you $50 to $100 just for labor. The bulb itself costs $15 to $50 depending on the type. When you do it yourself, you pay only for the bulb. You also avoid the markup many repair shops add. Over time, these savings add up. You can use that money for other car care needs. Think about it: a single visit to the mechanic could cost more than the entire bulb. That’s a strong reason to try it yourself.
You’ll Learn Your Vehicle Better
Every car has a unique layout. By replacing the headlight, you’ll learn where the battery sits, how the wiring harness connects, and where the fuse box is. This knowledge helps you handle other small repairs later. You’ll feel more confident behind the wheel. It’s a win-win situation. You also get to know the specific quirks of your model. Some cars have a quick-release clip; others need a quarter turn. Once you know your car, future repairs become faster.
Can I Replace a Headlight by Myself? The Tools and Parts You Need
Before you start, gather everything you need. Having the right parts and tools makes the job smooth. Nothing is worse than halfway through a repair and realizing you’re missing a screw.
Identifying the Correct Bulb Type
Your owner’s manual lists the exact bulb type. It might say something like H11, 9005, or H4. You can also check the old bulb’s base. Match the number exactly. Using the wrong bulb can cause poor light output or even damage the wiring. Here’s a quick comparison of common bulb types.
| Bulb Type | Common Use | Pros | Cons |
|---|---|---|---|
| Halogen | Standard low-beam and high-beam | Cheap, easy to find, simple to replace | Shorter lifespan, yellowish light |
| LED | Modern retrofits, daytime running lights | Bright, long-lasting, cool running temp | Higher cost, may need decoder |
| HID (Xenon) | Projector headlamps, premium vehicles | Very bright, blue-white light | Expensive, requires ballast, warm-up time |
For most DIYers, a halogen bulb is the best starting point. It’s cheap and straightforward. If your car came with LED or HID, you can still replace the bulb yourself, but the steps may vary slightly. Always refer to your service manual. The headlight bulb number is usually printed on the glass or the base. Keep the old bulb in its packaging until you’ve verified the match.
Where to Buy Replacement Bulbs
You can buy bulbs at auto parts stores, online retailers, or even some gas stations. I recommend buying from a reputable auto parts store or the dealer. Online prices are often lower, but you want to ensure the part number is exact. Avoid the cheapest no-name bulbs. They might burn out in weeks. Stick with trusted brands like Philips, Sylvania, or OSRAM. These brands offer consistent quality and a warranty.
Essential Tools for the Job
You don’t need a full toolbox. Here’s what you’ll need:
- Replacement bulb (match the part number exactly)
- Gloves (latex or nitrile to keep oil off the new bulb)
- Screwdriver set (Phillips and flathead)
- Socket wrench set (for retaining clips or bolts)
- Flashlight or headlamp (to see inside the housing)
- Dielectric grease (optional, protects the socket from moisture)
- Small towel or mat (to catch dropped screws)
Quick Tip: Keep a small towel or mat under the car. If you drop a screw, it’s easy to find. Also, have your phone ready to take photos of the old setup. This helps a lot during reassembly. A second pair of hands can be helpful too, especially if the access hole is tight.
Understanding the Headlight Housing
The headlight assembly has a few key parts. The projector lens or reflector directs the light. The housing holds everything together and keeps out moisture. Behind the lens, you’ll find the bulb socket and the wiring harness. The socket connects to the vehicle’s electrical system through a plug. Some sockets have a metal clip; others use a twist-lock ring. Knowing these parts helps you work faster and with more confidence.
Can I Replace a Headlight by Myself? The Step-by-Step Process
Now for the fun part. Follow these steps in order. Each car is slightly different, but the basic process is the same. I’ll walk you through a typical halogen bulb replacement.
Safety First: Disconnect the Battery
Before you touch any wiring, disconnect the negative battery terminal. Use a wrench to loosen the nut. Pull the cable off and tuck it away. This prevents electrical shorts. It’s a simple habit that keeps you safe. Wait a few minutes for the system to discharge. This also resets any electronic modules that might cause error messages later.
Accessing the Back of the Headlight Housing
Open the hood and locate the headlight assembly. You’ll see a plastic cover or a rubber gasket behind it. Some cars have a round access hole; others require removing a cover. Use your flashlight to look for the bulb socket. It’s usually held by a metal spring clip or a twist-lock ring. If there’s a plastic cover, remove the screws or clips first. Take your time and keep track of every screw.
Removing the Old Bulb
1. Unplug the wiring harness by pressing the tab and pulling gently.
2. Release the spring clip or twist the lock ring counterclockwise.
3. Carefully pull the old bulb straight out. Do not twist it.
4. Immediately compare the old bulb to the new one. Make sure they match.
Quick Tip: If the bulb is stuck, don’t force it. Check for a retaining clip that might be hiding. A gentle wiggle usually frees it. If you see corrosion on the socket, clean it with a dry cloth before proceeding.
Installing the New Bulb and Testing
1. Put on your gloves. Hold the new bulb by the plastic base only.
2. Insert the bulb into the socket. Push it in gently until it seats.
3. Reattach the spring clip or twist the lock ring clockwise to secure it.
4. Plug the wiring harness back in until you hear a click.
5. Reconnect the battery negative terminal.
6. Turn on the headlights and check both low beam and high beam.
7. If the light works, close the hood and you’re done!
Expert Insight: If the new bulb doesn’t light up, don’t panic. Check the fuse first. The fuse box diagram is in your owner’s manual. A blown fuse is the most common reason for a dead headlight after replacement. If the fuse is good, the issue might be a faulty relay or a bad ground. These are rare but worth checking.
Common Mistakes to Avoid
Even simple jobs can go wrong. Here are the most common mistakes people make when replacing a headlight. Avoid these, and you’ll have a perfect result every time.
Touching the Glass Part of the Bulb
The oils from your fingers can create hot spots on the bulb’s glass. These spots cause the bulb to overheat and fail early. Always handle the bulb by the plastic base or use gloves. If you accidentally touch the glass, wipe it clean with rubbing alcohol and a lint-free cloth. A small amount of oil won’t always ruin the bulb, but it’s best to avoid it entirely.
Skipping the Socket Inspection
Before you put the new bulb in, look at the socket. Is it corroded? Are the pins bent? A dirty socket can cause poor contact and flickering. Use a dry cloth to clean the contacts. If you see green corrosion, a quick spray of electrical contact cleaner works wonders. A corroded socket can cause the dashboard warning light to come on, even with a new bulb.
Forcing the Connector
The wiring harness connector should plug in smoothly. If it resists, don’t use excessive force. Check if the locking tab is in the way. Forcing it can break the plastic clips. Take your time, align it properly, and push until you hear the click. If the connector is stiff, a small amount of dielectric grease on the pins can help.
Forgetting to Check the Aim
A new bulb might not sit exactly in the same position as the old one. This can change the light beam pattern. After installation, park your car facing a wall and check the light pattern. If it’s too high, it can blind oncoming drivers. If it’s too low, you won’t see the road well. Adjust the headlight screws until the beam is level. This is a quick check that prevents accidents and tickets.
When to Call a Professional Mechanic
DIY is great, but some situations need a pro. Knowing when to stop and call for help saves time and money. Here are clear signs you should seek professional assistance.
Complex Electrical Problems
If you notice a dashboard warning light after replacing the bulb, something deeper might be wrong. A warning light for the headlight could indicate a wiring issue, a faulty relay, or a problem with the fuse box. These require diagnostic tools and experience. Don’t guess with electrical systems. A mechanic can read error codes and trace the problem safely.
Retrofitting Modern LED or Projector Headlights
Some newer vehicles have complex headlight assemblies with projector lens technology or adaptive LED systems. Replacing the bulb in these units can be tricky. The wiring harness might have multiple connectors. The housing could be sealed and not user-serviceable. In such cases, a dealer or specialty shop has the right tools and software. It’s worth the extra cost to avoid damaging the assembly.
Moisture Inside the Headlight Housing
If you open the back of the headlight and find water or condensation inside, the seal is broken. This is not a simple bulb swap. Moisture can cause short circuits and corrode the socket. A professional can reseal or replace the entire headlight assembly. Trying to fix this yourself might lead to bigger problems. A pro has the right sealant and tools to do the job correctly.
Keeping Your New Headlight Bright for Years
Replacing the bulb is just the start. A few maintenance habits will keep your headlights shining strong. Here’s how to protect your investment.
Cleaning the Polycarbonate Lens
Over time, the plastic lens can turn yellow or foggy. This blocks light and makes your headlight dim. You can restore it with a headlight restoration kit. These kits include sandpaper and a sealant. Follow the steps carefully: wet sand, polish, and apply the UV sealant. A clean lens can improve light output by up to 50 percent. It’s a cheap way to make your whole car look newer.
Checking Aim and Alignment
Every few months, check that your headlights are aimed correctly. Park your car about 25 feet from a wall. Turn on the low beams. The light should hit the wall at a specific height. If the beam is too high, it can blind other drivers. If it’s too low, you won’t see the road well. Adjust the screws on top of the headlight housing until the beam is level. This is a quick check that takes only a few minutes and keeps you safe.
Using Dielectric Grease
Applying a thin layer of dielectric grease to the bulb socket can prevent moisture and corrosion. It also makes future bulb changes easier. The grease is silicone-based and safe for electrical connections. Just a small dab on the base of the bulb before insertion works great. It seals out water and prevents the socket from sticking.
Replacing the Rubber Seal
The rubber gasket around the back of the headlight can dry out and crack over time. When it fails, moisture enters the housing. Inspect the seal during every bulb change. If it looks brittle or damaged, replace it. A new seal is cheap and easy to install. It prevents foggy lenses and electrical issues down the road.
Conclusion
Can I Replace a Headlight by Myself? Yes, you can, and you should! It’s a rewarding task that saves money and builds your car knowledge. With the right bulb, a few basic tools, and this guide, you can finish the job in under 30 minutes. Remember to handle the bulb carefully, check the socket, and test the lights before closing the hood.
Don’t let a dead headlight leave you in the dark. Grab your gloves, open the hood, and give it a try. You’ll be surprised how easy it is. Once you’ve done it once, you’ll feel confident to handle it again. Safe driving starts with clear vision. And now, you have the power to keep those lights shining bright.
Frequently Asked Questions
Is it hard to replace a headlight bulb?
No, it’s one of the easiest car maintenance tasks. Most vehicles have a simple twist-and-pull access. You’ll need a screwdriver or a socket wrench, but no special skills. If you can change a light switch at home, you can replace a headlight bulb.
How long does it take to replace a headlight?
For most cars, the job takes 15 to 30 minutes. The first time might take a little longer while you get familiar with the layout. Once you know where the socket and clips are, it becomes quick and easy.
Can I drive with a burned-out headlight?
It’s not safe and it’s illegal in most places. A burned-out headlight reduces your visibility and makes your car harder for others to see. Replace it as soon as possible. Driving with one working headlight can also result in a traffic ticket.
Do I need to reset anything after replacing a headlight?
Usually, no. Most cars don’t require a reset. However, some modern vehicles with automatic light systems might need a brief drive for the sensors to recalibrate. Check your owner’s manual if you notice the dashboard light stays on.
What if the new headlight bulb doesn’t work?
First, check the fuse. A blown fuse is the most common cause. Next, ensure the bulb is seated properly in the socket. If the bulb is good and the fuse is fine, the problem might be in the wiring harness or the relay. A multimeter can help you test for power at the socket.
Should I replace both headlights at the same time?
Yes, it’s a good practice. Even if only one bulb is dead, the other is likely near the end of its life. Matching brightness and color temperature between the two headlights improves visibility and safety. It also saves you a future trip to the auto parts store.