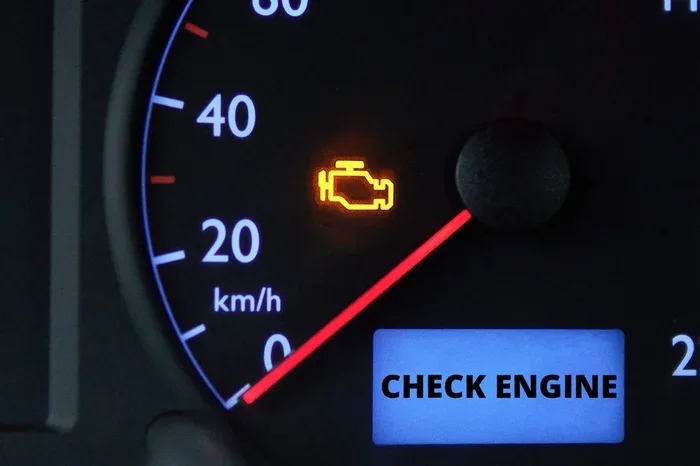
How to Reset the Check Engine Light After an Oil Change
Resetting the check engine light after an oil change is simple and can be done at home in minutes. Whether you use an OBD-II scanner, disconnect the battery, or use your vehicle’s built-in menu, this guide walks you through every method. Learn the safest techniques, avoid common mistakes, and keep your car running smoothly with our expert tips.
Key Takeaways
- Multiple reset methods exist: You can use an OBD-II scanner, disconnect the battery, or access your vehicle’s onboard menu to reset the light.
- Resetting is usually quick: Most methods take under 15 minutes and require no special tools.
- Address the root cause first: Always make sure the oil change is complete and the cap is tight before resetting.
- Common mistakes can cause problems: Avoid disconnecting the battery on newer vehicles and never ignore persistent lights.
- Driving habits matter: Normal driving cycles often reset the oil service light automatically after a few days.
- Know when to see a mechanic: If the light returns or flashes, professional diagnostics may be needed.
📑 Table of Contents
- How to Reset the Check Engine Light After an Oil Change
- Why Does the Check Engine Light Come On After an Oil Change?
- Method 1: Use an OBD-II Scanner (Best and Most Reliable)
- Method 2: Disconnect the Car Battery
- Method 3: Use the Vehicle’s Built-In Reset Menu
- What to Do If the Check Engine Light Keeps Coming Back
- Preventing the Check Engine Light After Future Oil Changes
- How Long Does It Take for the Light to Stay Off?
- When Should You NOT Reset the Check Engine Light?
- Final Thoughts
How to Reset the Check Engine Light After an Oil Change
You just finished an oil change. You hop in the car, turn the key, and — yikes — the check engine light is on. It is one of the most common surprises car owners face. The good news? It is almost always an easy fix.
Resetting the check engine light after an oil change is something you can do yourself. No mechanic required. No expensive visits needed. In most cases, the fix takes just a few minutes and costs nothing.
This guide covers every method you can use. We will walk you through the steps, explain why the light comes on in the first place, and share tips to prevent it from happening again. Whether you drive a Toyota, Honda, Ford, or any other brand, the process is similar. Let us get into it.
The check engine light is part of your car’s onboard diagnostics system. When something triggers a fault, the system stores a diagnostic trouble code. After an oil change, the most common trigger is a loose gas cap, a minor sensor glitch, or the oil service light needing a reset. Once you address the cause, resetting the light is straightforward.
Why Does the Check Engine Light Come On After an Oil Change?
Understanding why the light appears helps you reset it with confidence. Here are the most common reasons:
- Loose or missing gas cap: This is the number one cause. A loose cap disrupts the fuel system pressure and triggers the dashboard warning light.
- Oil cap not tightened properly: During the oil change, if the oil fill cap is not seated correctly, the engine detects a pressure issue.
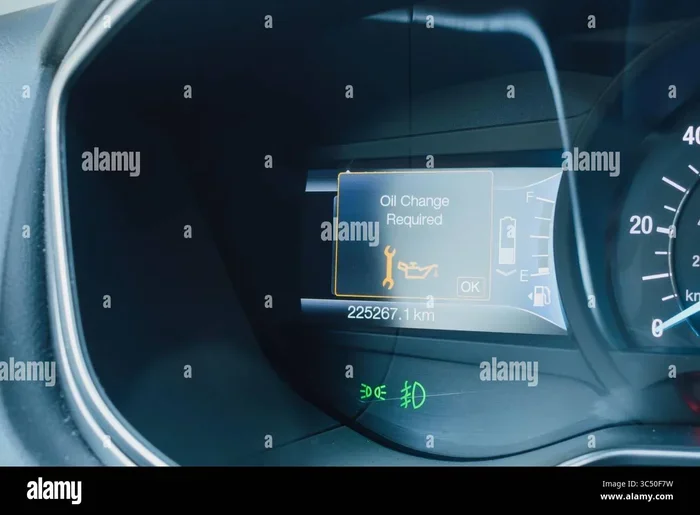
- Oil life system needs resetting: Many modern vehicles have an oil life system that tracks oil condition. After a change, this system must be manually reset.
- Minor sensor glitch: Disconnecting a sensor during the oil change can cause a temporary fault code.
- Oil pressure sensor issue: If the oil was drained too quickly or the sensor was bumped, the oil pressure sensor may report an error.
Most of these issues are harmless and easy to fix. The key is to check the basics first before jumping into a reset.
Method 1: Use an OBD-II Scanner (Best and Most Reliable)
An OBD-II scanner is the most effective tool for resetting the check engine light. It plugs directly into your car’s diagnostic port and reads or clears fault codes. You can buy one for under $30 at any auto parts store.
Step-by-Step Guide
- Locate the OBD-II port: It is usually under the dashboard on the driver’s side. Look near the steering column.
- Plug in the scanner: Connect the device firmly into the port.
- Turn the ignition to ON: Do not start the engine. Just turn the key to the accessory position.
- Follow the scanner prompts: Most scanners will automatically detect your vehicle.
- Read the codes: Write down any diagnostic trouble codes displayed. This helps you understand what triggered the light.
- Clear the codes: Select the “Erase” or “Clear” option on the scanner.
- Turn off the ignition: Wait 30 seconds, then turn the key back on. The check engine light should be off.
Which OBD-II Scanner Should You Buy?
| Scanner | Price Range | Best For |
|---|---|---|
| Basic Code Reader | $20 – $40 | Simple code clearing and reading |
| Bluetooth OBD Adapter | $25 – $50 | Smartphone connectivity and app-based diagnostics |
| Advanced Scan Tool | $80 – $200 | Live data, ABS codes, and transmission diagnostics |
Quick Tip: If you do not want to buy a scanner, many auto parts stores like AutoZone or O’Reilly will read and clear codes for free. Just drive in and ask.
Method 2: Disconnect the Car Battery
Disconnecting the battery resets the ECU (Engine Control Unit) and clears stored fault codes. This method works on most older vehicles and some newer ones.
How to Do It Safely
- Turn off the engine: Make sure the car is completely off and cooled down.
- Open the hood: Locate the battery. The negative terminal is usually marked with a minus (-) sign.
- Disconnect the negative cable: Use a wrench to loosen the clamp and pull the cable off the terminal.
- Wait 10-15 minutes: This allows the ECU to fully reset and clear all stored codes.
- Reconnect the cable: Place the negative cable back on the terminal and tighten the clamp.
- Start the engine: The check engine light should be off. If it stays on, drive the car for a few miles.
Expert Insight: On newer vehicles (2010 and later), disconnecting the battery can reset other settings like radio presets, power window calibration, and clock. Some cars may also need a battery register or initialization procedure after reconnecting. Check your owner’s manual first.
Common Mistake: Never disconnect the positive terminal first. Always remove the negative cable first to avoid short circuits. And never disconnect the battery while the engine is running.
Method 3: Use the Vehicle’s Built-In Reset Menu
Many modern cars have a built-in option to reset the oil service light and sometimes the check engine light through the dashboard menu. This method varies by brand and model.
How to Reset on Popular Brands
Toyota and Lexus: Turn the ignition to ON (do not start). Press and hold the odometer reset button. Turn the key to OFF, then back to ON. Hold the button until the maintenance light flashes and then turns off.
Honda and Acura: With the engine off, press and hold the odometer button. Turn the ignition to ON (do not start). Keep holding the button until the light resets. Release the button.
Ford and Lincoln: Use the steering wheel controls to navigate to Settings > Vehicle Information > Maintenance > Oil Life System. Select “Reset” and confirm.
Chevrolet and GMC: Turn the ignition to ON. Press the trip button repeatedly until you see “Oil Life” or “Remaining Oil Life.” Hold the button for about 10 seconds until it resets to 100%.
Quick Tip: If you cannot find the reset procedure for your specific vehicle, search online for “[your car brand] oil service light reset” and you will find detailed instructions in seconds.
What to Do If the Check Engine Light Keeps Coming Back
Sometimes the check engine light returns a few days after you reset it. This happens more often than you might think. Here is what to do:
Step 1: Check for a Real Problem
The light coming back means the ECU detected the same issue again. Do not just reset it and ignore it. Pull over safely and check the following:
- Is the oil level low? Check with the dipstick.
- Is the oil cap tight?
- Is the gas cap sealed properly?
- Do you see any oil leaks under the car?
- Is the engine running rough or making unusual noises?
Step 2: Get a Diagnostic Reading
If the basics check out, use your OBD-II scanner to read the diagnostic trouble codes again. Common codes after an oil change include:
- P0010: Camshaft position actuator circuit — often related to low oil pressure.
- P0520: Oil pressure sensor/switch circuit — indicates a sensor issue.
- P0420: Catalyst system efficiency — sometimes triggered by a loose gas cap after service.
- P0455: Evaporative emission system leak — usually a loose or missing gas cap.
Step 3: Visit a Mechanic if Needed
If the codes point to a real issue or the light keeps returning, take your car to a trusted mechanic. A persistent check engine light flashing after oil change could indicate a serious problem that needs immediate attention.
Common Mistake: Many people use an OBD-II scanner, clear the code, and drive away without reading what the code actually means. This is a missed opportunity. The code tells you exactly what went wrong. Reading it helps you prevent the same issue in the future.
Preventing the Check Engine Light After Future Oil Changes
Prevention is always better than cure. Here are simple habits that keep the dashboard warning light away after your next oil change:
- Tighten the oil cap and gas cap properly: Listen for the click. A loose cap is the #1 trigger.
- Reset the oil life system immediately: Do this right after the oil change, not days later.
- Use the correct oil type: Check your owner’s manual for the recommended oil viscosity and specification.
- Do not overfill the oil: Too much oil can cause pressure issues and trigger sensors.
- Check for spills: Wipe up any oil drips around the engine bay before starting the car.
- Keep your OBD-II scanner handy: Having one at home makes diagnostics easy and saves money.
Expert Insight: Many modern vehicles have an oil life system that automatically tracks driving conditions and calculates when the next oil change is due. After resetting, the system starts fresh. This is different from a simple time or mileage-based reminder. Understanding this difference helps you manage your vehicle maintenance schedule more effectively.
The Role of the ECU in Check Engine Light Behavior
Your car’s ECU is essentially its brain. It monitors dozens of sensors in real time. When a sensor reading falls outside the expected range, the ECU stores a trouble code and illuminates the check engine light. After an oil change, a sensor might briefly read incorrectly due to a loose connection or a minor pressure change. Once the issue resolves, the ECU may clear the code on its own after a few driving cycles.
However, sometimes the ECU holds onto the code and keeps the light on. In these cases, a manual reset using one of the methods above is necessary. The ECU reset process clears the stored codes and gives the system a clean slate.
How Long Does It Take for the Light to Stay Off?
After resetting the check engine light, the system monitors your driving for a set period. This is called a “drive cycle.” During this cycle, the ECU checks all sensors to confirm everything is working correctly.
Typically, you need to drive the car for 50-100 miles over several days. If no new issues are detected, the light stays off. If a problem persists, the light will return.
Quick Tip: After resetting, take a moderate drive on the highway. Highway driving puts the engine under consistent load and helps the ECU complete its monitoring cycle faster than short city trips.
When Should You NOT Reset the Check Engine Light?
There are times when you should leave the light alone and seek professional help:
- The light is flashing: A flashing check engine light usually indicates a severe engine misfire. Do not drive the car. Tow it to a shop.
- The oil pressure warning light is on: This is different from the check engine light. A low oil pressure light means stop driving immediately.
- Multiple warning lights are on: If several lights illuminate at once, there may be a serious electrical or mechanical issue.
- You notice fluid leaks or smoke: These are clear signs of a problem that a reset will not fix.
Knowing the difference between a simple reset situation and a serious issue keeps you safe and saves money on potential damage.
Final Thoughts
Resetting the check engine light after an oil change is one of the easiest car maintenance tasks you can do. Whether you use an OBD-II scanner, disconnect the battery, or navigate your vehicle’s built-in menu, the process is quick and simple.
The most important step is to check the basics first. Make sure the oil cap, gas cap, and dipstick are all properly seated. Then clear the codes or reset the system. If the light stays off after a normal drive cycle, you are all set.
Keep an OBD-II scanner in your glove box. It is one of the best investments any car owner can make. It gives you peace of mind, saves diagnostic fees, and helps you stay on top of your car maintenance routine.
Remember, the check engine light is your car’s way of communicating with you. Listen to it, respond quickly, and do not ignore it. A few minutes of attention can prevent hours of trouble down the road.
Now you have everything you need to handle this situation confidently. The next time that little yellow light pops up after an oil change, you will know exactly what to do.
Frequently Asked Questions
Can I drive my car with the check engine light on after an oil change?
In most cases, yes. If the light is solid and not flashing, it is usually safe to drive a short distance. However, you should check the oil level and gas cap first. If the light is flashing, pull over and do not continue driving. A flashing light indicates a serious issue that needs immediate attention.
How much does it cost to reset the check engine light?
It can cost nothing if you use a basic method like disconnecting the battery or using the vehicle’s built-in menu. An OBD-II scanner costs between $20 and $50 for a basic model. Many auto parts stores will reset the light for free if you purchase the parts from them.
Will disconnecting the battery erase other car settings?
Yes, it can. Disconnecting the battery may reset your radio presets, power window calibration, clock, and in some vehicles, the ECU adaptive learning. Newer cars may require a professional initialization after a battery disconnect. Always check your owner’s manual before disconnecting.
How long should I drive after resetting the check engine light?
Drive the car for 50 to 100 miles over several days. This allows the ECU to complete its drive cycle and monitor all sensors. If no new issues are detected, the light should stay off. If it returns, there is an underlying problem that needs attention.
What is the difference between the check engine light and the oil service light?
The check engine light is a general warning that something in the engine or emissions system has triggered a fault code. The oil service light specifically indicates that the oil change interval has been reached or the oil life system needs resetting. Both can appear after an oil change but have different causes and reset methods.
Can a dirty oil filter cause the check engine light to come on?
Yes, a clogged or improperly installed oil filter can restrict oil flow and cause low oil pressure. This can trigger the oil pressure sensor and illuminate the check engine light. Always make sure the oil filter is the correct size, properly threaded, and tightened to the manufacturer’s specification during every oil change.