How Do You Reset The Check Engine Light On A 2012 Toyota Corolla
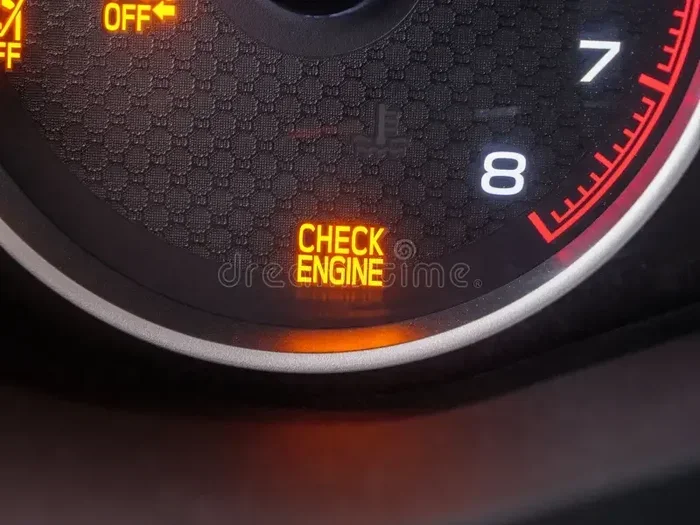
If your check engine light is on in a 2012 Toyota Corolla, you can reset it yourself. This guide shows you how to reset the check engine light on a 2012 Toyota Corolla using three simple methods: an OBD-II scanner, a battery disconnect, or the gas cap trick. You’ll learn which method works best, when to seek professional help, and how to prevent the light from coming back.
If your check engine light is glowing on the dashboard of your 2012 Toyota Corolla, it can feel stressful. You wonder what went wrong and whether it’s safe to drive. The good news is that resetting the light is often simple and something you can do at home. This guide walks you through every method step by step.
We’ll cover three main ways to reset the check engine light on a 2012 Toyota Corolla. You’ll learn how to use an OBD-II scanner, how to disconnect the battery, and the easy gas cap trick. I’ll also explain when the light means a serious problem and when it’s safe to just clear it. By the end, you’ll feel confident handling this common car issue.
Let’s start by understanding why the light comes on in the first place. Knowing the cause helps you choose the right reset method and avoid future trips to the shop.
Key Takeaways
- Use an OBD-II scanner for a clean reset that stores no new codes.
- Disconnect the battery as a backup method, but know it resets all settings.
- Check your gas cap first—a loose cap is the most common cause.
- Never ignore a flashing light—it signals a serious misfire that can damage the catalytic converter.
- Complete a drive cycle after resetting so the readiness monitors run properly.
- See a mechanic if the light returns immediately or you notice poor engine performance.
- Regular maintenance prevents most check engine light issues on the 2012 Corolla.
📑 Table of Contents
- Why the Check Engine Light Comes On in a 2012 Toyota Corolla
- How Do You Reset the Check Engine Light on a 2012 Toyota Corolla: The OBD-II Scanner Method
- Reset Without a Scanner: Disconnecting the Battery
- The Gas Cap Trick: A Simple Fix
- Using the Ignition Cycle Method
- Comparison of Reset Methods
- When to See a Mechanic Instead of Resetting
- Preventing the Check Engine Light from Returning
Why the Check Engine Light Comes On in a 2012 Toyota Corolla
The check engine light is part of your car’s onboard diagnostics system. The engine control module (ECM) monitors dozens of sensors. When a sensor reads outside its normal range, the ECM stores a fault code and turns on the light. The light can stay on for many reasons, from a loose gas cap to a failing catalytic converter.
Common Reasons for the Light
Here are the most frequent causes for a check engine light on a 2012 Toyota Corolla:
- Loose or damaged gas cap – The fuel system loses pressure and the light triggers.
- Faulty oxygen sensor – This sensor measures exhaust gases and helps the engine run efficiently.
- Mass airflow sensor issue – The sensor tells the computer how much air enters the engine.
- Catalytic converter problems – A failing converter reduces emissions and triggers the light.
- EGR valve malfunction – The exhaust gas recirculation valve can get clogged or stuck.
- Spark plug or ignition coil wear – Worn parts cause misfires that the system detects.
Steady vs. Flashing Light
A steady check engine light usually means a non-emergency issue. You can drive carefully to a repair shop. A flashing light, however, signals a serious misfire. Unburned fuel is entering the exhaust system, which can overheat and damage the catalytic converter. If you see a flashing light, pull over safely and get the car towed to a mechanic.
How Do You Reset the Check Engine Light on a 2012 Toyota Corolla: The OBD-II Scanner Method
The most reliable way to reset the check engine light on a 2012 Toyota Corolla is with an OBD-II scanner. This tool plugs directly into your car’s diagnostic port. It reads the fault codes stored in the ECM, lets you clear them, and turns off the light. You can buy a basic scanner for under $30 or use one at an auto parts store for free.
What You’ll Need
- An OBD-II scanner (Bluetooth or Wi-Fi models work well with smartphones).
- The vehicle’s OBD-II port location (under the dashboard on the driver’s side).
- A fully charged car battery or a backup power source.
Step-by-Step Process
- Turn off the ignition and all electrical accessories.
- Locate the OBD-II port under the dashboard on the driver’s side. It’s near the steering column.
- Plug the scanner connector firmly into the port.
- Turn the ignition to the “On” position (do not start the engine).
- Wait for the scanner to connect and display the fault codes.
- Write down or photograph the codes so you can look them up later.
- Select “Clear Codes” or “Reset” on the scanner menu.
- The scanner will erase the codes and turn off the check engine light.
- Turn the ignition off, wait 30 seconds, then start the engine to verify the light stays off.
After resetting, the ECM needs a few driving cycles to relearn normal sensor values. The light may not return if the issue was temporary, like a loose gas cap. If the problem still exists, the light will come back on within a few days.
Quick Tips for Scanner Use
- Always check the scanner’s compatibility with Toyota models before buying.
- Free scanners at auto parts stores like AutoZone or O’Reilly will read and clear codes for you.
- Never clear codes without writing them down first—you lose valuable diagnostic information.
Reset Without a Scanner: Disconnecting the Battery
If you don’t have an OBD-II scanner, you can reset the light by disconnecting the battery. This method erases all stored codes and resets the ECM to factory defaults. It works well when the light was triggered by a temporary glitch. However, it also resets your radio presets, clock, and power window settings.
Safety Precautions
- Make sure the car is parked on a level surface with the ignition off.
- Wear safety glasses and gloves to protect against battery acid or sparks.
- Never disconnect the battery while the engine is running.
- Know your radio security code in case it requires re-entry after the reset.
Step-by-Step Guide
- Open the hood and locate the battery on the 2012 Toyota Corolla. It sits on the right side of the engine bay.
- Identify the negative terminal, marked with a “-” sign. The cable is usually black.
- Use a 10mm wrench to loosen the nut on the negative terminal clamp.
- Carefully lift the cable off the terminal and tuck it away so it cannot touch the battery.
- Wait at least 15 minutes. This allows the ECM to fully discharge and forget all stored codes.
- Reconnect the negative cable and tighten the nut securely.
- Start the engine and let it idle for a few minutes.
- The check engine light should be off now. If it stays on, the underlying issue is still present.
Common Mistakes to Avoid
- Disconnecting the positive terminal instead of the negative can cause sparks and damage electronics.
- Forgetting to wait long enough means the ECM may not fully reset.
- Reconnecting the battery while tools are still on the terminal can create a short circuit.
The Gas Cap Trick: A Simple Fix
One of the easiest ways to turn off the check engine light is to tighten the gas cap. The fuel system on the 2012 Toyota Corolla is sealed. A loose or damaged cap lets fuel vapors escape, which the oxygen sensor detects as a leak. The ECM then stores a code and illuminates the light.
When This Works
This trick works when the light came on shortly after refueling. It’s also helpful if the cap is old, cracked, or the seal is worn. After tightening the cap, drive for a few days. The ECM will run a leak-detection test. If no leak is found, the light will turn off automatically. If it stays on, you’ll need to use a scanner or try another method.
Expert Insight: Many drivers don’t realize that a gas cap doesn’t need to be torqued extremely tight. A firm click is usually enough. Over-tightening can damage the cap’s seal and cause the same leak problem.
Using the Ignition Cycle Method
The ignition cycle method is a manual reset that doesn’t require any tools. It works by cycling the ignition key in a specific pattern to clear minor fault codes. This method is not as thorough as an OBD-II scanner, but it can reset the light when the issue was a temporary sensor blip.
Steps for the 2012 Corolla
- Insert the key into the ignition and turn it to the “Off” position.
- Wait 5 seconds, then turn the key to the “On” position (do not start the engine).
- Wait another 5 seconds, then turn the key back to “Off”.
- Repeat this cycle three more times for a total of four On/Off cycles.
- On the fourth cycle, leave the key in the “On” position for 10 seconds.
- Turn the key to “Off” and wait 30 seconds.
- Start the engine and check if the check engine light is off.
This method may not clear all codes, especially those related to emissions components like the catalytic converter. If the light returns, you’ll need a scanner or battery disconnect.
Comparison of Reset Methods
Each method has its pros and cons. Use the table below to decide which approach fits your situation.
| Method | Tools Needed | Effectiveness | Resets All Settings? |
|---|---|---|---|
| OBD-II Scanner | Scanner device | High – clears all codes cleanly | No – only clears diagnostic codes |
| Battery Disconnect | 10mm wrench | Medium – clears codes but may need relearn | Yes – resets radio, clock, and power windows |
| Gas Cap Tightening | None | Low to Medium – only works for cap-related codes | No |
| Ignition Cycle | None | Low – clears minor temporary codes only | No |
The OBD-II scanner method is the best choice for most people because it’s precise and doesn’t erase your car’s settings. The battery disconnect is a solid backup when you don’t have a scanner. The gas cap and ignition cycle methods are quick first steps when the light just appeared.
When to See a Mechanic Instead of Resetting
Resetting the check engine light is not always the right move. If the underlying problem isn’t fixed, the light will return. Sometimes it’s a sign of a serious issue that needs immediate attention. Knowing when to stop DIY and visit a professional can save you from expensive repairs.
Serious Underlying Issues
Take the car to a mechanic if the check engine light comes with any of these symptoms:
- The engine is misfiring or running rough.
- You notice a drop in fuel economy.
- The car struggles to start or stalls.
- Unusual noises like knocking or hissing come from the engine.
- The temperature gauge shows the engine is overheating.
Ignoring these signs can lead to major engine damage. A flashing check engine light combined with any of these symptoms means you should stop driving and call for a tow.
Drive Cycle and Readiness Monitors
After resetting the light, the ECM runs a series of tests called a drive cycle. These tests check the readiness monitors for emissions components. If you reset the light right before a state inspection, the readiness monitors may show as “not ready.” This fails the inspection. To complete a drive cycle, drive at steady speeds for 20-30 minutes, then let the car idle for a few minutes. The monitors will run and set to “ready.”
Preventing the Check Engine Light from Returning
Once you’ve successfully reset the check engine light on a 2012 Toyota Corolla, you want to keep it off. Regular maintenance is the best way to prevent future light triggers. A few simple habits can keep your Corolla running smoothly for years.
Regular Maintenance Tips
- Check the gas cap after every fill-up – Make sure it clicks tight and isn’t cracked.
- Replace spark plugs on schedule – The 2012 Corolla uses iridium plugs that last about 100,000 miles, but inspect them at 60,000 miles.
- Use the correct oil – Toyota recommends 0W-20 synthetic oil for the 1.8L engine. Wrong viscosity can trigger sensor codes.
- Keep the air filter clean – A clogged filter affects the mass airflow sensor and can cause lean condition codes.
- Address small issues early – A minor sensor fault today can become a costly repair tomorrow.
Key Takeaways: Resetting the check engine light is straightforward when you know the right method. The OBD-II scanner gives the cleanest reset. The battery disconnect works without tools. The gas cap trick solves the simplest problem. Always pay attention to what the light is trying to tell you. A 2012 Toyota Corolla is a reliable car, and with proper care, it will serve you well for many miles.
Now that you know how to reset the check engine light on a 2012 Toyota Corolla, you can handle this situation with confidence. Try the easiest fix first, use a scanner if needed, and visit a mechanic when the symptoms point to something serious. Your car will reward you with a long, healthy life on the road.
Frequently Asked Questions
Can I drive my 2012 Toyota Corolla with the check engine light on?
It depends on the severity. If the light is steady and the car runs normally, you can drive carefully to a repair shop. If the light is flashing or you notice rough running, pull over and get the car towed to avoid catalytic converter damage.
How much does it cost to reset the check engine light?
Using an OBD-II scanner at home costs nothing if you already own one. Many auto parts stores offer free scanning and resetting. If you visit a mechanic, expect to pay between $50 and $150 for the diagnostic and reset service.
Will disconnecting the battery erase my radio code?
Yes, disconnecting the battery on a 2012 Toyota Corolla will reset the radio and may require you to enter a security code. Check your owner’s manual for the code or contact a Toyota dealer if you don’t have it.
Why did the check engine light come back after I reset it?
The light returns because the underlying problem wasn’t fixed. The ECM detected the same fault again during a drive cycle. You need to address the root cause, whether it’s a loose gas cap, a failing sensor, or an emissions issue.
How long does it take for the check engine light to turn off after fixing the problem?
After the repair, the light usually turns off within a few driving cycles. A complete drive cycle may take 50 to 100 miles of mixed driving. If the light stays on after that, use a scanner to confirm the code is cleared.
Is it safe to reset the check engine light yourself?
Yes, it’s safe as long as you use the correct method. An OBD-II scanner is the safest way. Just make sure you don’t ignore the light repeatedly—persistent warnings can lead to expensive repairs if the real problem goes undetected.