Where Do I Start When Drawing a Car Beginner Guide
Not sure where do I start when drawing a car? This beginner guide breaks it down into simple, easy-to-follow steps. You will learn the basics of car proportions, sketching techniques, and shading tips that make your drawings look professional. Whether you are a complete beginner or someone who wants to improve, this guide covers everything you need to start drawing cars with confidence.
Have you ever looked at a cool car and thought, “I wish I could draw that”? You are not alone. Learning where do I start when drawing a car is one of the most common questions new artists ask. The good news is that drawing a car does not require years of practice or fancy tools. All you need is a pencil, some paper, and the right approach.
This guide is designed for absolute beginners who want to jump into car drawing without feeling overwhelmed. We will walk you through every step, from the very first sketch to adding details and shading. By the end, you will have the confidence and skills to start sketching cars on your own. Let us get started!
Key Takeaways
- Start with basic shapes: Every great car drawing begins with simple geometric forms like rectangles and circles.
- Master proportions first: Understanding car proportions is the single most important step in learning how to draw a car.
- Practice pencil sketching: Pencil gives you control and makes it easy to erase mistakes while learning car illustration.
- Use reference images: Studying real cars and photos helps you understand details, curves, and angles better.
- Shading adds realism: Learning basic shading techniques transforms flat sketches into lifelike automotive art.
- Be patient and consistent: Drawing cars takes practice, and every sketch gets better over time.
- Follow a step-by-step approach: Breaking the process into small steps makes beginner car art much easier to learn.
📑 Table of Contents
Why Drawing Cars Is Easier Than You Think
Many people avoid drawing cars because they seem too complex. Cars have curves, angles, wheels, and shiny surfaces. It looks intimidating at first. But here is the secret: every car is just a combination of simple shapes put together.
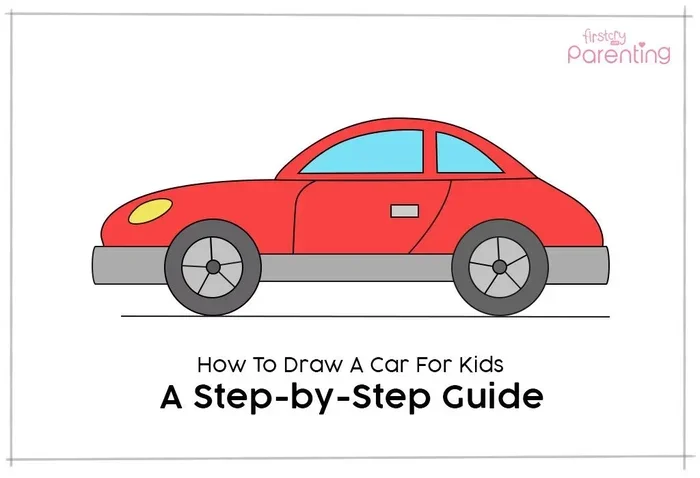
When you break a car down into basic forms, it becomes much less scary. A sedan is basically a rectangle with circles. A sports car is a tilted rectangle with curves. Once you see this, sketching cars for beginners becomes a fun and rewarding activity. You do not need to be a professional artist to get started.
Automotive sketching is a skill that anyone can learn. It just takes a little patience and the right method. So let us dive into the very first thing you need to know.
Understanding the Basics of Car Proportions
Before you put pencil to paper, you need to understand car proportions. Proportions are the sizes and relationships between different parts of the car. If your proportions are off, the car will look weird or distorted. Getting them right from the start saves you a lot of frustration later.
Here is a simple way to think about it. Most cars follow a general pattern:
- The body is roughly three times longer than it is tall.
- The hood takes up about one-third of the total length.
- The passenger cabin sits in the middle third.
- The trunk fills the back third.
- The wheels are roughly the same size and evenly spaced.
These are basic guidelines, not strict rules. Different car types have different proportions. A pickup truck is taller and boxier. A sports car is lower and longer. A hatchback is shorter and taller. But for your first few sketches, these general rules work perfectly.
Drawing car proportions correctly is the foundation of every great car sketch. Spend time studying real cars or photos. Notice how the hood line, roofline, and wheel arches relate to each other. This observation is the key to improving fast.
Where Do I Start When Drawing a Car: The Step-by-Step Process
Now let us answer the big question: where do I start when drawing a car? The answer is simple. You start with shapes. Then you add details. Then you refine and shade. That is it. Let us break this down into clear steps.
Step 1: Sketch the Basic Outline
Every car drawing tutorial begins with a loose outline. Do not worry about making it perfect. Use light, thin lines. The goal is to block in the overall shape of the car.
Start by drawing a long horizontal rectangle for the body. Then add two circles for the wheels. Sketch a smaller shape on top for the cabin or roof area. These are just guidelines. Think of them as a skeleton that your drawing will grow from.
Keep your lines light and loose at this stage. You will erase and adjust them later. The purpose of this step is to get the general shape and position of everything on the page. This is the most important part of beginner car art because it sets the foundation for everything else.
Step 2: Refine the Shape
Once you have the basic outline, go over it with slightly firmer lines. Start to define the curves of the hood, the angle of the windshield, and the slope of the roof. Erase any unnecessary guidelines.
This is where your drawing starts to look like a real car. Pay attention to the front and rear ends. Notice how the bumper curves and where the headlights sit. Vehicle sketching at this stage is all about capturing the character of the car.
Do not rush this step. Take your time and compare one side to the other. Are the wheels the same size? Is the hood symmetrical? Small adjustments now make a big difference in the final result.
Step 3: Add the Details
Now comes the fun part. You start adding the details that make the car recognizable. This includes the windows, doors, headlights, taillights, grille, and mirrors.
Here are some details to focus on:
- Windows: Draw them as simple rectangles or trapezoids. Remember that car windows are usually angled, not perfectly vertical.
- Wheels: Add the tire outline first, then the hubcap or rim inside. Wheels are one of the most important parts of any car outline drawing.
- Lights: Headlights and taillights give the car its personality. Even a simple shape can make the car look alive.
- Door lines and handles: These small touches add realism and character.
When you are adding drawing car details, keep your lines consistent. Use the same pressure and style throughout. This makes the drawing look polished and professional.
Step 4: Add Shading and Depth
Shading is what takes a flat sketch and turns it into something that looks three-dimensional. Without shading, even a well-drawn car can look lifeless.
Start by identifying the light source. Where is the light coming from? In most cases, light comes from above and to one side. The areas facing the light stay light, and the areas facing away get darker.
Use the side of your pencil for smooth shading. Build up the darkness gradually. Do not press too hard too quickly. Shading techniques for cars include hatching, cross-hatching, and blending. Try different methods and see which one feels most natural to you.
Automotive art comes alive through shading. The reflections on the hood, the shadows under the car, and the depth of the wheel wells all add realism. Practice shading on simple shapes first before applying it to your car drawings.
Essential Tools for Drawing Cars
You do not need expensive equipment to start drawing cars. But having the right tools makes the process more enjoyable and the results better. Here is what you need to get started.
Pencils and Paper
A standard graphite pencil set is all you need to begin pencil sketch car work. Get a range of hardness levels, from soft (like 2B or 4B) to hard (like HB or H). Soft pencils create dark, rich lines that are great for shading. Hard pencils make light, precise lines that are perfect for outlines.
For paper, use a smooth, heavier weight sketch paper. It handles erasing well and does not wrinkle when you shade heavily. You do not need expensive paper. A basic sketchbook works perfectly for car illustration practice.
Erasers and Sharpeners
A good eraser is just as important as your pencil. A kneaded eraser is gentle and can lift graphite without tearing the paper. A precision eraser helps you fix small details. Keep your pencils sharp for clean lines, especially when drawing car wheel sketches and fine details.
Optional Tools That Help
As you progress, you might want to try a few extra tools:
- Ruler: Useful for drawing straight lines on the car body or wheel rims.
- Blending stumps: These help you create smooth, even shading without using your fingers.
- Reference photos: Print out photos of cars you want to draw. They are invaluable for learning car design drawing.
- Colored pencils or markers: Once you are comfortable with pencil, adding color brings your automotive design sketch to the next level.
Common Mistakes Beginners Make When Drawing Cars
Everyone makes mistakes when learning to draw. The good news is that most common errors are easy to avoid if you know what they are. Here are the top mistakes beginners make and how to fix them.
Skipping Proportions
The biggest mistake is jumping straight into details without getting the proportions right. If the body is too long or the wheels are too small, the whole drawing falls apart. Always start with proportion guidelines and check them before adding details.
Using Too Much Pressure
Pressing too hard makes it hard to erase mistakes and creates uneven lines. Keep your pencil grip light and relaxed. Think of it as guiding the pencil, not forcing it.
Ignoring the Wheels
Wheels are the foundation of any car drawing. If the wheels are off, the whole car looks wrong. Spend extra time getting the wheels right. Draw them as perfect circles and make sure they align properly with the body.
Not Using Reference Images
Trying to draw a car from memory is tough, even for experienced artists. Always use reference photos when starting out. They help you understand the shape, angles, and details of different car models. Car silhouette drawing practice with references is one of the fastest ways to improve.
Giving Up Too Soon
Your first few drawings might not look great. That is completely normal. Every artist starts somewhere. The key is to keep practicing and enjoy the process. Drawing cars easy comes with time and repetition. Do not compare your first sketch to someone else’s hundredth sketch.
Tips to Improve Your Car Drawings Faster
Want to get better at drawing cars quickly? Here are some practical tips that make a real difference.
Draw Every Day
Consistency beats intensity. Drawing for 15 minutes every day is better than drawing for three hours once a week. Make it a habit. Even a quick car sketch during a break helps build your skills over time.
Study Different Car Types
Cars come in many shapes and sizes. Sedans, SUVs, trucks, sports cars, and hatchbacks all have unique proportions. Study each type and practice drawing them. This broadens your skills and makes you a more versatile automotive sketching artist.
Break the Car Into Sections
Instead of trying to draw the whole car at once, break it into sections. Draw the body first, then the cabin, then the wheels. Tackling one part at a time keeps things manageable and less overwhelming.
Trace to Learn
Tracing is not cheating. It is a learning tool. Print a photo of a car, place a blank sheet over it, and trace the outline. This helps your hand learn the shapes and curves. After tracing, try drawing the same car from memory. You will be surprised how much you remember.
Share Your Work
Sharing your drawings with others is a great way to stay motivated. Post your work online, show friends, or join a drawing community. Feedback helps you grow, and seeing others improve inspires you to keep going.
How to Practice Car Drawing at Home
Setting up a practice routine at home makes learning automotive art much more effective. Here is a simple plan you can follow.
First, set aside 20 to 30 minutes for each practice session. Find a quiet spot with good lighting. Gather your pencils, paper, and a few reference photos of cars you like.
Start each session with warm-up sketches. Draw circles, rectangles, and ovals for five minutes. This loosens your hand and gets you in the zone. Then move on to a full car drawing.
Try drawing the same car from different angles. Draw it from the front, side, and back. This builds your understanding of perspective drawing and makes your car illustrations more dynamic.
Keep a sketchbook dedicated to car drawings. Over time, you will see your progress. Looking back at your earlier sketches is incredibly motivating and reminds you how far you have come.
Quick Tips for Better Car Sketches
- Draw light lines first. You can always go darker later.
- Use a reference photo for every drawing, especially at the beginning.
- Focus on one car type at a time before switching to different styles.
- Keep your eraser clean for precise corrections.
- Take breaks to avoid hand fatigue and keep your lines steady.
- Rotate your paper as you draw. This helps you draw curves more naturally.
- Watch car design videos online for inspiration and new techniques.
Conclusion
So, where do I start when drawing a car? Now you know the answer. You start with basic shapes, focus on proportions, add details step by step, and finish with shading. That is all there is to it.
Drawing cars is a skill that anyone can learn with practice and patience. You do not need to be born talented. You just need to show up, pick up a pencil, and draw. Every sketch teaches you something new. Every mistake helps you improve.
Start simple. Use the steps in this guide. Be consistent with your practice. In time, you will be able to draw any car you want, from a sleek sedan to a powerful truck. The journey of automotive sketching is fun, creative, and deeply rewarding. Pick up your pencil today and start your first car sketch. You will be glad you did.
Remember, every professional car artist started exactly where you are now. The only difference is they kept going. So will you. Grab your pencil, find a reference photo, and start drawing. Your car drawing journey begins right now.
Frequently Asked Questions
Do I need any artistic talent to start drawing cars?
No, artistic talent is not required. Drawing cars is a skill that anyone can learn with practice and the right approach. Start with basic shapes and follow step-by-step tutorials, and you will see improvement quickly.
What is the easiest car to draw for beginners?
Simple sedan shapes are the easiest cars to draw for beginners. They have clean lines, basic proportions, and fewer curves than sports cars. Start with a side view of a basic sedan to build your confidence.
How long does it take to learn to draw cars?
You can sketch a basic car within a few hours of practice. However, getting comfortable with details, shading, and proportions takes a few weeks of regular practice. Consistency is the key to improving fast.
Should I use a pen or pencil for car sketching?
Start with a pencil. Pencils allow you to erase mistakes and adjust your lines easily, which is essential for beginner car art. Once you feel more confident, you can try pen for bolder, more defined car outline drawings.
Are reference images necessary for learning car drawing?
Yes, reference images are very helpful, especially when starting out. They give you a clear picture of proportions, angles, and details. Even professional artists use references for automotive design sketching and vehicle sketching.
Can kids learn to draw cars with this guide?
Absolutely. This guide is perfect for kids and adults alike. The step-by-step approach makes drawing cars easy for all ages. Kids can start with simple shapes and gradually build up to more detailed car illustrations.
=== /FAQS ===