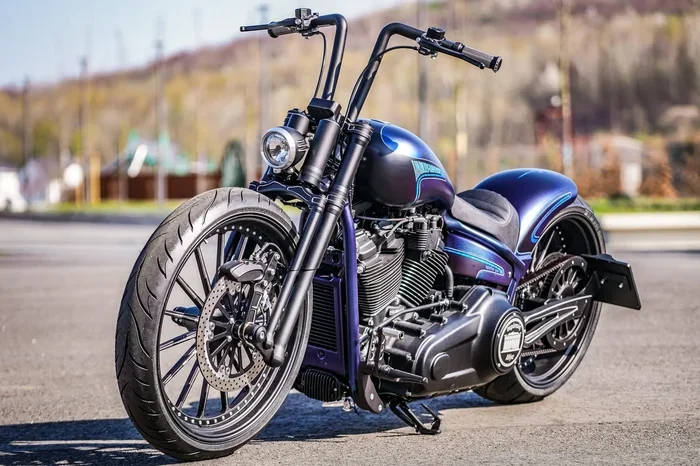
Harley-Davidson Air Suspension Chart and Adjustments
The Harley-Davidson Air Suspension Chart is a simple guide that helps riders set the right ride height and spring rate for their bike. Whether you carry heavy luggage or ride solo, this chart makes suspension tuning easy and fast. You will learn how to read the chart, adjust your air springs, and fix common problems like sagging or bouncing.
If you own a Harley-Davidson, you know that how your bike rides matters a lot. The Harley-Davidson Air Suspension Chart is one of the best tools you can use to get the perfect ride. This chart shows you exactly how to set your air suspension for the best comfort and control. Many riders skip this step and end up with a bumpy or unstable ride. But with the right chart and a little know-how, you can tune your bike like a pro.
Air suspension is different from regular coil springs. It uses air bags instead of metal coils. This means you can adjust the ride height easily. You just add or let out air. The Harley-Davidson Air Suspension Chart tells you how much air to use for different situations. Whether you ride alone, carry a passenger, or haul heavy gear, the chart has you covered. It is simple, clear, and built for real-world use.
In this guide, we will walk you through everything you need to know. You will learn what the chart is, how to read it, and how to make adjustments step by step. We will also cover common mistakes and tips to get the best results. By the end, you will feel confident adjusting your own air suspension at home.
Key Takeaways
- Easy Setup: The Harley-Davidson Air Suspension Chart helps you find the right settings in minutes.
- Better Ride Quality: Proper adjustments lead to a smoother, more comfortable ride on any road.
- Load Leveling Made Simple: Use the chart to balance your bike when carrying passengers or gear.
- Save Money: DIY adjustments mean fewer trips to the shop and lower maintenance costs.
- Safe Riding: Correct suspension settings improve stability and control at all speeds.
- Works for All Models: The chart applies to many Harley-Davidson models with air suspension.
📑 Table of Contents
- What Is a Harley-Davidson Air Suspension Chart?
- Why You Need an Air Suspension Adjustment Chart
- How to Read and Use the Air Suspension Chart
- Common Harley-Davidson Air Suspension Models and Settings
- Step-by-Step Guide to Adjusting Your Air Suspension
- Troubleshooting Common Air Suspension Issues
- Maintenance Tips for Long-Lasting Suspension
- Final Thoughts on Using the Harley-Davidson Air Suspension Chart
What Is a Harley-Davidson Air Suspension Chart?
The Harley-Davidson Air Suspension Chart is a reference guide that shows the recommended air pressure and ride height settings for different riding conditions. Think of it as a map for your suspension system. It tells you exactly what settings to use based on how much weight your bike is carrying.
Most Harley-Davidson models that come with air suspension include a chart in the owner’s manual. You can also find updated versions online from Harley-Davidson or aftermarket parts makers. The chart usually lists settings for three main situations:
- Solo riding with no extra weight
- Rider and passenger with normal luggage
- Heavy load with a full saddlebag and trunk setup
Each setting includes a recommended air pressure level measured in PSI (pounds per square inch). The chart also shows the target ride height. Ride height is the distance between the ground and the lowest point of the bike. Getting this right is key to a smooth and safe ride.
Why the Chart Matters for Air Ride Suspension
Air ride suspension systems use air springs instead of traditional coil springs. These air springs are flexible and respond well to changes in air pressure. When you add air, the suspension rises. When you let air out, it lowers. This makes the Harley-Davidson Air Suspension Chart so useful. It gives you the exact PSI numbers you need for each riding scenario.
Without the chart, you would be guessing. Guessing can lead to a poor ride. Your bike might sit too low or too high. It might feel bouncy or stiff. The chart removes all the guesswork. It gives you clear numbers that are tested and approved by Harley-Davidson engineers.
Why You Need an Air Suspension Adjustment Chart
Riding a Harley with the wrong suspension settings can ruin your experience. A bike that sits too low can scrape on bumps. A bike that sits too high can feel unstable in turns. The Harley-Davidson Air Suspension Chart helps you avoid all of these problems.
Here are the main reasons you need this chart:
- Comfort: The right settings make long rides much more comfortable. Your body absorbs less vibration from the road.
- Safety: Proper ride height improves handling and braking. You stay in control on wet roads, curves, and rough terrain.
- Load Balancing: When you add a passenger or heavy bags, the rear of the bike sags. The chart helps you level things out.
- Protect Your Bike: Wrong settings can damage your shocks, air springs, and frame over time. The chart keeps everything within safe limits.
- Save Time and Money: You can make adjustments at home instead of paying a mechanic to do it.
Many riders buy aftermarket air suspension kits from brands like Progressive Suspension or Arnott. These kits often come with their own adjustment charts. But the factory Harley-Davidson Air Suspension Chart remains the gold standard. It is designed specifically for your bike model and engine type.
How Suspension Sag Affects Your Ride
Suspension sag is the amount the rear end drops when you sit on the bike. Too much sag means the bike sits too low. Too little sag means the suspension is too stiff. The Harley-Davidson Air Suspension Chart helps you find the sweet spot. Most riders aim for about one inch of sag when sitting on the bike with normal gear.
You can measure sag with a simple tape measure. Just measure the distance from the rear axle to a fixed point on the fender. Then sit on the bike and measure again. The difference is your sag. Compare this to the chart recommendations and adjust the air pressure accordingly.
How to Read and Use the Air Suspension Chart
Reading the Harley-Davidson Air Suspension Chart is easier than you might think. The chart is usually laid out in a simple table format. Each row represents a different riding condition. Each column shows the air pressure and ride height for that condition.
Here is what a typical chart entry looks like:
- Condition: Solo rider, no luggage
- Recommended PSI: 7 PSI
- Target Ride Height: 5.5 inches from the ground to the lowest point of the exhaust
To use the chart, first figure out your riding condition. Are you riding alone or with a passenger? Do you have saddlebags and a trunk? Match your situation to the right row on the chart. Then set your air pressure to the recommended PSI. Finally, check your ride height and make small adjustments if needed.
Tools You Will Need
Before you start, gather these tools:
- A motorcycle air pump or compressor with a pressure gauge
- A tape measure or ruler
- The Harley-Davidson Air Suspension Chart for your specific model
- A pen and notebook to track your settings
Most Harley-Davidson models use a small air compressor built into the bike to add or release air. You can also buy an aftermarket inflation kit if your bike does not have one. The process is simple. Just connect the pump, add air to reach the target PSI, and check the ride height.
Quick Tips for Reading the Chart
- Always check the chart for your specific model year. Settings can change between years.
- Make adjustments when the suspension is cold. Riding heats up the air and changes the pressure.
- Write down your settings after each ride so you can repeat them easily.
- If you are between two PSI values, start with the lower number and add air slowly.
Common Harley-Davidson Air Suspension Models and Settings
Different Harley-Davidson models use different air suspension systems. The Harley-Davidson Air Suspension Chart varies by model. Here are some of the most common models and their general settings.
Softail Models
Softail models like the Softail Standard and Softail Slim use rear air suspension. These bikes have a classic look but still offer modern comfort. The factory chart usually recommends lower PSI for solo riders and higher PSI when carrying a passenger. Ride height on Softails is easy to adjust because the rear air spring is accessible.
Touring Models
Touring bikes like the Road King and Street Glide come with air suspension on both the front and rear. These bikes are designed for long-distance comfort. The Harley-Davidson Air Suspension Chart for touring models includes more settings because they carry more gear. Front fork air pressure is just as important as rear spring pressure. Always check both sides when making adjustments.
Dyna Models
Dyna models like the Fat Bob and Street Bob often have rear air suspension. These bikes are popular for custom builds. Many riders add aftermarket air suspension kits for a more aggressive look. The factory chart still works as a starting point, but you may want to fine-tune the settings for your style.
CVO and High-Performance Models
CVO (Custom Vehicle Operations) models come with premium suspension systems. These bikes often have electronic suspension adjustment. The Harley-Davidson Air Suspension Chart for CVO models may include electronic presets. You can switch between settings with the push of a button on the handlebar.
Comparison Table: Common Model Settings
| Model Type | Solo PSI | Passenger PSI | Heavy Load PSI |
|---|---|---|---|
| Softail | 7 PSI | 9 PSI | 11 PSI |
| Touring | 8 PSI | 10 PSI | 12 PSI |
| Dyna | 6 PSI | 8 PSI | 10 PSI |
| CVO | Electronic | Electronic | Electronic |
Note: These values are general examples. Always refer to your specific model’s Harley-Davidson Air Suspension Chart for exact numbers. Settings can vary based on engine size, year, and factory options.
Step-by-Step Guide to Adjusting Your Air Suspension
Now that you understand the chart, let’s walk through the actual adjustment process. Follow these steps to get the best results from your Harley-Davidson Air Suspension Chart.
Step 1: Park on a Level Surface
Always start by parking your bike on a flat, hard surface. A garage floor or driveway works great. Do not adjust your suspension on a slope. The bike needs to be level for accurate measurements.
Step 2: Measure Your Current Ride Height
Use a tape measure to check the distance from the ground to the lowest point of the bike. Write this number down. This is your baseline. It helps you see how much you need to adjust.
Step 3: Check the Chart for Your Condition
Look at the Harley-Davidson Air Suspension Chart and find the row that matches your riding situation. Note the recommended PSI and target ride height.
Step 4: Connect Your Air Pump
Attach your air pump or compressor to the air valve on the suspension. Most Harley-Davidson models have the valve near the rear wheel or under the seat. Add air slowly and check the pressure gauge often.
Step 5: Adjust the PSI
Add or release air to reach the recommended PSI from the chart. Go slowly. Small changes make a big difference. If you add too much air, you can always let some out.
Step 6: Recheck the Ride Height
After adjusting the air pressure, measure the ride height again. Compare it to the target height from the chart. Make small adjustments until you hit the mark.
Step 7: Take a Test Ride
Once you have the right settings, take a short test ride. Pay attention to how the bike feels. Does it ride smooth? Does it handle well in turns? If something feels off, make small tweaks and test again.
Quick Tips for the Adjustment Process
- Adjust your suspension every time your riding conditions change.
- Keep a log of your settings for different scenarios.
- Never exceed the maximum PSI listed on the chart or in your owner’s manual.
- If your bike has electronic suspension, use the handlebar controls for fine-tuning.
Troubleshooting Common Air Suspension Issues
Even with the right Harley-Davidson Air Suspension Chart, you may run into issues from time to time. Here are the most common problems and how to fix them.
Rear End Sags Too Much
If your rear end sags when you add a passenger or luggage, you need more air pressure. Check the chart for the correct PSI for your load. Add air slowly until the ride height matches the target. If the sagging continues, you may have a leak in the air spring. Inspect the air bag for cracks or damage.
Bike Rides Too High and Bouncy
If your bike feels too bouncy or sits too high, you have too much air. Let some air out until the ride height drops to the recommended level. A bike that is too high can feel unstable, especially at low speeds and in parking lots.
Air Compressor Runs Constantly
If your air compressor keeps running, there may be a leak in the system. Check all air lines and fittings for cracks or loose connections. A small leak can cause the compressor to work overtime. This can burn out the compressor motor over time.
Uneven Ride Height
If one side of the bike sits lower than the other, the air spring on that side may be failing. This is a common issue with older air suspension systems. Inspect both air springs and replace any that show signs of wear or damage.
When to Seek Professional Help
Some suspension problems are best handled by a trained mechanic. If you notice oil leaking from your shocks, strange noises when riding, or if the bike pulls to one side, get it checked. A professional can diagnose issues that go beyond simple air pressure adjustments.
Maintenance Tips for Long-Lasting Suspension
Your air suspension system needs regular care to perform its best. Here are some simple maintenance tips that every Harley owner should follow.
- Check air pressure weekly: Air springs can lose pressure over time. A quick weekly check keeps your ride consistent.
- Inspect air bags regularly: Look for cracks, tears, or bulges in the air bags. Replace them if you see any damage.
- Keep the compressor clean: Dust and debris can clog the compressor. Wipe it down and keep the area around it clear.
- Lubricate fittings: Apply a small amount of silicone lubricant to air line fittings to prevent leaks.
- Follow the Harley-Davidson Air Suspension Chart: Always use the chart as your guide. Do not guess or improvise with air pressure settings.
Good maintenance habits extend the life of your suspension system. They also keep your ride smooth and safe mile after mile. A well-maintained air suspension system can last for many years with proper care.
Final Thoughts on Using the Harley-Davidson Air Suspension Chart
The Harley-Davidson Air Suspension Chart is one of the simplest yet most powerful tools for any Harley owner. It takes the mystery out of suspension tuning and gives you clear, reliable settings for every riding situation. Whether you ride solo, carry a passenger, or haul heavy gear, the chart has the answers you need.
Adjusting your air suspension is not hard. With a basic air pump, a tape measure, and the right chart, you can fine-tune your ride in under 30 minutes. The result is a smoother, safer, and more comfortable ride every time you hit the road.
Take the time to understand your chart. Make it a habit to check your settings before long rides. Your bike will thank you with better handling, improved comfort, and a longer lifespan for your suspension components. Ride smart, ride safe, and enjoy every mile on your Harley.
Frequently Asked Questions
What PSI should I use for my Harley-Davidson air suspension?
The right PSI depends on your riding condition. Check the Harley-Davidson Air Suspension Chart for your specific model. Solo riders typically need lower PSI, while loaded bikes need higher PSI. Always start with the chart recommendations and fine-tune based on how the bike feels.
Can I adjust my air suspension without a chart?
You can, but the chart removes all the guesswork. Without it, you may set the wrong pressure and end up with a poor ride. The Harley-Davidson Air Suspension Chart gives you exact numbers tested by Harley-Davidson engineers for each model and riding condition.
How often should I check my air suspension settings?
You should check your settings at least once a month. Also check them before any long ride or when your riding conditions change. Regular checks keep your suspension performing at its best and help you catch small problems before they become big ones.
What happens if I over-inflate my air suspension?
Over-inflating makes the ride too stiff and bouncy. It can also damage the air bags and compressor over time. Always follow the Harley-Davidson Air Suspension Chart and never exceed the maximum PSI listed for your model. If you accidentally over-inflate, let air out slowly until you reach the correct pressure.
Do all Harley-Davidson models come with air suspension?
No, not all models come standard with air suspension. Many touring and luxury models include it, but some entry-level and sport models use traditional coil springs. Check your owner’s manual or look for the air valve near the rear wheel to confirm your bike has air suspension.
Can I use aftermarket air suspension kits with the factory chart?
Aftermarket kits often come with their own adjustment charts. However, the factory Harley-Davidson Air Suspension Chart is still a great starting point. If you use an aftermarket kit, refer to the kit’s chart first and then fine-tune based on your personal riding preferences.