Can You Replace a Prius Hybrid Battery Yourself at Home
Can you replace a Prius hybrid battery yourself at home? Yes, with the right tools and a careful approach. This guide walks you through the entire DIY hybrid battery replacement process, saving you hundreds on Prius battery replacement cost. You’ll learn safety steps, tools needed, and how to reset the system after the swap.
So, you’re staring at a Prius hybrid battery warning light on the dashboard. The thought of a Toyota dealer quote makes your stomach drop. What if you could do it yourself? The idea of a DIY Prius battery replacement can feel both exciting and scary. But here’s the truth: thousands of owners have swapped their hybrid battery in their garage. With the right guide, you can too. This article will show you exactly how.
Replacing a Prius hybrid battery is not like changing a regular car battery. You’re dealing with a high-voltage NiMH battery pack that powers the electric motor. It’s a complex system, but it’s also very logical. Once you understand the basics, the process becomes clear. I’ll walk you through every step, from spotting the first signs of failure to the final test drive. By the end, you’ll know if a DIY hybrid battery replacement fits your skill level and budget.
Many people assume that a Toyota Prius battery replacement requires a specialist. That was true ten years ago, but today the parts are widely available and the process is well-documented. Whether you have a first-generation Prius or a latest model, the core steps are the same. You just need patience, a clean workspace, and a respect for the electricity involved. Let’s dive into the details.
Key Takeaways
- DIY is possible: Replacing a Prius hybrid battery yourself is doable if you follow safety rules and have basic tools.
- Cost savings: Doing it yourself can cut the Prius battery replacement cost by hundreds compared to a dealer.
- Safety first: Always disconnect the high-voltage system and wear proper gear before touching any wires.
- Right tools matter: You’ll need a torque wrench, insulated gloves, and a diagnostic scanner to reset the battery management system.
- Post-installation steps: Resetting the system and driving gently for the first few miles helps the new battery learn your driving style.
- Know your limits: If you feel unsure about high-voltage work, a certified technician is the safer choice.
📑 Table of Contents
- What Is a Prius Hybrid Battery and Why Does It Matter?
- How to Know If Your Prius Hybrid Battery Is Failing
- Can You Replace a Prius Hybrid Battery Yourself at Home?
- Does Your Prius Generation Change the Battery Replacement Process?
- Tools and Safety Gear You’ll Need Before Starting
- Step-by-Step Guide to Replacing Your Prius Hybrid Battery
- After the Swap: Testing and Common Mistakes to Avoid
What Is a Prius Hybrid Battery and Why Does It Matter?
Your Toyota Prius uses two battery systems. The first is a small 12V lead-acid battery that starts the car and powers the electronics. The second is the big hybrid battery pack. This is the high-voltage NiMH battery (or lithium-ion in newer models) that stores energy for the electric motor. Together, they create the hybrid synergy drive that gives the Prius its amazing fuel economy.
The Two-Battery System Explained
Think of the 12V battery as the helper. It wakes up the car and runs the radio and computers. The hybrid battery is the powerhouse. It provides electric thrust, captures energy during braking, and smooths out engine power. When the hybrid battery fails, the car often goes into a “limp mode” to protect itself. You’ll notice a drop in performance and a warning light. Ignoring it can lead to a car that won’t start.
NiMH vs. Lithium-Ion: Which Prius Has What?
Most older Prius models use nickel-metal hydride (NiMH) packs. These are robust and have been around for years. Newer models, like the Prius Prime, use lithium-ion batteries. They’re lighter and hold more energy, but they also require more careful handling. Both types can be replaced with aftermarket battery options. The replacement steps are similar, but the battery management system (BMS) may differ slightly.
How to Know If Your Prius Hybrid Battery Is Failing
Catching the problem early saves you from a roadside breakdown. The hybrid battery doesn’t just die one day. It gives you clues. Here are the most common signs that your Prius battery needs attention.
Warning Signs to Watch For
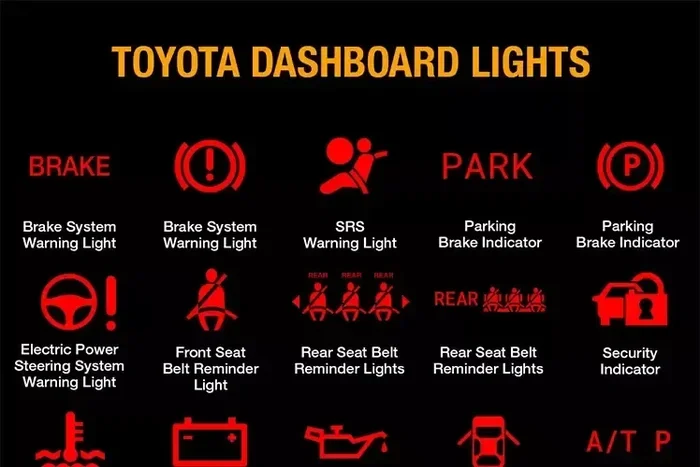
- Check Engine or Hybrid System Light: This is the first red flag. The car’s computer detects a fault in the battery management system.
- Reduced Fuel Economy: If your Toyota Prius suddenly drinks more gas, the hybrid battery may not be holding a charge.
- Strange Noises: A clicking or whining sound from the battery pack can indicate a failing cell.
- State of Charge Dropping: If the battery gauge drops to empty quickly, internal cells are weak.
- Car Won’t Start: In severe cases, the car refuses to turn on. The high-voltage system shuts down completely.
Reading Diagnostic Trouble Codes
You can plug an OBD-II scanner into the port under the steering wheel. Look for codes starting with P0A or P30. These point directly to hybrid battery issues. A code like P0A80 means “Replace Hybrid Battery Pack.” This is your confirmation that the battery modules are degrading. Don’t guess. Let the scanner speak.
Can You Replace a Prius Hybrid Battery Yourself at Home?
The short answer is yes. The long answer is: it depends on your comfort with high-voltage systems and your willingness to follow safety rules. The DIY Prius battery replacement is not a beginner project, but it’s far from impossible. Many owners with basic mechanical skills have done it successfully. You need patience, the right manual, and a respect for the electricity involved.
The DIY Reality Check
Replacing a hybrid battery takes about 2 to 4 hours. You’ll need to remove the rear seat or trunk panel to access the battery pack. The pack is secured with bolts and a high-voltage connector. You must disconnect the 12V auxiliary battery first to disable the system. Then you disconnect the main high-voltage harness. After removing the old pack, you install the new one, reconnect everything, and reset the battery management system. It sounds simple, and the steps are logical. But one mistake with the high-voltage wires can be dangerous.
DIY vs. Professional Replacement: Which Makes Sense?
Let’s compare the two paths clearly.
| Factor | DIY Replacement | Professional Replacement |
|---|---|---|
| Cost | Parts only ($1,200–$2,500 for an aftermarket battery) | Parts + labor ($2,500–$4,500 total) |
| Time | 3–5 hours (plus research time) | 1–2 hours at the shop |
| Skill Level | Intermediate to advanced | Certified technician |
| Warranty | Varies by seller (often 1–3 years) | Dealer warranty (often 8 years) |
| Safety Risk | Higher if you skip safety steps | Low (trained professionals) |
| Satisfaction | High (you did it yourself!) | Low to moderate |
As you can see, a DIY hybrid battery replacement saves significant money. But it requires you to take the work seriously. If you have a garage, a good floor jack, and a basic understanding of car electrical systems, you’re in a good spot. If not, you might want to hire a pro. The Prius battery replacement cost difference is often $1,500 or more. That’s a strong motivator to learn the process.
Does Your Prius Generation Change the Battery Replacement Process?
Not all Prius models are exactly the same. The generation you own affects how you access the battery pack and which connector types you’ll encounter. Here’s a quick look at the differences.
First Generation (Gen 1, 2001–2003)
The original Toyota Prius has a battery pack located under the rear seat. Access is straightforward, but the NiMH battery modules are heavier. The high-voltage connector is a simple plug-and-play style. If you own a Gen 1, you’re in luck—the battery layout is very simple.
Second and Third Generations (Gen 2, 2004–2009; Gen 3, 2010–2015)
These models moved the battery pack to the trunk area. You’ll need to remove the trunk trim and a plastic cover. The connectors are similar, but the hold-down straps are slightly different. The battery management system on these generations is very reliable, and the hybrid battery failure symptoms are easy to spot.
Fourth Generation (Gen 4, 2016–Present) and Prime Models
Newer models use a lithium-ion battery in some trims. The pack is often under the rear seat again, but it’s lighter and more compact. The reset procedure may require a slightly different scan tool. Always check your owner’s manual for the exact battery replacement steps for your model year.
Tools and Safety Gear You’ll Need Before Starting
Safety is not optional. The Prius hybrid battery operates at 200 to 300 volts. That can kill you. Before you touch anything, gather your gear and tools.
Essential Tools
- 10mm and 12mm socket set (for removing battery hold-down bolts)
- Torque wrench (to tighten bolts to the correct spec)
- Insulated wrench set (rated for high voltage)
- Digital multimeter (to verify the system is dead before you touch wires)
- OBD-II scanner (to clear codes and reset the battery management system)
- Battery carrier or strap (the new battery pack is heavy, around 100 lbs)
- Wheel chocks and jack stands (never rely on a jack alone)
Why Each Tool Matters
The insulated wrench set protects you from accidental electrical contact. A torque wrench prevents you from over-tightening the plastic battery tray. The digital multimeter is your lifeline—it confirms the system is truly dead before you work on the high-voltage harness. Skipping any of these tools is a common mistake that can lead to injury or damage.
Safety Gear You Must Wear
- High-voltage insulated gloves (rated for 1000V or more)
- Safety glasses
- Rubber-soled shoes (no bare feet or wet floors)
- Work light (to see the wiring clearly)
Pre-Work Safety Checklist
- Turn off the ignition and remove the key.
- Disconnect the 12V auxiliary battery terminal first (negative cable).
- Wait at least 10 minutes. This lets the capacitors in the battery management system discharge.
- Use your multimeter to check the high-voltage terminals. Verify they read 0 volts.
- Place wheel chocks and lift the rear of the car on jack stands.
Following these steps reduces the risk of electric shock to near zero. Never skip the wait time. Never assume the system is dead without measuring.
Step-by-Step Guide to Replacing Your Prius Hybrid Battery
Now comes the hands-on part. I’ll break this down into clear phases. Work slowly and double-check each step.
Phase 1: Removing the Old Battery
- Access the Battery: Fold down the rear seats or remove the trunk trim panel. You’ll see the hybrid battery pack covered by a plastic shield. Remove the screws holding the shield.
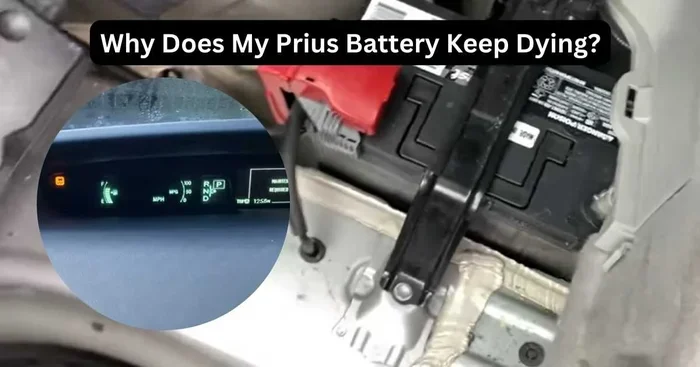
- Disconnect the 12V Auxiliary Battery: This is crucial. Find the 12V battery under the hood or in the rear. Disconnect the negative terminal. This kills the low-voltage side of the system.
- Disconnect the High-Voltage Harness: Locate the orange high-voltage connector on top of the battery pack. Squeeze the locking tab and pull it straight out. Do not yank the wires. Use an insulated tool if needed.
- Remove the Battery Hold-Down Strap: Use a 10mm socket to unbolt the metal strap that secures the pack. Keep the bolts safe in a cup.
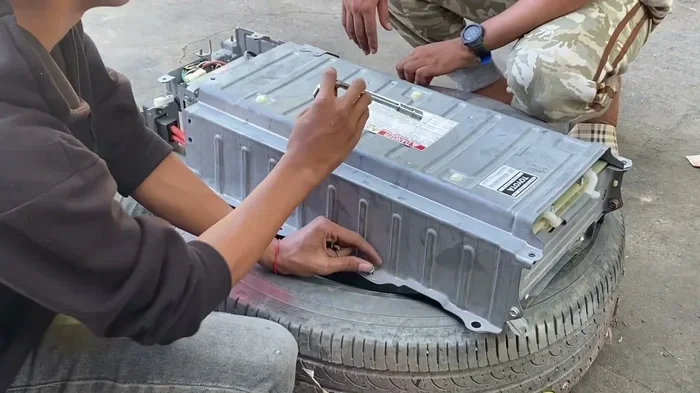
- Lift Out the Old Pack: The battery is heavy. Use a battery carrier or a friend to help. Slide it out carefully. Place it on a stable surface. Do not tip it upside down.
Phase 2: Installing the New Battery
- Prepare the New Pack: If you bought a rebuilt hybrid battery or a new aftermarket battery, make sure the state of charge is between 40% and 60%. This is ideal for shipping and initial setup. Check the voltage of individual modules with your multimeter if possible.
- Slide the New Pack In: Carefully slide the new battery into the same position. Ensure the high-voltage connector aligns with the car’s harness.
- Secure the Hold-Down Strap: Bolt the strap back on. Tighten it to the factory torque spec (usually around 15-20 ft-lbs). Use your torque wrench.
- Reconnect the High-Voltage Harness: Push the orange connector firmly until it clicks. Give it a gentle tug to confirm it’s locked.
- Reconnect the 12V Auxiliary Battery: Attach the positive terminal first, then the negative. Apply a thin layer of dielectric grease to the terminals to prevent corrosion.
Phase 3: Resetting the Battery Management System
Now you need to teach the car about the new battery. Plug your OBD-II scanner into the diagnostic port. Turn the ignition to the “ON” position (do not start the engine). Follow the scanner’s menu to clear all fault codes and perform a battery management system reset. This step tells the car’s computer that a new battery is installed. Without it, you may see persistent warning lights.
After the Swap: Testing and Common Mistakes to Avoid
You’ve done the hard part. Now it’s time to verify everything works. A careful test drive will confirm your DIY hybrid battery replacement was a success.
First Start-Up Checklist
- Ignition On: Turn the key. The “Ready” light should illuminate. No check engine light should appear.
- Battery Gauge: Check the state of charge on the hybrid display. It should show a reasonable level (around 40-60%).
- Drive Slowly: For the first 5 miles, drive gently. Avoid hard acceleration. This allows the battery management system to learn the new battery’s capacity.
- Monitor Fuel Economy: After a few days, check if your fuel economy returns to normal Prius levels (50+ mpg).
- Scan Again: Use your OBD-II scanner one more time after 100 miles to ensure no new codes have appeared.
Common DIY Mistakes That Can Ruin Your Day
- Skipping the 12V Disconnect: This is the most dangerous mistake. Always kill the 12V system first.
- Forgetting to Reset the BMS: A reset prevents error codes and ensures the battery charges properly.
- Over-Tightening Bolts: The battery tray is plastic. Over-torquing can crack it, leading to rattles and potential damage.
- Ignoring Module Voltage Imbalance: If your new battery is a rebuilt pack, one weak module can drag down the whole system. Test each module before installation.
- Not Recycling the Old Battery: Hybrid battery recycling is essential. The NiMH battery contains toxic materials. Take the old pack to a certified recycling center or return it to the seller.
What If You Hit a Roadblock? Troubleshooting Tips
If the “Ready” light doesn’t come on after the reset, don’t panic. Double-check that the 12V auxiliary battery is connected. Verify that the high-voltage connector clicked into place. Sometimes the battery management system needs a full power cycle—turn the ignition off, wait 30 seconds, and try again. If you still see a warning light, use your scanner to read the code. A code P0A80 often means the new battery needs a full charge cycle before the system will accept it.
Expert Tips for Long Battery Life
Your new Prius hybrid battery can last many years if you treat it right. Avoid deep discharges (letting the battery sit at 0% for weeks). Keep the car plugged in if it’s a plug-in hybrid. Use a battery maintainer if the car sits for long periods. These small habits add up to a longer, healthier hybrid battery life. Also, avoid extreme heat exposure when the car is parked for long periods, as heat is the biggest enemy of NiMH battery longevity.
In conclusion, can you replace a Prius hybrid battery yourself at home? Absolutely. The process is well within reach for a motivated DIYer. You’ll save money, gain valuable car knowledge, and enjoy the satisfaction of a job well done. Just remember to respect the high-voltage system, follow each step carefully, and never rush. A successful DIY Prius battery replacement is one of the most rewarding projects a Toyota Prius owner can tackle. Now go give your car the fresh battery it deserves.
Frequently Asked Questions
How much does it cost to replace a Prius hybrid battery yourself?
An aftermarket hybrid battery typically costs between $1,200 and $2,500. Add about $50 for a new 12V auxiliary battery if needed. That’s it. No labor charges. Compare that to a dealer’s $3,000–$4,500 quote. The Prius battery replacement cost savings are huge when you do it yourself.
Is it safe to work on a Prius hybrid battery at home?
Yes, if you follow the safety rules exactly. The Toyota Prius high-voltage system is well-designed and has safety disconnects. But you must always disconnect the 12V battery first, wait 10 minutes, and verify with a multimeter that the voltage is zero. Never work on the high-voltage harness while the system is live. Wear insulated gloves and rubber-soled shoes.
How long does a DIY Prius hybrid battery replacement take?
Most people finish the job in 3 to 5 hours. If it’s your first time, give yourself an extra hour to read the manual and double-check connections. The actual hybrid battery replacement steps are straightforward, but taking your time prevents mistakes.
Can I use a rebuilt hybrid battery instead of a new one?
Yes, rebuilt hybrid batteries are a popular and cost-effective option. They come with tested battery modules and often include a 1–3 year warranty. Just make sure the seller matches the pack to your specific Prius model year. The battery management system must be compatible.
What happens if I don’t reset the battery management system after replacement?
The car may throw error codes, show a low state of charge even when the battery is good, or fail to charge properly. A simple reset with an OBD-II scanner fixes this. It tells the car’s computer that a new battery is installed and allows the system to relearn the battery’s capacity.
Do I need any special tools beyond a basic socket set?
Yes, you’ll need an insulated wrench set for the high-voltage connections, a torque wrench for proper bolt tightness, and an OBD-II scanner to reset the system. A digital multimeter is also essential to verify the system is dead before you start. These tools are a one-time investment that pays for itself in one battery replacement.