3m Car Wax Polish How to Achieve a Professional Level Shine
Learning how to use 3M car wax polish can transform your vehicle’s appearance from dull to dazzling. This guide covers everything from surface prep to final buffing, giving you the exact steps professionals follow. Whether you’re a beginner or a seasoned detailer, you’ll find practical tips to get a flawless, long-lasting shine.
There’s something deeply satisfying about seeing your car reflect the sky like a mirror. A great shine speaks volumes about how much you care for your vehicle. But achieving that level of gloss isn’t just about luck. It comes down to using the right products and following a proven process. 3M car wax polish has been a trusted name in the automotive world for decades, and for good reason. The brand offers a full lineup of polishing compounds, finishing polishes, and waxes designed to handle every paint condition imaginable.
Whether your car sits in the sun all day and suffers from oxidation, or you simply want to remove those fine swirl marks from weekly washing, there’s a 3M car wax polish solution for you. The key is knowing which product to use, how to apply it, and what mistakes to avoid along the way. This guide breaks it all down into simple, actionable steps you can follow right in your garage.
We’ll walk you through the entire process from start to finish. You’ll learn how to prep the surface, choose the right polishing pad, apply the compound correctly, and bring out the deepest gloss your paint has ever had. By the time you’re done reading, you’ll have the knowledge and confidence to achieve professional-level results without spending a fortune at a detailing shop.
Key Takeaways
- Right Product Matters: Choosing the correct 3M car wax polish for your paint condition saves time and prevents damage.
- Prep Is Everything: Washing, claying, and inspecting the surface before polishing ensures the best possible results.
- Technique Beats Pressure: Using light, even passes with a dual action polisher gives a swirl-free finish every time.
- Multiple Stages Work Best: Starting with a cutting compound and finishing with a polish creates depth and clarity.
- Protection Follows Polish: Sealing or waxing after polishing locks in the shine and shields your paint from UV rays.
- Avoid Common Errors: Skipping prep, using too much product, or polishing in direct sunlight leads to poor outcomes.
📑 Table of Contents
What Is 3M Car Wax Polish and Why It Matters
Before you dive into the how-to, it helps to understand what you’re working with. 3M car wax polish refers to a range of products engineered to correct paint imperfections and enhance the overall appearance of your vehicle’s finish. These products include compounds, polishes, and finishing agents, each designed for a specific level of correction.
The science behind these products is straightforward. A polishing compound contains tiny abrasive particles suspended in a lubricating carrier. When you apply it with a machine polisher, these micro-abrasives gently remove a thin layer of clear coat. This process levels out scratches, swirl marks, and oxidation, revealing a smoother and more reflective surface underneath.
Understanding the 3M Polish Lineup
3M organizes its polishing products into different tiers based on cutting power and finishing ability. The 3M Perfect-It series is one of the most popular choices among detailers. It offers everything from heavy-duty compounding to fine finishing. Each product in the line serves a distinct purpose, and using them in the right sequence is what creates that professional depth of gloss.
Here’s a quick look at the main categories:
- Cutting Compounds: These remove the most paint and tackle heavy defects like deep scratches and oxidation.
- Polishing Pads: Different foam densities match different compounds and paint conditions.
- Finishing Polishes: These refine the surface after compounding, removing haze and adding ultimate clarity.
- Waxes and Sealants: Applied after polishing, these lock in the shine and protect the paint from UV rays and environmental damage.
Why People Choose 3M for Their Vehicles
So why do so many professionals and DIYers reach for 3M car wax polish over other brands? The answer comes down to consistency and versatility. 3M has spent decades refining its formulations, and each product is tested under real-world conditions. Whether you’re working on a fresh clear coat or a 20-year-old paint job, there’s a 3M product designed for the task.
Another big advantage is availability. You can find 3M detailing products at most auto parts stores and online retailers. The brand also offers complete kits that include everything you need, which makes it easy for beginners to get started without guessing what to buy.
How to Prep Your Car Before Waxing
Preparation is the most overlooked step in the polishing process, and it’s also the most important. Skipping prep can lead to uneven results, marring, or even damage to your clear coat. Taking the time to properly prepare your surface ensures that the 3M car wax polish works on clean, uncontaminated paint and delivers the best possible finish.
Washing and Decontamination
Start with a thorough two-bucket wash using a quality car shampoo and soft microfiber mitt. This removes loose dirt, grime, and road film from the surface. Pay extra attention to areas like the lower panels, wheel wells, and door jambs where contamination tends to build up.
After washing, use a detailing clay bar or clay mitt with a lubricant to pull embedded contaminants from the paint. These particles, often called fallout or rail dust, sit embedded in the clear coat and can cause scratches during polishing if they’re not removed first. Run your hand over the paint after claying. It should feel glass-smooth.
Inspecting the Paint Surface
Once the car is clean and dry, inspect the paint under good lighting. A paint depth gauge can help you check the thickness of your clear coat, which tells you how much material you have to work with. This is especially important on older vehicles or cars that have been repainted.
Look for specific defects like:
- Swirl marks: Fine circular scratches usually caused by improper washing techniques.
- Oxidation: A chalky or faded appearance caused by prolonged UV exposure.
- Water spots: Mineral deposits from hard water that etch into the clear coat over time.
- Etching: Deeper marks caused by bird droppings, tree sap, or acid rain.
Identifying these issues early helps you choose the right 3M car wax polish and pad combination for the job. It also sets realistic expectations for how much correction is possible.
Quick Tip
Always work in a shaded area or indoors. Direct sunlight heats the paint and causes the polish to dry too quickly, leading to haze and difficult cleanup.
Step-by-Step Guide to Using 3M Car Wax Polish
Now that your car is prepped, it’s time to start polishing. This is where the magic happens. Follow these steps carefully, and you’ll see a dramatic improvement in your paint’s clarity and depth.
Choosing the Right Pad and Machine
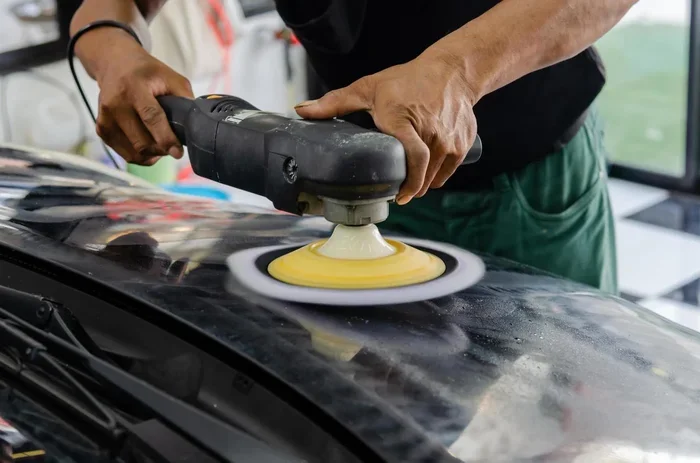
A dual action polisher is the best choice for most users. Unlike a rotary polisher, which spins in a single direction and requires more skill, a dual action machine oscillates in a random pattern. This greatly reduces the risk of burning through your clear coat while still providing excellent cutting power.
For pads, match the foam density to the product you’re using:
- Cutting pads: Use a firm, high-density foam when working with heavy compounds.
- Polishing pads: A medium-density foam works well for lighter polishes and finishing compounds.
- Finishing pads: Soft, low-density foam is ideal for the final polish stage to maximize gloss.
Always start with a clean pad. Even tiny pieces of dried compound from a previous session can create scratches in your paint.
Applying the Polish Correctly
Apply a small amount of 3M car wax polish directly to the polishing pad or onto the paint surface. A pea-sized drop is usually enough for a 2×2 foot section. Spread the product evenly across the pad before you start working.
Set your dual action polisher to a moderate speed. For most cutting compounds, speed 4 or 5 on a 1-10 scale works well. For finishing polishes, drop it down to speed 2 or 3. The key is to let the machine do the work. Pressing too hard slows the pad and generates excess heat, which can damage the paint.
Work in overlapping sections about 2×2 feet in size. Make slow, steady passes across each area for 3 to 5 seconds before moving to the next section. Keep the pad flat against the surface at a slight angle for the most even coverage.
Buffing and Finishing
Once the compound has done its job, use a clean microfiber towel to wipe away any residue. Don’t let the compound dry on the paint, as this creates a stubborn haze that’s difficult to remove. Work in sections, polishing one area and then immediately wiping it clean before moving on.
After the compound stage is complete and the entire vehicle has been treated, switch to a finishing polish for the second pass. This refines the surface even further, removing any remaining haze from the compound and adding a deep, wet-looking gloss.
Follow the same process: apply the finishing polish to a clean pad, work in small sections, and wipe away residue with a fresh microfiber cloth. When you’re done, the paint should look incredibly clear and reflective.
Best 3M Polish Products for Different Needs
Not all 3M car wax polish products are created equal. Each one is formulated for a specific purpose, and choosing the right one depends on your paint’s current condition. Here’s a breakdown of the best options for different scenarios.
3M Perfect-It Series for Heavy Correction
The 3M Perfect-It series is the go-to choice for heavy paint correction. These products feature aggressive cutting compounds that remove significant defects in fewer passes. The Perfect-It EXO compound, for example, is a favorite among professional detailers for its ability to level uneven clear coats and remove deep swirl marks quickly.
Best used with a firm cutting pad on a dual action polisher, these compounds are ideal for vehicles with moderate to heavy paint imperfections. They do remove more clear coat than lighter polishes, so always check your paint thickness before starting.
3M Ultra-Cut for Medium Polishing
The 3M Ultra-Cut compound strikes a great balance between cutting power and paint safety. It’s perfect for vehicles with light to moderate defects like swirl marks, light scratches, and minor oxidation. The Ultra-Cut removes less clear coat than the Perfect-It series, making it a safer choice for daily drivers and thinner paint jobs.
Pair it with a medium-density polishing pad for the best results. This combination smooths out the surface and prepares it for a final finishing polish.
3M Finishing Polish for Final Touches
After compounding and polishing, a finishing polish adds the final layer of clarity and depth. The 3M Perfect-It Finishing Polish is designed to remove the faint haze left by heavier compounds and leave behind a razor-sharp, high-gloss finish. It uses very fine abrasive particles that refine the surface without removing any measurable paint.
This is the product that makes your paint look like glass. It’s also the final step before applying a wax or sealant for protection.
| Product | Cutting Level | Best For | Pad Type |
|---|---|---|---|
| 3M Perfect-It Compound | Heavy | Deep scratches, heavy oxidation | Firm cutting pad |
| 3M Ultra-Cut Compound | Medium | Swirl marks, light scratches | Medium polishing pad |
| 3M Finishing Polish | Light | Haze removal, final gloss | Soft finishing pad |
| 3M Paint Guard Polish | Light | Maintenance polishing | Soft foam pad |
Common Mistakes to Avoid When Polishing
Even with the best 3M car wax polish in hand, mistakes can ruin your results. Learning what to avoid is just as important as learning what to do. Here are the most common errors people make when polishing their cars.
Using Too Much Pressure
This is the number one mistake beginners make. People assume that pressing harder on the polisher will speed up the process. In reality, it does the opposite. Excessive pressure slows the pad, reduces the cutting action, and builds up heat that can damage the paint. Let the machine and the compound do the work. Apply only light, even pressure and let the tool glide across the surface.
Skipping the Prep Work
Polishing over a dirty or contaminated surface is a recipe for disaster. Dirt particles trapped between the pad and the paint act like sandpaper, creating new scratches and swirl marks. Always wash, clay, and dry your car thoroughly before you start any polishing session.
Polishing in Direct Sunlight
Heat is the enemy of a good polish. Working in direct sunlight causes the compound to flash-dry on the paint, creating a stubborn haze that’s very difficult to remove. Find a shaded area or work indoors with good ventilation and lighting.
Not Changing Pads Between Stages
Using the same pad for compounding and finishing contaminates your finishing polish with coarse abrasive particles from the compound stage. This creates swirl marks instead of removing them. Always use clean, dedicated pads for each stage of the polishing process.
Over-Polishing the Paint
It’s tempting to keep polishing the same area to get it perfect, but over-polishing removes too much clear coat and thins the paint. Each pass with a compound removes a microscopic layer. Once the defect is gone, move on to the next section and finish with a light polish for refinement.
Expert Insight
Professional detailers often use a paint thickness gauge before and after polishing. This simple tool measures how much clear coat has been removed and helps ensure you’re not thinning the paint to unsafe levels. It’s a small investment that pays off in peace of mind.
Maintaining Your Shine After Polishing
Getting a perfect shine is one thing, but keeping it looking great is another challenge entirely. After all the hard work you’ve put into polishing with 3M car wax polish, you’ll want to protect that finish for as long as possible.
Sealing and Protecting the Finish
After polishing, always apply a layer of protection to seal in the gloss. A ceramic coating offers the longest-lasting protection, creating a semi-permanent bond with the clear coat that shields against UV rays, chemicals, and environmental contaminants. For a more budget-friendly option, a high-quality paint sealant or carnauba wax provides excellent protection and a warm, natural glow.
Apply the sealant or wax with a foam applicator pad, working in small sections. Allow it to haze according to the product instructions, then buff off with a clean microfiber towel. The result is a slick, hydrophobic surface that repels water and makes future washing easier.
How Often to Re-Polish
A good polish doesn’t last forever, but it can certainly last a long time with proper care. Most vehicles benefit from a light maintenance polish once or twice a year. This removes new swirl marks and oxidation that accumulate from regular washing and exposure to the elements.
Between full polishing sessions, keep your paint clean with a pH-neutral car shampoo and a soft microfiber wash mitt. Avoid automatic car washes with harsh brushes, as these quickly reintroduce swirl marks and scratches. A quick detail spray between washes also helps maintain the hydrophobic properties of your sealant and keeps the paint looking fresh.
Quick Tips for Long-Lasting Shine
- Wash your car in the shade to prevent water spots and soap from drying too quickly.
- Use a two-bucket method with a grit guard to minimize the risk of introducing new scratches.
- Dry with a plush, clean microfiber drying towel to prevent water spot formation.
- Apply a quick detailer spray after washing to boost gloss and add a layer of protection between full polishing sessions.
- Park in a garage or under a carport whenever possible to reduce sun exposure and environmental damage.
Taking care of your paint between polishing sessions means your 3M car wax polish results last longer and your car always looks its best. It’s a simple routine that pays off in both appearance and resale value.
Final Thoughts
Achieving a professional-level shine with 3M car wax polish is entirely within your reach. The process comes down to three key elements: thorough preparation, choosing the right product for your paint’s condition, and applying it with patience and the correct technique. You don’t need expensive equipment or years of experience. You just need the right guidance and a willingness to take your time.
Start with a clean, decontaminated surface. Choose the appropriate 3M car wax polish compound for your level of paint defects. Work in small sections with light, steady passes. And always finish with a protective sealant or wax to lock in your results. Follow these steps consistently, and you’ll be amazed at the transformation.
The pride that comes from seeing your own car reflect the world around it like a mirror is something every car owner should experience. With 3M car wax polish as your tool and the knowledge from this guide as your roadmap, you have everything you need to make that happen. Grab your polisher, pick your product, and get ready to enjoy a shine that turns heads every time you pull out of the driveway.
Frequently Asked Questions
Can I use 3M car wax polish by hand instead of a machine?
Yes, you can apply 3M car wax polish by hand, but it requires significantly more effort and time. Machine polishing with a dual action polisher provides consistent results and covers large areas quickly. Hand application works for light maintenance polishing but won’t match the correction power of a machine for deeper defects.
How long should I wait to wax after polishing with 3M car wax polish?
Wait at least 24 to 48 hours after polishing before applying a wax or sealant. This allows the paint surface to fully cool and any residual oils to dissipate. Applying protection too soon can trap contaminants and reduce the adhesion of your wax or ceramic coating.
Is 3M car wax polish safe for all paint types?
Most 3M polishing products are safe for modern automotive clear coats, but always check the product label for specific compatibility. Vehicles with older single-stage paint, repainted panels, or very thin clear coats require extra caution. Use a paint depth gauge and test a small hidden area first.
What is the difference between a compound and a polish?
A compound contains larger abrasive particles and is designed for heavy paint correction, removing deep scratches and oxidation. A polish uses finer abrasives and is meant for refining the surface after compounding, removing haze, and adding final gloss. Most professional detailing workflows use both in sequence for the best results.
How often should I polish my car with 3M car wax polish?
Most vehicles only need a full correctional polish once or twice a year. Light maintenance polishing can be done more frequently, such as every few months, depending on your driving conditions and how much time your car spends outdoors. Over-polishing should be avoided to preserve clear coat thickness.
Can 3M car wax polish fix deep scratches in my paint?
3M polishing compounds can reduce the appearance of light to moderate scratches by leveling the surrounding clear coat. However, deep scratches that have penetrated through the clear coat into the base color or primer cannot be fully removed by polishing alone. These types of scratches typically require touch-up paint or professional repainting to repair properly.
=== CONCLUSION ===
Getting a professional-level shine with 3M car wax polish is a rewarding process that anyone can learn. From proper surface prep to choosing the right compound and finishing with protection, each step plays a vital role in the final result. The products are designed to be forgiving and effective, whether you’re correcting heavy defects or simply refreshing your paint’s appearance.
Take your time, follow the steps outlined in this guide, and resist the urge to rush through the process. The difference between a good result and a great result often comes down to patience and attention to detail. With the right approach and quality 3M car wax polish products, your car can achieve a depth and clarity of shine that truly stands out.
Now that you have the knowledge, it’s time to put it into action. Your car is waiting, and the results will speak for themselves.