Can I Remove Car Seats to Clean My Car the Easy Way
Yes, you can remove car seats to clean your car, and it makes a huge difference. This guide walks you through the entire process safely and easily. You will learn the tools you need, the steps to follow, and how to avoid costly mistakes. Removing car seats gives you access to hidden dirt and grime that regular cleaning misses.
Key Takeaways
- Removing car seats is safe and effective: It allows you to deep clean areas that are normally hidden.
- You need basic tools: A socket wrench, pliers, and a cleaning kit are all you need.
- Follow the correct order: Disconnect the battery, remove bolts, and unplug connectors carefully.
- Deep cleaning is key: Use the right products for upholstery, carpet, and hard surfaces.
- Avoid common mistakes: Do not force connectors or skip reinstallation steps.
- Reinstallation matters: Properly secure seats to ensure safety and stability.
📑 Table of Contents
- Can I Remove Car Seats to Clean My Car the Easy Way?
- Why You Should Consider Removing Car Seats
- Tools and Equipment You Need
- Step-by-Step Guide to Removing Car Seats
- How to Deep Clean Your Car Interior After Seat Removal
- Common Mistakes to Avoid When Removing Car Seats
- Reinstalling Your Car Seats Properly
- How Often Should You Deep Clean Your Car Interior?
- Benefits of a Clean Car Interior
- When to Call a Professional
- Final Thoughts
Can I Remove Car Seats to Clean My Car the Easy Way?
Have you ever looked at the floor of your car and thought, “This is disgusting”? You are not alone. Dirt, crumbs, spills, and dust build up under and around car seats. Sometimes, a simple vacuum just does not cut it. That is where removing car seats comes in.
So, can you remove car seats to clean your car? The short answer is yes. Removing car seats to clean your car is one of the best ways to get a truly deep clean. It opens up access to the carpet, the seat rails, and those tight corners that a regular clean misses. Whether you have a sedan, SUV, or truck, this method works across most vehicle types.
In this guide, we will walk you through everything you need to know. We will cover why you should do it, what tools you need, and how to do it step by step. By the end, you will feel confident tackling this project yourself. Let us get into it.
Why You Should Consider Removing Car Seats
Many car owners skip removing seats because they think it is too hard or too risky. But the truth is, cleaning car seats after removal gives you a level of cleanliness that nothing else can match. Here are some strong reasons to consider it.
Access to Hidden Dirt and Grime
When seats stay in place, dirt hides underneath them. Food crumbs, pet hair, and dust settle deep into the carpet. You cannot reach these areas well with the seats in place. Removing them lets you see and clean every inch of your car floor.
Better Air Quality Inside Your Vehicle
Trapped dirt and debris can affect the air quality inside your car. Dust mites, mold spores, and allergens hide in the carpet and seat bases. A deep clean car interior routine that includes seat removal helps reduce these irritants. This is especially important for people with allergies or asthma.
Easier Upholstery Cleaning
Cleaning the seats themselves becomes much simpler when they are out of the car. You can flip them over, clean both sides, and treat stains more effectively. Car upholstery cleaning works best when you have full access and room to move around.
Spotting Hidden Damage
Removing seats also lets you inspect the floor pan and seat rails. You might find rust, moisture damage, or worn wiring that you never knew was there. Catching these issues early can save you from expensive repairs down the road.
Tools and Equipment You Need
Before you start, gather everything you need. Having the right tools makes the process smooth and fast. You do not need anything fancy, but a few key items will make a big difference.
Basic Tools for Seat Removal
- Socket wrench set: Most car seats are held by bolts. A socket wrench helps you remove them quickly.
- Socket extensions: Some bolts sit in tight spots. Extensions help you reach them.
- Pliers: You will need these for unplugging electrical connectors.
- Trim removal tools: These protect your car’s interior from scratches when removing clips.
- Car jack and jack stands: Optional but helpful for lifting the car if needed.
Cleaning Supplies for a Deep Clean
- Vacuum cleaner: A shop vac or wet/dry vac works best for car cleaning.
- Upholstery cleaner: Choose a cleaner safe for your seat material, whether fabric or leather.
- Carpet cleaner: A dedicated carpet cleaner helps lift deep stains from the car floor.
- All-purpose interior cleaner: Great for wiping down the floor pan and seat rails.
- Microfiber cloths: These are gentle and leave no lint behind.
- Soft-bristle brush: Useful for scrubbing stubborn dirt out of carpet fibers.
Safety Gear
Do not skip safety. Wear gloves to protect your hands from dirt and chemicals. Safety glasses help keep debris out of your eyes. If you are working under the car, jack stands are a must. Never rely on a jack alone.
Step-by-Step Guide to Removing Car Seats
Now that you have your tools ready, let us walk through the process. Follow these steps carefully for a safe and successful car seat removal experience.
Step 1: Disconnect the Battery
Start by disconnecting the negative terminal on your car battery. This is a safety step that prevents any electrical issues while you work. Use a wrench to loosen the nut on the negative cable and pull it off the terminal. Set it aside where it cannot touch the terminal again.
Step 2: Locate the Mounting Bolts
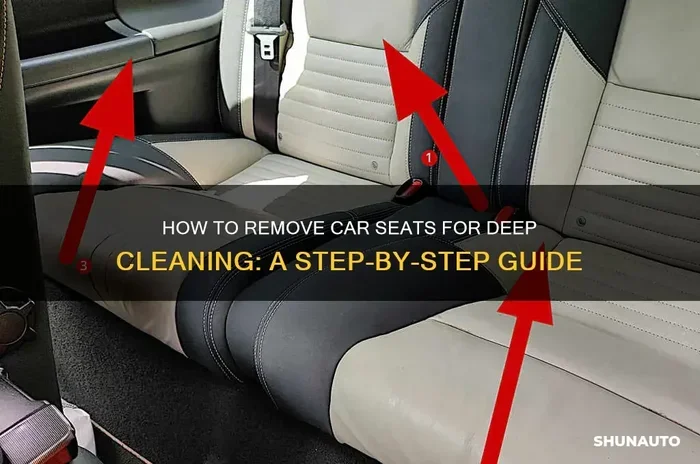
Move to the front of the seat. Look for bolts on the base of the seat. Most cars have four to six bolts per seat. Use your socket wrench to loosen and remove each bolt. Keep track of where each bolt came from. Some bolts may be different lengths.
Step 3: Unplug Electrical Connectors
Modern cars have seat heaters, seat belt sensors, and airbag wiring. Before you pull the seat out, you need to unplug these connectors. Look for clips or locks on the connectors. Press or squeeze them gently to release. Do not pull on the wires themselves.
Step 4: Remove the Seat
Once all bolts and connectors are free, carefully slide the seat out. You may need to tilt it slightly to get it past the seat rails. Have a helper if the seat is heavy. Set it on a clean surface or old blanket to keep it from scratching.
Step 5: Repeat for the Second Seat
Follow the same steps for the other seat. Work one seat at a time to stay organized. Label or group bolts and connectors so you know which ones go back where.
How to Deep Clean Your Car Interior After Seat Removal
This is the fun part. With the seats out, you finally get to see what is hiding under there. Here is how to make the most of this opportunity.
Vacuum Thoroughly
Start with a strong vacuum. Go over the entire car floor, including the trunk area if your car allows access. Use the crevice tool to reach tight spots. Pay extra attention to areas around the seat belt retractor and the pedal well. These spots collect the most dirt.
Clean the Carpet and Floor Mats
Remove the floor mats and shake them out. If they are rubber mats, wash them with soap and water. Let them dry completely before putting them back. For carpeted floors, spray a carpet cleaner and scrub gently with a soft brush. Blot up excess moisture with a microfiber cloth.
Wipe Down the Floor Pan
The floor pan is the metal base of the car. Spray it with an all-purpose cleaner and wipe it down. This removes grease, dust, and any residue from spills. Check for any signs of rust or moisture damage while you are at it.
Clean the Seat Rails and Tracks
The seat rails are where the seats slide in and out. These tracks collect dust and grime too. Spray them with a lubricant designed for car parts after cleaning. This keeps the seat movement smooth when you reinstall them.
Clean the Seats Themselves
Now is the perfect time to give each seat a thorough cleaning. Spray upholstery cleaner on fabric seats and scrub with a brush. For leather seats, use a leather cleaner and follow up with a conditioner. Clean both the top and bottom of each seat. Let them dry completely before reinstalling.
Quick Tip: On a sunny day, open all your car doors and let the interior dry naturally. Sunlight helps speed up the drying process and removes mild odors.
Common Mistakes to Avoid When Removing Car Seats
Even with the best intentions, mistakes happen. Knowing what to avoid saves you time, money, and frustration.
Skipping the Battery Disconnect
Never skip this step. Working on electrical components without disconnecting the battery can cause short circuits or trigger airbag warnings. It takes only a minute and keeps you safe.
Forcing Connectors Loose
Seat connectors are designed to click in and hold securely. If you pull too hard, you can break the clip or damage the wire. Use gentle pressure and release the locking mechanism first.
Losing Bolts and Hardware
Keep all bolts in a small container or zip-lock bag. Losing even one bolt can delay your reinstallation. Some bolts are unique to specific seat positions, so labeling helps.
Forgetting to Reinstall Safety Features
When putting seats back, make sure all seat belt retractors and sensors are reconnected. Missing a connection can affect your seat belt warning system or airbag functionality.
Rushing the Drying Process
After cleaning, make sure everything is completely dry before reinstalling seats. Trapped moisture can lead to mold and musty smells. Give it at least a few hours or overnight if needed.
Reinstalling Your Car Seats Properly
Once your car is sparkling clean, it is time to put the seats back. Proper reinstallation ensures your seats are safe and secure.
Slide the Seat Back In
Carefully slide each seat back onto the rails. Align the bolt holes with the floor pan. Do not force the seat. If it does not fit easily, check for obstructions or misaligned connectors.
Reconnect Electrical Plugs
Plug in all electrical connectors firmly until you hear or feel them click. Double-check each one. A loose connection can cause warning lights on your dashboard or malfunctioning seat heaters.
Bolt the Seats Down
Replace each bolt in its original position. Tighten them with your socket wrench. Make sure they are snug but do not overtighten. Overtightening can strip the threads or damage the floor pan.
Reconnect the Battery
Once both seats are secure, reconnect the negative battery terminal. Tighten the nut and make sure the connection is firm. Start the car and check for any warning lights. Test the seat heaters and seat belt sensors to confirm everything works.
How Often Should You Deep Clean Your Car Interior?
A good car cleaning guide includes regular deep cleaning sessions. Most experts recommend removing seats and doing a thorough clean every three to six months. However, if you eat in your car often or have pets, you may need to do it more frequently.
Between deep cleans, keep up with regular vacuuming and surface wiping. This prevents buildup and makes each deep clean session faster and easier. Think of it like brushing your teeth between dentist visits.
Benefits of a Clean Car Interior
A clean car interior does more than just look good. Here are some benefits you might not have considered.
- Better resale value: A well-maintained interior adds to the overall value of your vehicle. Buyers notice clean carpets and stain-free seats.
- Healthier environment: Removing allergens, dust, and bacteria from your car creates a healthier space for you and your passengers.
- Improved driving experience: Sitting in a clean, fresh-smelling car makes every drive more enjoyable.
- Longer-lasting materials: Regular deep cleaning prevents stains and wear from setting in. Your upholstery and carpet stay in better condition longer.
When to Call a Professional
While removing car seats to clean your car is doable for most people, there are times when calling a professional makes sense. If your car has complex electrical systems or you are uncomfortable working with airbag components, a professional car detailing service can help. They have the experience and tools to handle tricky situations safely.
Also, if your car has significant mold or heavy staining, a professional deep clean may be the best option. They use industrial-grade equipment that can tackle problems home tools cannot always fix.
Final Thoughts
So, can you remove car seats to clean your car? Absolutely. Removing car seats to clean your car the easy way is one of the most effective steps you can take for a truly clean vehicle. It gives you access to hidden dirt, lets you clean every surface thoroughly, and helps your car interior last longer.
With the right tools, a little patience, and the steps outlined in this guide, you can do it yourself with confidence. Start with one seat if you are new to the process. Once you see the results, you will wonder why you did not do it sooner. A clean car is a happy car, and the effort you put in pays off every time you step inside.
Take your time, follow the safety steps, and enjoy the process. Your car will thank you for it.
Frequently Asked Questions
Is it safe to remove car seats by yourself?
Yes, it is safe as long as you follow the correct steps. Always disconnect the battery first and carefully unplug any electrical connectors. Take your time, keep track of all bolts, and never force any parts. If you feel unsure, ask a friend for help or consult your vehicle’s owner manual.
How long does it take to remove and clean car seats?
For most cars, the entire process takes about two to three hours. Removing both seats usually takes 30 to 45 minutes. Deep cleaning the interior and seats can take another hour or more, depending on how dirty they are. Allow extra drying time before reinstalling the seats.
Do I need any special tools to remove car seats?
No special tools are needed. A basic socket wrench set, pliers, and trim removal tools are enough for most vehicles. You also need standard cleaning supplies like a vacuum, upholstery cleaner, and carpet cleaner. Most of these items are easy to find at any hardware or auto parts store.
Will removing car seats void my vehicle warranty?
Generally, removing car seats for cleaning does not void your warranty. However, if any damage occurs during the process, it may not be covered. Always check your warranty terms and follow the manufacturer’s guidelines. Be gentle with connectors and avoid damaging any wiring or floor components.
Can I remove just one car seat for cleaning?
Yes, you can remove just one seat if you prefer. This works well if only one seat needs deep cleaning or if you want to take it one step at a time. Just make sure to follow the same safety steps for the seat you remove. It is a great way to ease into the full process.
What should I do if I lose a seat bolt during removal?
Do not panic. Check your workspace carefully before reinstalling the seat. If you cannot find the bolt, visit an auto parts store or dealership with your vehicle model information. They can help you find the correct replacement bolt. Always keep all hardware in a labeled container during the process to avoid this situation.