How Do I Manually Clear Car Trouble Codes Yourself
Learning how do I manually clear car trouble codes yourself is easier than you think. With the right tools and a little patience, you can reset your check engine light and clear diagnostic trouble codes at home. This guide walks you through every step, from finding the OBD-II port to understanding what those fault codes actually mean.
That little orange light on your dashboard is glowing again. You know the one. The check engine light. It can make anyone feel a knot in their stomach. But here is the good news. You do not need to rush to the mechanic or spend hundreds of dollars just to turn that light off.
In this guide, we will walk you through exactly how do I manually clear car trouble codes yourself. Whether you are dealing with a loose gas cap or something more serious, clearing diagnostic trouble codes at home is totally doable. Let us break it down step by step.
Key Takeaways
- You can clear car trouble codes yourself: No mechanic visit is needed for most OBD-II code resets.
- An OBD-II scanner is essential: It reads and clears fault codes directly from your vehicle’s ECM.
- Know the code first: Always look up what the code means before clearing it.
- Disconnecting the battery is an option: But it comes with risks and may not work on all vehicles.
- Some codes need root cause fixes: Clearing without repair will just bring the code back.
- Reset procedures vary by car: Different vehicles have different methods for clearing codes.
- Prevention saves time and money: Regular car maintenance tips can help avoid future trouble codes.
📑 Table of Contents
- What Are Car Trouble Codes?
- Tools You Need to Clear Car Trouble Codes
- Step-by-Step Guide to Manually Clearing Car Trouble Codes
- Common Trouble Codes and What They Mean
- When to Clear Codes and When Not To
- Tips to Prevent Future Trouble Codes
- Expert Insights on Clearing Trouble Codes
- Key Takeaways
- Conclusion
What Are Car Trouble Codes?
Before you can clear codes, you need to understand what they are. Every modern car built after 1996 uses a standardized system called OBD-II, which stands for On-Board Diagnostics II. This system monitors dozens of sensors and components in your vehicle at all times.
When something goes wrong, the engine control module (also called the ECM) stores a fault code. This code is essentially an error message from your car. It tells you which system or part is causing a problem. The check engine light is your vehicle’s way of waving a red flag and saying, “Hey, something needs attention!”
Types of Diagnostic Trouble Codes
Not all error codes car systems use are the same. They fall into different categories based on severity:
- Green codes (Status A): These are minor issues. Your car is still safe to drive, but it needs a checkup soon.
- Yellow codes (Status B): These indicate a problem that could get worse if ignored. Pay attention.
- Red codes (Status C): These are serious. Stop driving and address the issue immediately.
- Red codes (Status D): These are critical. Your vehicle may be unsafe to operate at all.
Each code starts with a letter followed by four numbers. The letter tells you which system is affected. For example, “P” means powertrain, “B” means body, “C” means chassis, and “U” means network communications. The numbers give you more specific details about the problem.
Why Understanding Codes Matters
Here is why this matters. When you know what a trouble code explanation means, you can make smarter decisions. You might fix a simple issue yourself and save a ton of money. Or you might realize you need a professional. Either way, knowledge is power. Clearing codes without understanding them is like taking medicine without knowing what is wrong with you.
Tools You Need to Clear Car Trouble Codes
Clearing vehicle diagnostics codes at home is simple. You just need the right tools. Here is what you will need before you get started.
OBD-II Scanner
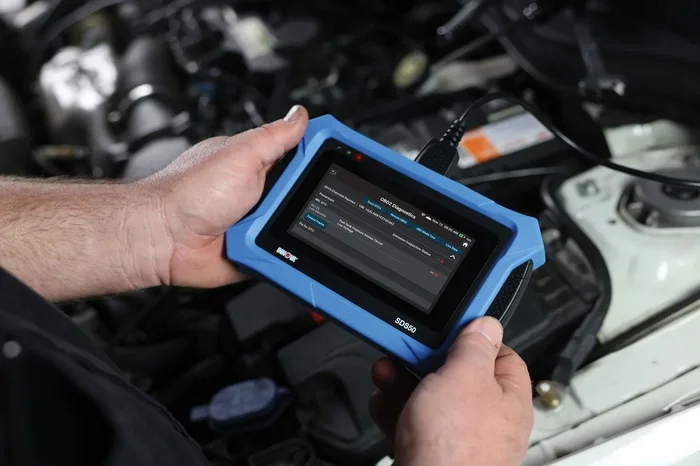
The most important tool is an OBD-II scanner, also called a code reader tool. This small device plugs directly into your car’s OBD-II connector. It reads the stored codes and lets you clear them. You can buy one for as little as $20 to $30 at any auto parts store.
There are two main types of scanners:
- Basic code readers: These are simple devices that read and clear codes. They are affordable and work great for most people.
- Advanced diagnostic tools: These provide live data, freeze frame data, and detailed fault code explanation reports. They cost more but offer much more information.
If you only need to clear codes occasionally, a basic reader will do the job just fine. Brands like Innova, ANCEL, and BlueDriver are popular choices for car maintenance tips and home use.
Other Helpful Tools
Besides a scanner, you might also want:
- A notebook or phone: To write down codes before clearing them.
- A flashlight: To see under the dashboard and find the OBD port.
- A multimeter: If you plan to test sensors or electrical connections yourself.
- Your vehicle owner’s manual: This will help you locate the OBD port and understand your specific car’s systems.
Step-by-Step Guide to Manually Clearing Car Trouble Codes
Now let us get into the actual process. Follow these steps to clear fault codes on your own. This process works for most cars, trucks, and SUVs made after 1996.
Step 1: Park Your Vehicle Safely
First things first. Park your car on a flat surface. Turn off the engine. Make sure the ignition is off but the car is in park (or neutral for manual transmissions). You want a safe, stable workspace before you start poking around under the dashboard.
Step 2: Locate the OBD-II Port
The OBD-II port is almost always in the same spot. It is usually found under the dashboard on the driver’s side. Look for a small rectangular plug with 16 pins. It is often near the steering column, below the fuse box area, or tucked behind the lower dashboard panel.
If you have trouble finding it, check your vehicle owner’s manual. It will show you the exact location. Some cars also have a small diagram on the dashboard side of the glove box.
Step 3: Plug In Your OBD-II Scanner
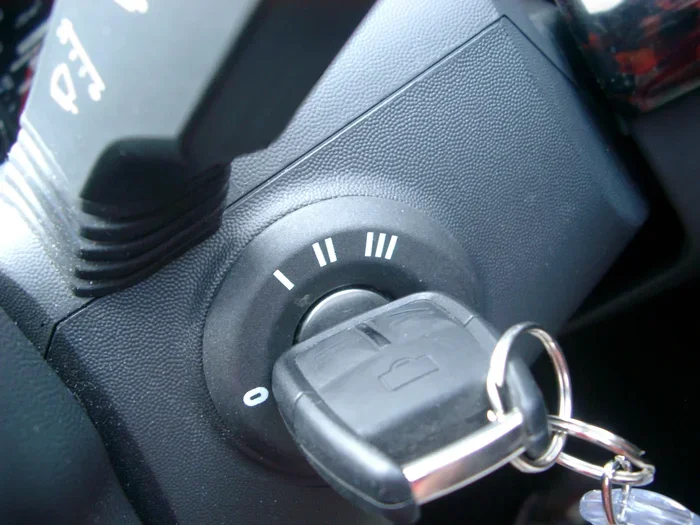
Take your code reader tool and plug it firmly into the OBD-II connector. The connector only fits one way, so do not force it. Once plugged in, turn the ignition to the “ON” position. Do not start the engine. The scanner should power on automatically and display a menu.
Wait a moment for the scanner to connect with your vehicle’s engine control module. Most scanners will show a “Searching” or “Connecting” message. Once connected, you are ready to read the codes.
Step 4: Read the Stored Codes
This is a very important step. Before you clear anything, write down or take a photo of all the codes stored in your car’s memory. The scanner will display each code along with a brief description.
For example, you might see codes like:
- P0300: Random/Multiple Cylinder Misfire Detected
- P0420: Catalyst System Efficiency Below Threshold
- P0171: System Too Lean (Bank 1)
Write these down. Look them up online or in your scanner’s manual. Understanding what each code means helps you decide the best next step.
Step 5: Clear the Codes
Once you have recorded the codes, you can now clear them. On most scanners, you will see a menu option that says “Clear Codes,” “Erase DTCs,” or “Reset.” Select that option and confirm. The scanner will send a command to your car’s ECM to erase the stored diagnostic trouble codes.
After clearing, the check engine light should turn off. If it does not, do not panic. Sometimes the light takes a few ignition cycles to reset. Try turning the car off, waiting 30 seconds, and turning it back on.
Step 6: Test Drive and Verify
Take your car for a short test drive. Drive for at least 10 to 15 minutes under different conditions. This allows your car’s systems to relearn and monitor. After the drive, plug the scanner back in and check if any codes have returned.
If codes come back, that means the underlying problem is still there. You need to fix the root cause before clearing again. If no codes return, congratulations. You successfully cleared the codes yourself.
Alternative Method: Disconnecting the Battery
Some people prefer to reset check engine light by disconnecting the car battery. This method works, but it comes with caveats. When you disconnect the battery, you clear all stored codes and reset the engine control module. However, this method also erases your radio presets, clock settings, and sometimes power window calibration.
Here is how to do it safely:
- Turn off the engine and all accessories.
- Open the hood and locate the battery.
- Use a wrench to loosen the negative (black) terminal clamp.
- Disconnect the cable and move it away from the battery terminal.
- Wait at least 15 minutes.
- Reconnect the cable and tighten the clamp.
- Turn the ignition to ON and check if the light is off.
Keep in mind that this method does not work on all vehicles. Some modern cars have systems that keep codes in memory even without battery power. Always try the scanner method first.
Common Trouble Codes and What They Mean
Not all fault codes are created equal. Some are simple fixes you can handle in minutes. Others point to serious problems that need professional attention. Here are some of the most common codes people encounter.
| Code | Description | Common Cause | Severity |
|---|---|---|---|
| P0420 | Catalyst System Low Efficiency | Failing catalytic converter | Moderate |
| P0171 | System Too Lean (Bank 1) | Vacuum leak or dirty MAF sensor | Low to Moderate |
| P0300 | Random Cylinder Misfire | Spark plugs, ignition coils, or fuel injectors | Moderate to High |
| P0401 | Insufficient EGR Flow | Clogged EGR valve or passage | Low to Moderate |
| P0455 | EVAP System Large Leak | Loose or damaged gas cap | Low |
| P0128 | Coolant Thermostat Below Thermostat Regulating Temperature | Stuck-open thermostat | Low |
As you can see, some of these codes are easy fixes. A loose gas cap can trigger the P0455 code. Simply tightening or replacing the cap might solve the problem entirely. Other codes like P0300 might require spark plug replacement or ignition coil testing.
The key takeaway here is to never clear codes blindly. Always understand what the code means first. This approach saves you time, money, and frustration in the long run.
When to Clear Codes and When Not To
Knowing how do I manually clear car trouble codes yourself is one thing. Knowing when to actually do it is another. Timing matters a lot in car diagnostics.
Clear Codes When
- You have already fixed the underlying problem.
- The code was triggered by a one-time event, like a loose gas cap.
- You want to check if the repair resolved the issue.
- You are preparing your car for an inspection or emissions test.
Do Not Clear Codes When
- You do not know what caused the code in the first place.
- The check engine light is flashing (this indicates a serious problem).
- Your car is showing signs of poor performance, like rough idling or stalling.
- You are using the code clearing as a permanent fix without addressing the root cause.
Here is an important point. The check engine light exists for a reason. It protects your engine and helps you catch problems early. Clearing it just to hide a warning is never a good idea. Always fix the root cause first.
Tips to Prevent Future Trouble Codes
Once you have cleared your codes, you probably want to avoid seeing that dreaded light again. Here are some practical car maintenance tips that can help.
Perform Regular Vehicle Maintenance
Stick to your manufacturer’s recommended maintenance schedule. Change your oil on time, replace air filters regularly, and keep up with spark plug replacements. These simple automotive diagnostics and maintenance habits go a long way in preventing fault codes from appearing.
Pay Attention to Warning Signs
Do not ignore small changes in how your car feels or sounds. Unusual noises, decreased fuel economy, or slight performance changes can all be early warning signs. Catching problems early means smaller repairs and fewer surprise codes.
Use Quality Fuel and Fluids
Fill up at reputable gas stations. Use the fuel grade recommended in your owner’s manual. Low-quality fuel can cause a range of error codes car systems detect. Similarly, always use the correct type of engine oil and coolant for your vehicle.
Keep Your Gas Cap Tight
This sounds silly, but a loose gas cap is one of the most common reasons for a check engine light. After fueling, always make sure the cap clicks at least three times. Replace the cap if it looks worn or damaged.
Address Small Issues Immediately
If you notice a minor issue, do not wait for it to become a major problem. A small vacuum leak today can turn into a rich fuel mixture and a P0171 code tomorrow. Quick fixes prevent bigger headaches down the road.
Keep an OBD-II Scanner in Your Glove Box
Having a code reader tool handy at all times is one of the best car maintenance tips you can follow. When a code appears, you can read it immediately and decide whether it is something you can handle yourself or if you need professional help. This knowledge gives you confidence and control over your vehicle.
Expert Insights on Clearing Trouble Codes
We asked experienced automotive technicians for their advice on clearing diagnostic trouble codes at home. Here is what the pros had to say.
“Always read the code before clearing it,” says Mike, a certified ASE master technician with over 20 years of experience. “The code tells a story. If you erase it without understanding the story, you might miss something important.”
“The battery disconnect method works,” adds Sarah, an automotive instructor, “but it should be your last resort. Some newer vehicles have modules that keep codes even after a battery disconnect. A scanner is always the better option.”
“Never clear codes right before an emissions test,” warns Tom, a long-time auto shop owner. “The monitor needs time to run and complete its self-tests. Clearing codes a week before the test gives the monitors time to reset properly.”
These expert insights highlight a common theme. Clearing codes is a tool, not a magic fix. Use it wisely, and it will serve you well.
Key Takeaways
- You can clear car trouble codes yourself: No mechanic visit is needed for most OBD-II code resets.
- An OBD-II scanner is essential: It reads and clears fault codes directly from your vehicle’s ECM.
- Know the code first: Always look up what the code means before clearing it.
- Disconnecting the battery is an option: But it comes with risks and may not work on all vehicles.
- Some codes need root cause fixes: Clearing without repair will just bring the code back.
- Reset procedures vary by car: Different vehicles have different methods for clearing codes.
- Prevention saves time and money: Regular car maintenance tips can help avoid future trouble codes.
Conclusion
Now you know exactly how do I manually clear car trouble codes yourself. The process is straightforward and empowering. With a basic OBD-II scanner, a few simple tools, and the knowledge from this guide, you can take control of your vehicle’s health.
Remember to always read and understand the codes before clearing them. Fix the root cause first, then clear the codes. Use the check engine light as a guide, not an enemy. And most importantly, keep up with regular car maintenance tips to prevent future issues from arising.
Clearing diagnostic trouble codes at home saves you time and money. It also gives you a better understanding of your vehicle. So the next time that check engine light comes on, do not panic. Grab your scanner, follow the steps, and handle it like a pro.
Your car talks to you through these codes. Learning to listen is one of the best skills any car owner can develop. Now go out there and clear those codes with confidence.
Frequently Asked Questions
Can I clear car trouble codes without an OBD-II scanner?
Yes, you can disconnect the car battery to clear codes, but this method is less reliable. Some modern vehicles retain codes even after a battery disconnect. An OBD-II scanner is the most effective and recommended tool for clearing fault codes safely.
Will clearing trouble codes fix the underlying problem?
No, clearing codes only erases the error message. It does not repair the actual issue. If the root cause is not fixed, the codes will return. Always diagnose and repair the problem before clearing any diagnostic trouble codes.
How long does it take to clear car trouble codes?
The actual process takes only a few minutes. Plugging in the scanner, reading the codes, and clearing them usually takes less than five minutes. However, completing monitor readiness after clearing may take several drive cycles over a few days.
Is it safe to drive with the check engine light on?
It depends on the severity of the code. A steady check engine light usually means a non-emergency issue, but you should get it checked soon. A flashing check engine light indicates a serious problem, such as engine misfires, and you should stop driving immediately to avoid costly damage.
Can I clear trouble codes before an emissions test?
It is not recommended to clear codes right before an emissions test. Most testing stations check for pending codes and monitor readiness status. Clearing codes too close to the test may result in a failed inspection. Clear codes at least one to two weeks before testing to allow all monitors to complete.
What is the difference between a pending code and a confirmed code?
A pending code is stored when a problem is detected once but has not yet repeated. A confirmed code is stored when the same problem is detected multiple times across several drive cycles. Pending codes may clear on their own, but confirmed codes usually require manual clearing with a scanner.