Harley-Davidson Panel Lights Explained: Meanings Fixes
Harley-Davidson panel lights tell you what is happening under the hood. Each symbol on your motorcycle dashboard has a specific meaning, from oil warnings to battery alerts. This guide breaks down every dashboard indicator and gives you simple, step-by-step dashboard light fix tips you can do at home.
You are riding your Harley-Davidson down an open road. The wind is in your face. Then you glance down and see a light glowing on your motorcycle instrument panel. It is red. It is yellow. What does it mean? Should you stop right now? This is the moment every rider faces. Harley-Davidson panel lights are not just random symbols. They are your bike’s way of talking to you. Each light tells a story about what is happening under the hood. Some mean a quick fix. Others mean a trip to the shop. In this guide, we break down every light, every symbol, and every warning you will see on your motorcycle dashboard. We also give you real, practical fixes you can try at home. By the end, you will never stare at a glowing symbol in confusion again.
Knowing your dashboard indicator meanings is one of the most important skills any rider can have. It keeps you safe. It saves money. It keeps your bike running strong. Whether you ride a Street Glide, a Road King, or a Sportster, the panel lights work the same way. The colors tell you how urgent the problem is. The symbols tell you what the problem is. Let us dive in and make sense of it all.
Key Takeaways
- Know Your Lights: Understanding Harley-Davidson panel lights helps you spot problems early and avoid costly repairs.
- Quick Fixes Exist: Many warning lights, like a loose gas cap or dead battery, have simple solutions you can do yourself.
- Safety First: Red lights mean stop now. Yellow lights mean check soon. Green lights mean all is good.
- Model Differences Matter: Different Harley-Davidson models may have slightly different panel light layouts and symbols.
- Preventive Care Wins: Regular Harley-Davidson maintenance keeps your instrument cluster working right for years.
- Don’t Ignore Warnings: Ignoring even a small light can lead to big engine or electrical problems down the road.
📑 Table of Contents
Understanding Your Harley-Davidson Panel Lights
Why Panel Lights Matter on Your Motorcycle
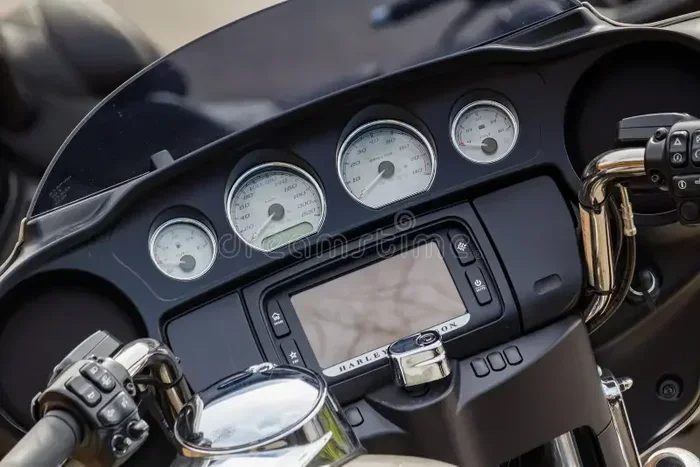
Your Harley-Davidson instrument cluster is like a control center. It sits right in front of you. It shows your speed, your fuel level, and your engine health. The lights on this cluster are your first line of defense. They warn you before a small issue becomes a big repair bill. Think of them as your bike’s voice. When something goes wrong, the panel speaks up. Ignoring that voice can lead to engine damage, electrical failures, or even safety risks on the road.
Most Harley-Davidson dashboard warning lights use a simple color system. Red means stop and fix it now. Yellow or amber means check it soon. Green or blue means everything is working fine. This system is universal across most motorcycle warning lights. Once you learn the colors, you can read your panel like a book.
The Color Code Explained
Colors are the language of your motorcycle gauge lights. Here is what each color means in simple terms:
- Red Lights: These are urgent. They mean stop riding safely and check the problem right away. Red lights often signal oil pressure loss, brake issues, or battery failure.
- Yellow or Amber Lights: These are warnings. They mean something needs attention soon but you do not need to pull over immediately. Engine temperature, ABS issues, and turn signal reminders often show as yellow.
- Green or Blue Lights: These are good news. They tell you a system is active and working. High beams, turn signals, and cruise control often glow green or blue when active.
Understanding this color code is the first step to mastering your dashboard light fix skills. When you see a light, your first question should be, “What color is it?” That answer guides your next move.
Common Harley-Davidson Panel Lights and What They Mean
Oil Pressure Warning Light
The oil pressure light is one of the most important lights on any Harley-Davidson model. It looks like an old oil can with a drip. If this light comes on, it means your engine oil pressure is too low. Low oil pressure can destroy your engine in minutes. If you see this red light, pull over safely. Check your oil level right away. Add oil if needed. If the light stays on, do not keep riding. Call a mechanic. This is not a light to ignore.
Common causes include low oil levels, a failing oil pump, or a clogged oil filter. Regular oil changes keep this light off and your engine healthy.
Battery or Charging System Light
This light looks like a small battery with plus and minus symbols. It tells you your motorcycle electrical system is not charging properly. Your bike runs on the battery alone once this light comes on. You might get a few miles before the engine stalls. Common causes are a bad alternator, loose wiring, or a worn-out battery. If this yellow light shows up, head to a shop soon. Do not wait for a long ride.
ABS Warning Light
Anti-lock braking systems are a great safety feature. The ABS light looks like the letters “ABS” inside a circle. If this yellow light stays on, your ABS system is not working. Your regular brakes still work, but you lose the anti-lock protection. This is especially important in wet or rainy conditions. A faulty wheel speed sensor often causes this light. A simple sensor replacement usually fixes the problem. Check your Harley-Davidson maintenance schedule for ABS inspections.
Engine Temperature Warning
Overheating can ruin an engine fast. The temperature light looks like a thermometer. If it glows red, your engine is too hot. This can happen from low coolant, a broken thermostat, or a clogged radiator. If you see this light, find a safe spot and turn off the engine. Let it cool down. Check the coolant level. Never open the radiator cap when the engine is hot. Wait for it to cool first.
Turn Signal Indicator
Your turn signals are essential for safety. The arrow lights on your motorcycle instrument cluster blink left or right when you signal. If one arrow blinks faster than the other, it means a bulb is burned out. This is an easy fix. Just replace the bulb. If both arrows stop blinking, check the flasher relay. These are cheap parts and simple swaps.
High Beam Light
A blue or green light shaped like a headlamp with horizontal lines means your high beams are on. This is a helpful reminder, especially for other drivers on the road. Some riders forget they left their high beams on. This light keeps you aware. Just toggle the switch to turn them off when not needed.
Check Engine Light
The check engine light is one of the most common Harley-Davidson warning symbols. It can mean many things. A loose gas cap, a faulty oxygen sensor, or a more serious engine issue. If this yellow light comes on, do not panic. First, check your gas cap. Tighten it until it clicks. Drive for a few miles and see if the light goes off. If it stays on, use an OBD-II scanner to read the error codes. These codes give you a clear direction for the fix.
Service Light
The service light reminds you it is time for routine maintenance. It often looks like a wrench or spanner icon. This is your Harley service light. It does not mean something is broken. It means your bike is due for an oil change, tire rotation, or inspection. Reset it after each service to keep tracking your maintenance schedule.
How to Fix Dashboard Warning Lights on Your Harley
Step-by-Step Troubleshooting Guide
When a dashboard warning light appears, you do not need to panic. Follow these simple steps to diagnose and fix the issue:
- Check the Color: Red means stop. Yellow means check soon. Green means all good.
- Note the Symbol: Look at the shape. Is it a battery? A thermometer? A wrench? Each symbol points to a specific system.
- Check the Simple Things First: Gas cap tightness, oil level, and battery connections are easy checks that fix many issues.
- Use a Scanner: An OBD-II scanner reads error codes from your motorcycle electrical system. This gives you a clear starting point.
- Consult Your Manual: Your Harley owner manual has a full list of symbols and their meanings. Keep it handy.
- Fix or Seek Help: If the simple fix works, great. If not, take it to a trusted mechanic.
Common Dashboard Light Fixes You Can Do at Home
Many dashboard light fix tasks are simple and do not need a mechanic. Here are the most common ones:
- Tighten the Gas Cap: A loose gas cap triggers the check engine light. Twist it until it clicks. Drive a few miles. The light should go off.
- Replace a Burned Bulb: Turn signal and brake light bulbs burn out often. Replacement bulbs are cheap and easy to swap.
- Reset the Battery Connection: Corroded battery terminals cause many warning lights. Clean them with a wire brush and reconnect securely.
- Top Off Coolant: Low coolant triggers the engine temperature light. Add the right coolant mix and check for leaks.
- Check Fuse Boxes: A blown fuse can kill a dashboard light or keep one on. Inspect your fuses and replace any that are burned out.
Tools Every Harley Owner Should Have
Having the right tools makes instrument panel repair much easier. Here is a short list of essentials:
- OBD-II scanner for reading error codes
- A basic multimeter for checking electrical connections
- A set of screwdrivers and wrenches
- Replacement bulbs for turn signals and brake lights
- Electrical contact cleaner
- Your Harley owner manual
These tools are affordable and will save you hundreds of dollars in mechanic visits over the years. Keep them in a small toolbox in your garage or saddlebag.
Harley-Davidson Panel Lights by Model
Differences Across the Harley Lineup
Not all Harley-Davidson models have the exact same panel layout. The basic warning lights are similar, but the design and placement can vary. A Street Glide has a full dashboard with a large screen. A Sportster has a simpler cluster. A Road King may have additional lights for its audio system or navigation. Regardless of the model, the color system stays the same. Red means urgent. Yellow means caution. Green means active and working.
Modern Bikes with Digital Displays
Newer Harley models come with digital displays and touchscreen interfaces. These bikes show more than just warning lights. They display error codes, service reminders, and even tire pressure readings. The motorcycle gauge lights on these models are often LED-based and brighter. They are easier to read in daylight or at night. If you own a newer model, take time to explore the menu settings. You can customize what information appears on your screen.
Classic Models with Analog Gauges
Older Harleys use analog gauges with physical needles. The panel lights in these models are simpler. They usually include just a few key warning lights. If you ride a classic model, learn the specific lights for your year and model. Online forums and Harley clubs are great resources for finding model-specific dashboard indicator meanings.
Preventing Panel Light Issues on Your Harley
Regular Maintenance Tips
The best way to avoid dashboard warning lights is through regular care. Here are simple habits that keep your panel and electrical system in top shape:
- Follow the Service Schedule: Stick to your Harley-Davidson maintenance plan. Regular oil changes, inspections, and part replacements keep problems away.
- Check Electrical Connections: Loose or corroded wires cause many panel light issues. Inspect connections under the seat and near the battery every few months.
- Keep Your Battery Clean: A dirty battery terminal can cause flickering lights and false warnings. Clean terminals with a baking soda and water mix.
- Replace Bulbs Promptly: Do not wait for a burned bulb to cause a warning light. Replace them as soon as you notice a problem.
- Use Quality Parts: Cheap replacement bulbs and fuses can fail quickly. Invest in quality parts from trusted suppliers.
Seasonal Care for Your Electrical System
Weather affects your motorcycle electrical system more than you might think. Cold winters can drain your battery. Hot summers can overheat your engine. Rain and humidity can cause corrosion on electrical connections. Here is what to do each season:
- Winter: Use a battery tender to keep your charge stable. Store your bike in a warm, dry place if possible.
- Spring: Check all lights and gauges before your first ride of the season. Replace any worn-out bulbs or frayed wires.
- Summer: Monitor your engine temperature closely. Ensure your coolant levels are full before long rides in hot weather.
- Fall: Prepare your bike for winter storage. Clean terminals, charge the battery fully, and inspect the entire electrical system.
When to See a Professional Mechanic
Signs You Need Expert Help
Many dashboard light fix tasks are simple and DIY-friendly. But some issues need a professional touch. Here are signs it is time to visit a mechanic:
- Multiple Lights Stay On: If several warning lights come on at once, there may be a serious electrical or engine problem.
- Lights Flashing Rapidly: Rapid flashing often signals a critical fault that needs immediate attention.
- Lights Return After Fixing: If you fixed the issue but the light stays on, there may be a deeper problem the scanner needs to reveal.
- Strange Noises with Warning Lights: Grinding, clicking, or knocking sounds combined with a warning light mean stop riding and get help.
- You Cannot Find the Cause: Sometimes the problem is not obvious. A professional mechanic has the tools and experience to diagnose it quickly.
Finding the Right Harley Mechanic
Not every mechanic knows Harleys inside and out. Look for shops that specialize in Harley-Davidson models. Ask fellow riders for recommendations. Check online reviews. A good mechanic will explain the problem clearly and give you honest advice on what needs fixing and what can wait. Building a relationship with a trusted mechanic saves you time and money in the long run.
Key Takeaways
- Know Your Colors: Red means stop now. Yellow means check soon. Green means all systems are working fine.
- Learn the Symbols: Each symbol on your Harley-Davidson panel lights points to a specific system or component.
- Start Simple: Many warning lights come from easy fixes like a loose gas cap or a burned bulb.
- Use the Right Tools: An OBD-II scanner and a multimeter are your best friends for electrical troubleshooting.
- Stay on Top of Maintenance: Regular care prevents most panel light issues before they start.
- Do Not Ignore Warning Lights: Even a small yellow light can point to a bigger problem if left unchecked.
- Call a Pro When Needed: Some issues need expert diagnosis. Knowing when to seek help keeps you safe and your bike running.
Conclusion
Your Harley-Davidson panel lights are your best friend on the road. They tell you what your bike needs before a small issue turns into a big problem. By learning what each light means and how to fix common issues, you become a smarter, more confident rider. You save money on repairs. You stay safe on every ride. You keep your beloved Harley running strong for years to come.
Take a few minutes today to study your dashboard. Learn each symbol. Know the color code. Keep your tools handy. The more you understand your motorcycle instrument panel, the more enjoyable every ride will be. Your Harley speaks to you. Now you know exactly what it is saying.
Frequently Asked Questions
What do the red lights on my Harley-Davidson dashboard mean?
Red lights on your Harley-Davidson panel lights mean you need to stop safely and address the issue immediately. Common red lights include oil pressure warnings, brake system alerts, and battery failure indicators. Never ignore a red dashboard warning light.
Can I still ride my Harley if a yellow warning light is on?
Yes, you can usually ride short distances with a yellow light. Yellow lights are warnings, not emergencies. However, you should get the issue checked as soon as possible. Continuing to ride with a yellow light for too long can lead to more serious damage.
How do I reset the check engine light on my Harley?
First, fix the underlying issue that triggered the light. Then, use an OBD-II scanner to clear the error code. If the cause was something simple like a loose gas cap, tightening it and driving a few miles may turn the light off automatically.
Why is my turn signal indicator blinking fast on one side?
A fast-blinking turn signal means a bulb is burned out on that side. This is one of the simplest dashboard light fix tasks. Just replace the bulb with the correct size and type for your Harley-Davidson model.
How often should I check my motorcycle instrument cluster?
You should do a quick visual check of your motorcycle gauge lights before every ride. A deeper inspection of the electrical system should be part of your regular Harley-Davidson maintenance schedule, ideally every few months or at each oil change.
Are aftermarket panel lights compatible with all Harley-Davidson models?
Most aftermarket motorcycle warning lights and instrument clusters are designed to fit specific model families. Always check compatibility before purchasing. OEM parts from your dealer are the safest choice for guaranteed fit and function.